OpenLDAP setup instructions
You can use the LDAP protocol with Ozeki Bulk Messenger to import contacts from an LDAP server. There are endless possibilities for configuring such connection, so in this tutorial we will present how you can properly configure the OpenLDAP server.
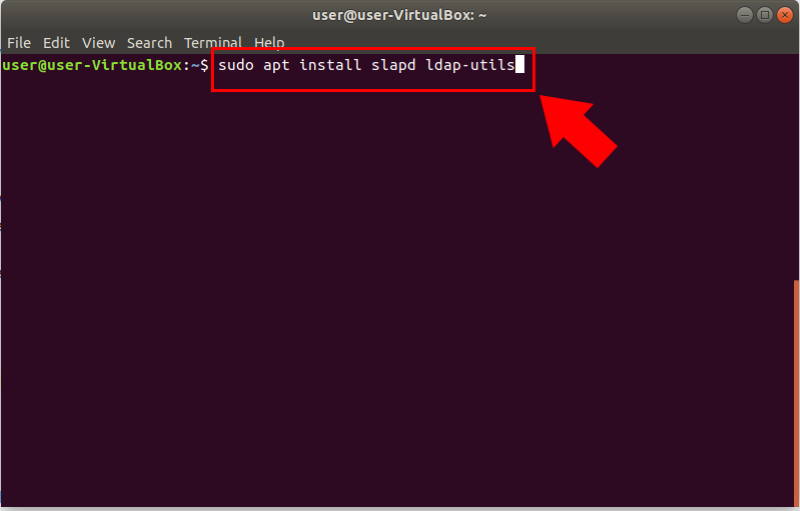
First step is to install the OpenLDAP service in your Ubuntu system. For this, go to the terminal window and issue the command:
sudo apt install slapd ldap-utils

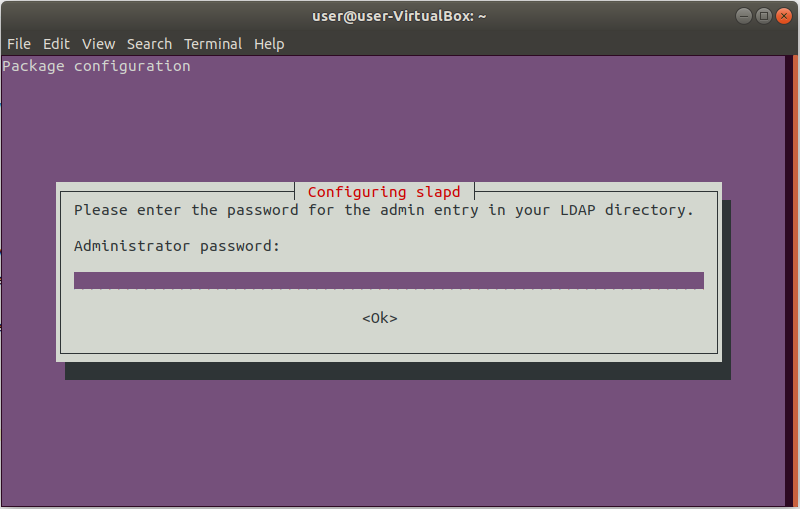
During the installation, you will be asked to create an admin password for the LDAP directory.

After the installation completes, you may want to modify the default Directory Information Tree (DIT) suffix. Let's go ahead and do that. We'll change our DIT to dc=ozeki,dc=lan. You can change yours to fit your company network needs. To do this, run the command:
sudo dpkg-reconfigure slapd
When prompted, answer No for the first question (omitting an initial configuration). For our DNS name we'll enter ozeki.la (Figure 4). You will then be asked to configure the Organization name, and then enter/verify the admin password you created during the installation. Once you've done that, select MDB as the database backend, and then select No for removing the database when slapd is purged. Finally, select Yes to move the old database, and you're done with the installation and configuration.
Now we're going to add initial data to the LDAP database. We'll do this from a file and create a single entry. From your terminal window, issue the command:
nano ldap_data.ldif
In this new file, add the following contents (Note: You'll need to modify this file to fit your needs, as this is just an example):
dn: ou=People,dc=ozeki,dc=lan
objectClass: organizationalUnit
ou: People

dn: ou=Groups,dc=ozeki,dc=lan
objectClass: organizationalUnit
ou: Groups

dn: cn=smpp,ou=Groups,dc=ozeki,dc=lan
objectClass: posixGroup
cn: smpp
gidNumber: 5000

dn: uid=John_Smith,ou=People,dc=ozeki,dc=lan
objectClass: inetOrgPerson
objectClass: posixAccount
objectClass: shadowAccount
uid: John_Smith
sn: John
givenName: Smith
cn: John_Smith
displayName: John Smith
mobile: +36555874194
mail: John_Smith@example.com
uidNumber: 10000
gidNumber: 5000
userPassword: John_Smith
gecos: John_Smith
loginShell: /bin/bash
homeDirectory: /home/user/John_Smith
You can modify the ou entries (People, Groups) to fit your organizational needs. For instance, you can have ou entries like Editorial and Writers, or NetAdmins and SecAdmins, or DevOps and Testers.
Save and close that file and the add the content of the file to LDAP server with the following command:
ldapadd -x -D cn=admin,dc=ozeki,dc=lan -W -f ldap_data.ldif
You now have your first entry in the LDAP database. You can modify that data file every time you need to add an entry. Either way you handle your LDAP data, you are ready to start employing this incredibly powerful and flexible directory access protocol.
LDAP Admin is a free Windows LDAP client and administration tool for LDAP directory management. This application lets you browse, search, modify, create and delete objects on LDAP server. You are able to connect to the OpenLDAP server by provide it IP address and the Directory Information Tree in the Base secrion as the Figure 9 shows.
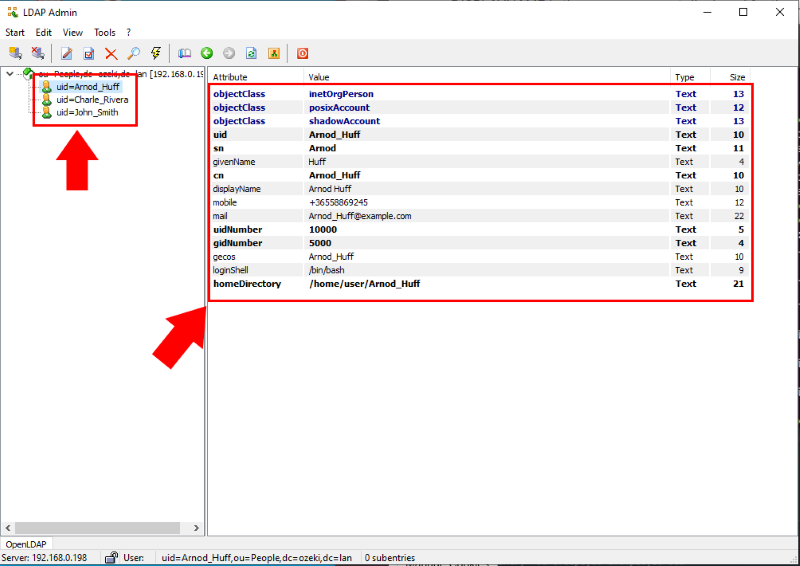
Finally if you log in successfully You can see the User attributes in LDAP Admin as you can see in the Figure 10.

