How to import contacts from a XLSX list to Ozeki Bulk Messenger software
Ozeki Bulk Messenger offers the possibility of importing Excel contact lists so you will not waste time by adding them individually. In this tutorial we will demonstrate you how to create an Excel document and open the XLSX file in Ozeki Bulk Messenger.
Step 1 - Create an Excel document
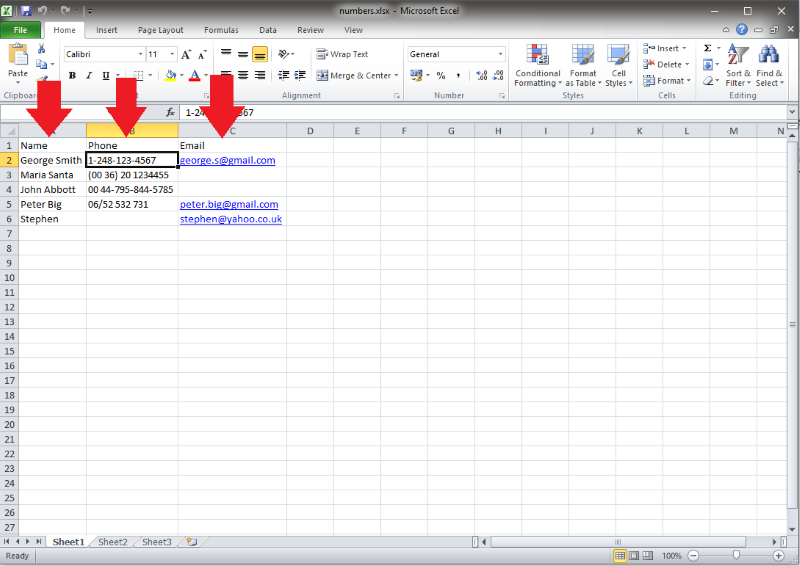
As a first step please open a new workbook in Microsoft Excel and write 'Name', 'Phone' and Email in the first row, as shown in Figure 1. Then you can start adding names, numbers and E-mail addresses from the second row and downwards.
Step 2 - Save the Excel document
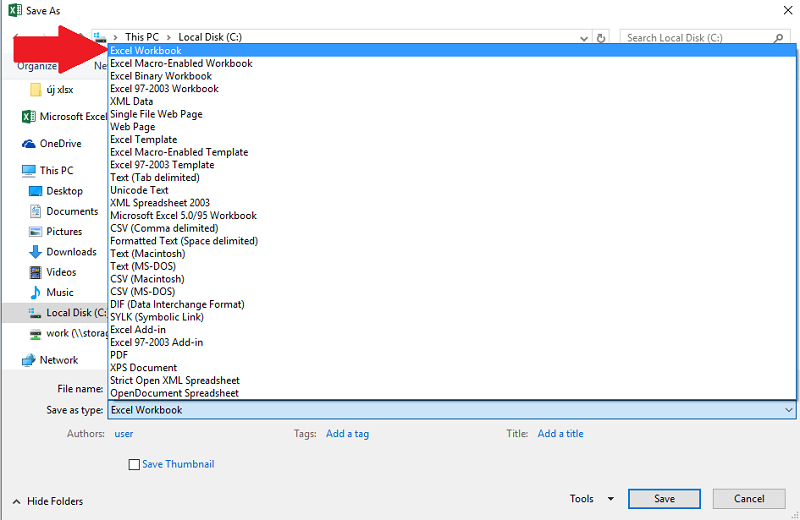
Select the 'Excel Workbook' when saving your document using the 'Save as type' option.
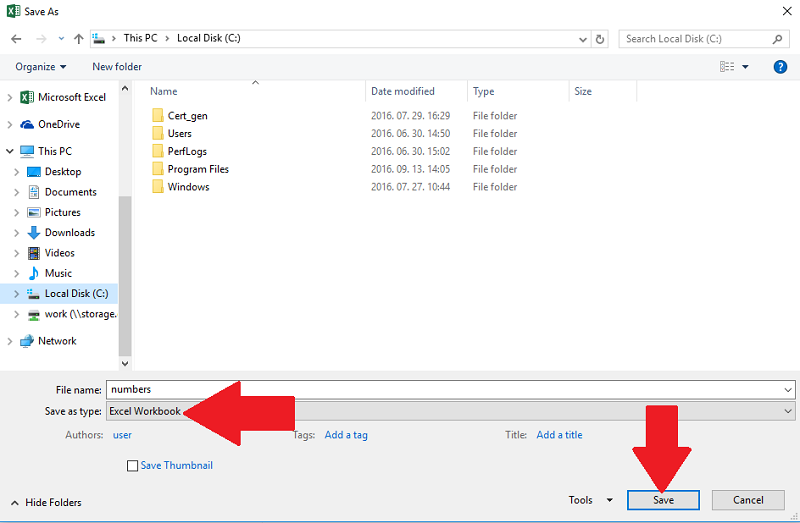
!Before clicking 'Save' make sure you have selected the 'Excel Workbook' document type.
Now let us return to the Ozeki Bulk Messenger software.
Step 3 - Create new XLSX address book
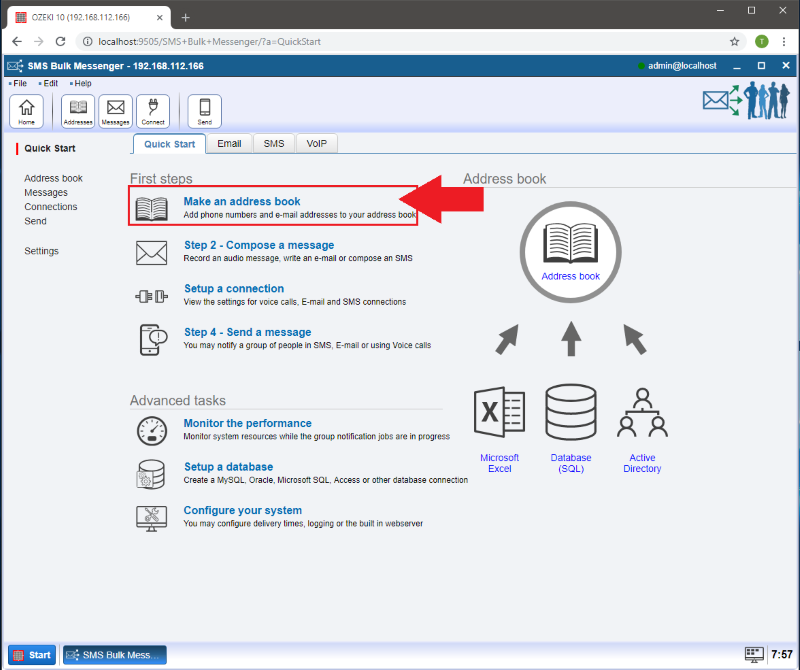
Select the 'Make an address book' option on the 'Quick Start' tab.
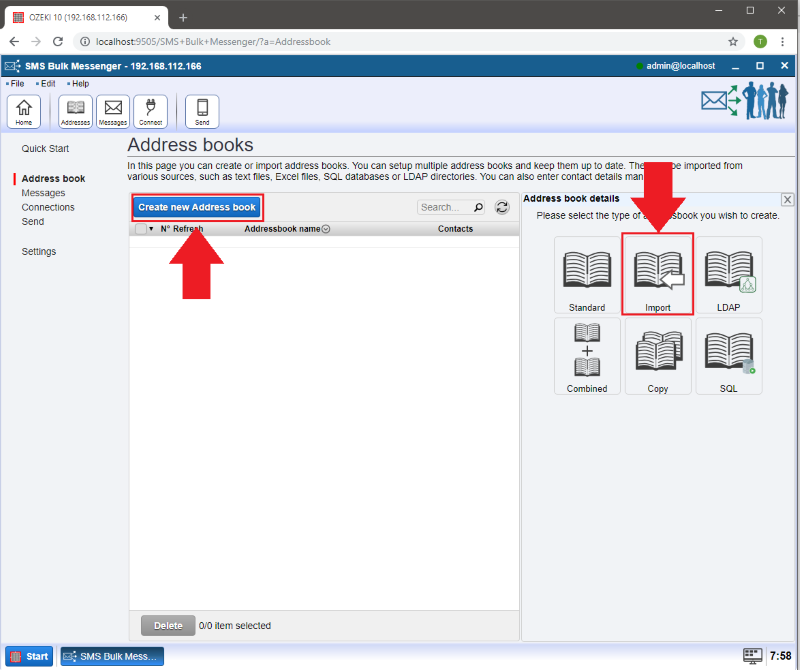
Now click on the blue 'Create new Address book' button and select the 'Import' address book.
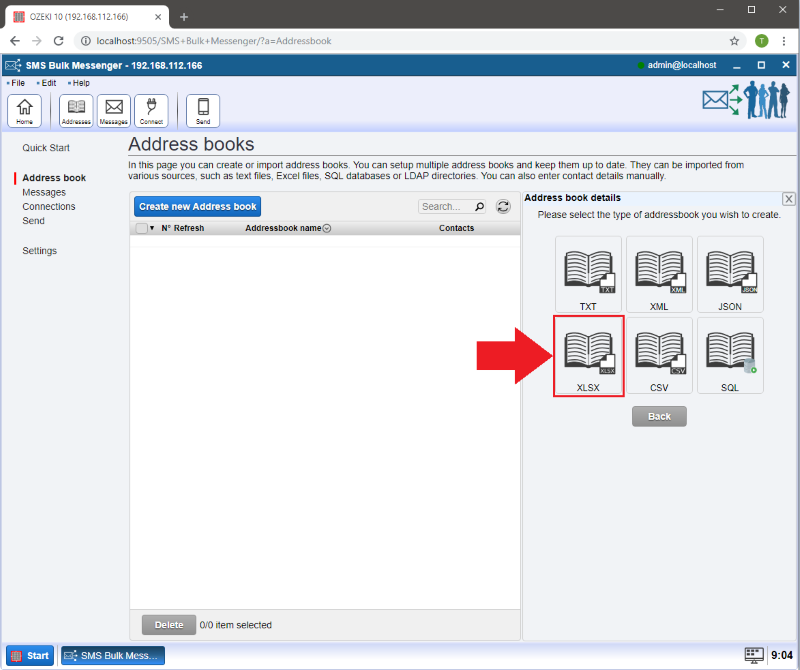
Step 4 - Upload an XLSX file
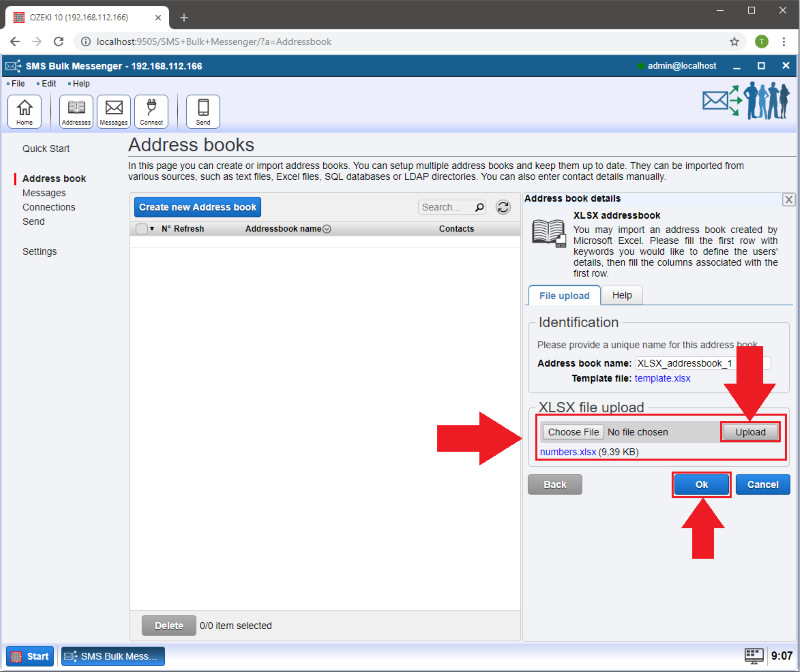
By clicking on 'Choose file' you can select your Excel file. After having your file selected click on the 'Upload' button and finally press 'Ok'.
Step 5 - Manage your contacts
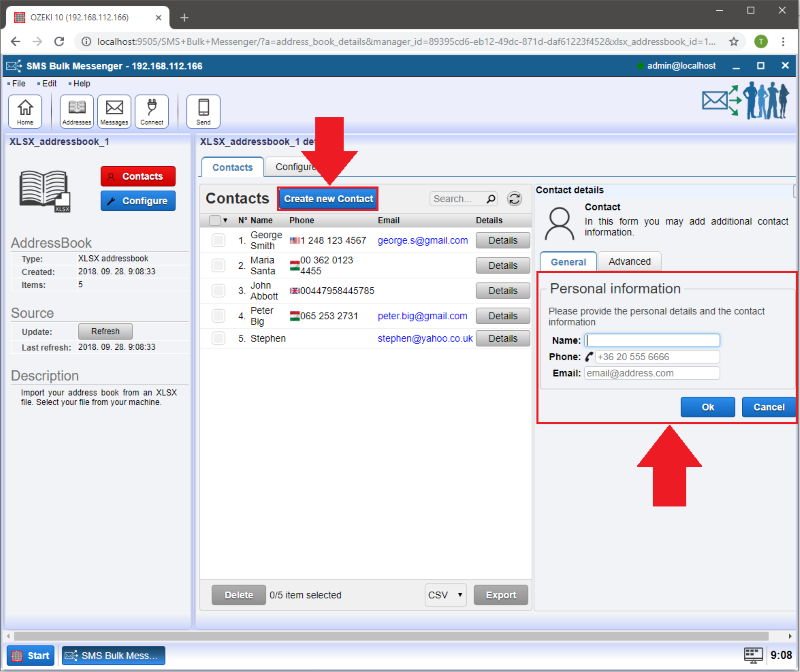
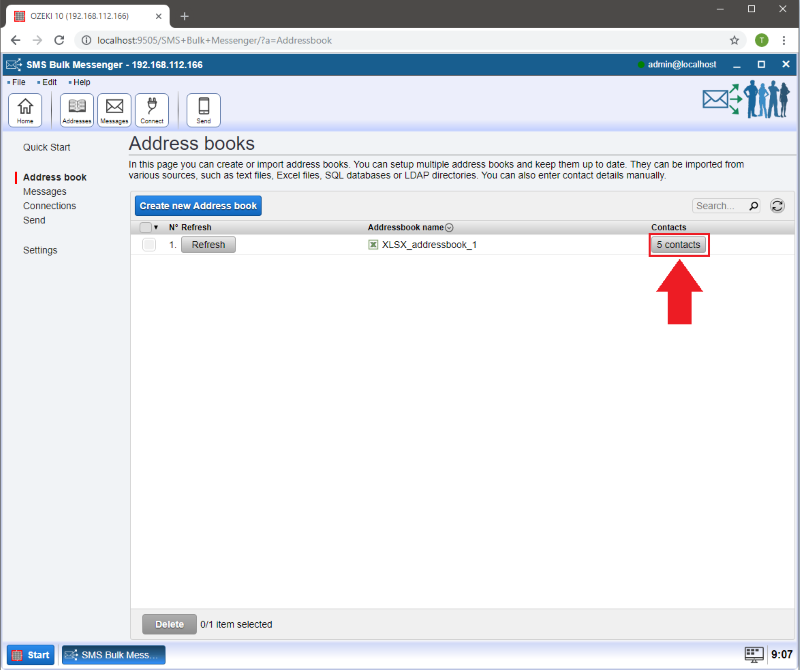
Click on the 'Contacts' button to manage your contacts.
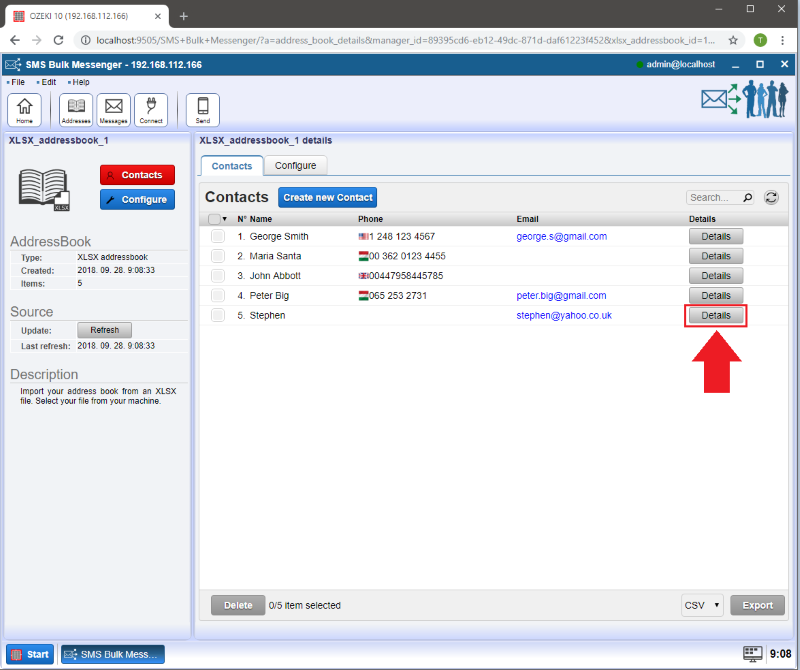
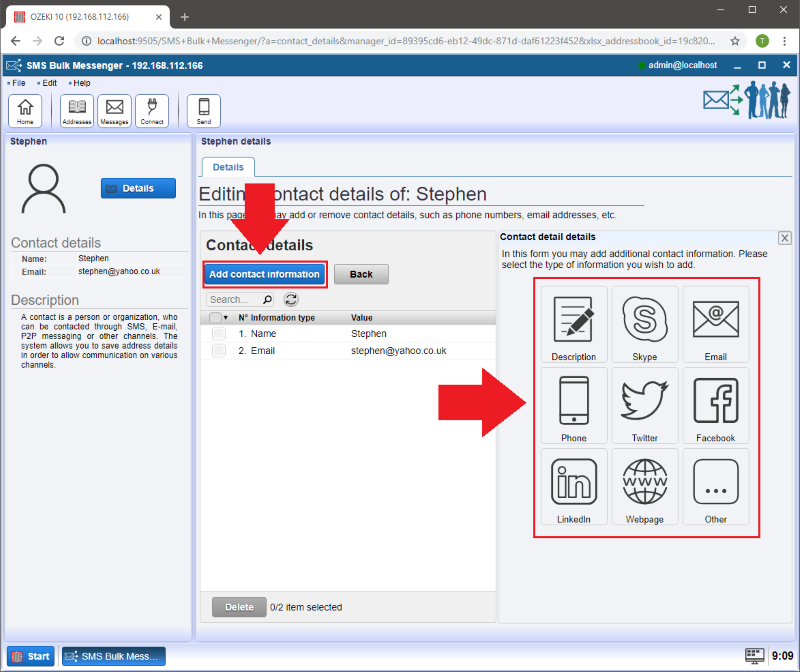
It is possible to add further information to your contacts like Instagram, Facebook, X etc. On the next page click on 'Add contact information'. In the 'Contact detail details' window you can choose the type of information you would like to add to the contact.
In case you would like to add new contacts manually click on the 'Create new Contact' button.
Here you can provide additional information about the given contact on the 'General' tab:
- 'Name:' Here goes the name of your contact.
- 'Phone:' Enter the phone number here.
- 'Email:' Provide the E-mail address.
