Database Authentication Provider in Ozeki Bulk Messenger
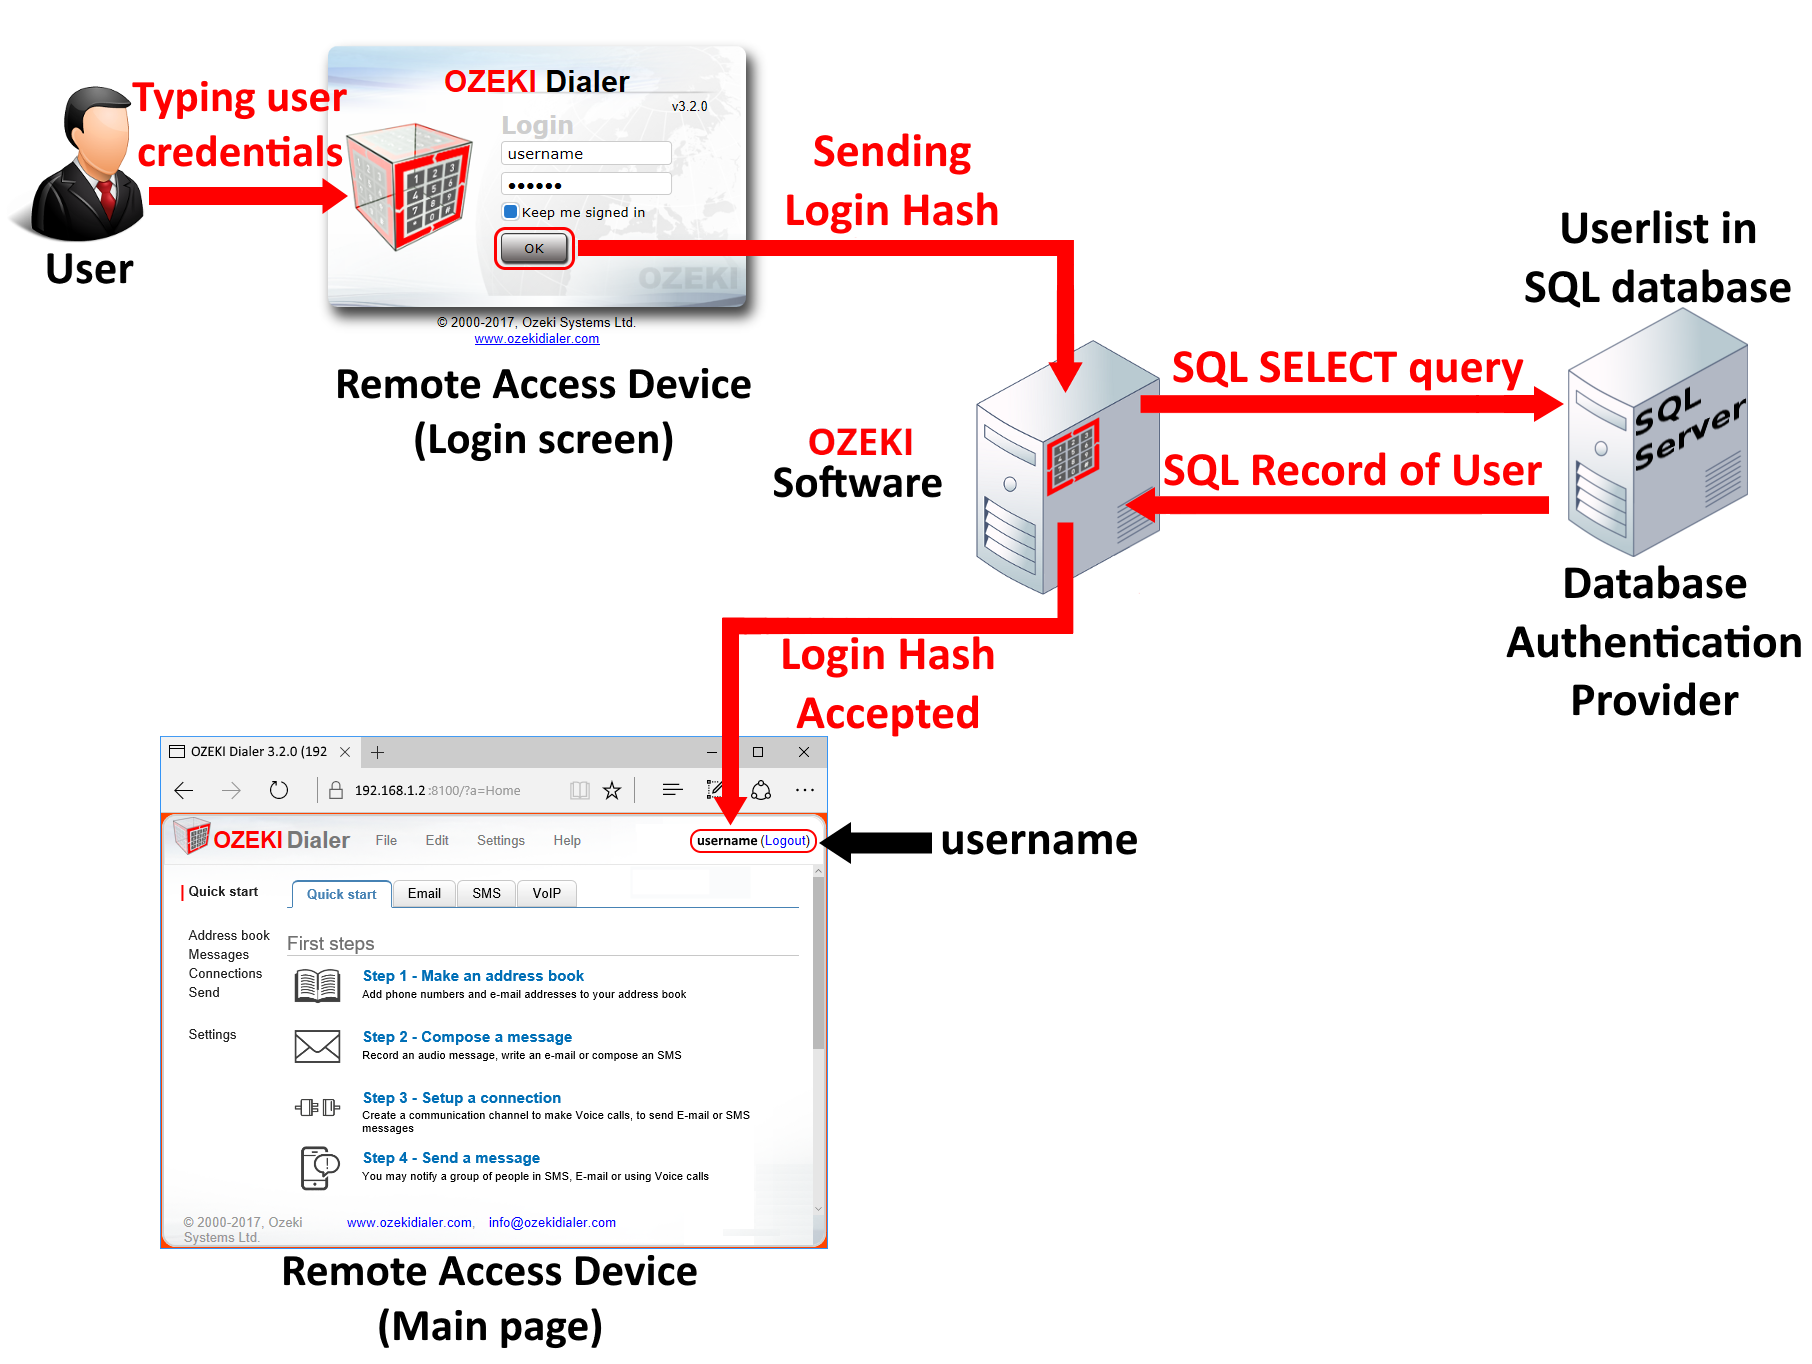
The Database Authentication Provider can be your own SQL database storing user credentials. You are probably storing your customer or employee base who have registered at your company. You can give these people rights to access Ozeki Bulk Messenger. The authentication is done with SQL queries. When there is a login attempt Ozeki Bulk Messenger compares the username and hashed password pairs with your SQL records.
In this tutorial you will learn how to create a database and a table containing Ozeki Bulk Messenger users. You do not have to create a database if your company aleady has one. You will learn how to create an SQL user with SELECT rights granted. You will see how to connect to the SQL user from Ozeki Bulk Messenger and how to setup a SELECT query on the table. The SELECT query will be called at every login attempt made into Ozeki Bulk Messenger. Figure 1 shows the login workflow. It shows it from the input of the login credentials through the SQL authentication process until the user is logged in:
Get started
To get started please download and install Ozeki Bulk Messenger. When installing Ozeki Bulk Messenger you will be asked to type in the system user's login credentials. The system user has administrator priviliges in Ozeki Bulk Messenger.
 | Ozeki Bulk Messenger can be obtained by opening the download page: Download Ozeki Bulk Messenger! |
STEP 1 - Create SQL database with a table and connect table to MySQL user
To try the Database Authentication Provider you will need to have at least one SQL table that contains login information of the users. The table must have at least 2 columns. 1 column is for the username and the other one is for the password hash of the user's password.
It is likely that your company already has employee or customer login data in SQL tables, so you can skip step 1. If not then you will see how you can create an SQL table with the following commands.
Type 'CREATE DATABASE myDataBase;' to create your first database then type 'USE myDataBase;' to use it.
Now you will need to create a table in the database:
CREATE TABLE user (
	User VARCHAR(255),
	Password VARCHAR(255)
	);
Add user credentials to your table. You can use this table later on for user authentication. Ozeki Bulk Messenger will search users in this table. Do not forget to hash the passwords as you can see below:
INSERT INTO user (User, Password) /* Add as many users as you wish. */
VALUES ("Ozeki", PASSWORD("12345"),
	   ("TestUser", PASSWORD("qwe123"),
	   ("DialerTestUser", PASSWORD("54321");
Create a user that will represent Ozeki Bulk Messenger. Do not forget to grant SELECT query to the user so it can run SELECT on the 'user' table. The 'user' table is contained in the 'myDataBase' database. After creating the user on your SQL server you will be able to add this user in the Ozeki Bulk Messenger GUI in STEP 2 below.
CREATE USER 'Dialer'@'localhost';
SET PASSWORD FOR 'Dialer'@'localhost' = PASSWORD('dialer');
GRANT SELECT ON myDataBase.user TO 'Dialer'@'localhost';
STEP 2 - Create Database Connection in Ozeki Bulk Messenger
Now you are going to see how you can connect your database and the SQL user created in STEP 1 to Ozeki Bulk Messenger. Keep in mind the IP address and port number of the SQL server and also the username and password of the SQL user, you will need them later. Also do not forget the name of the database.
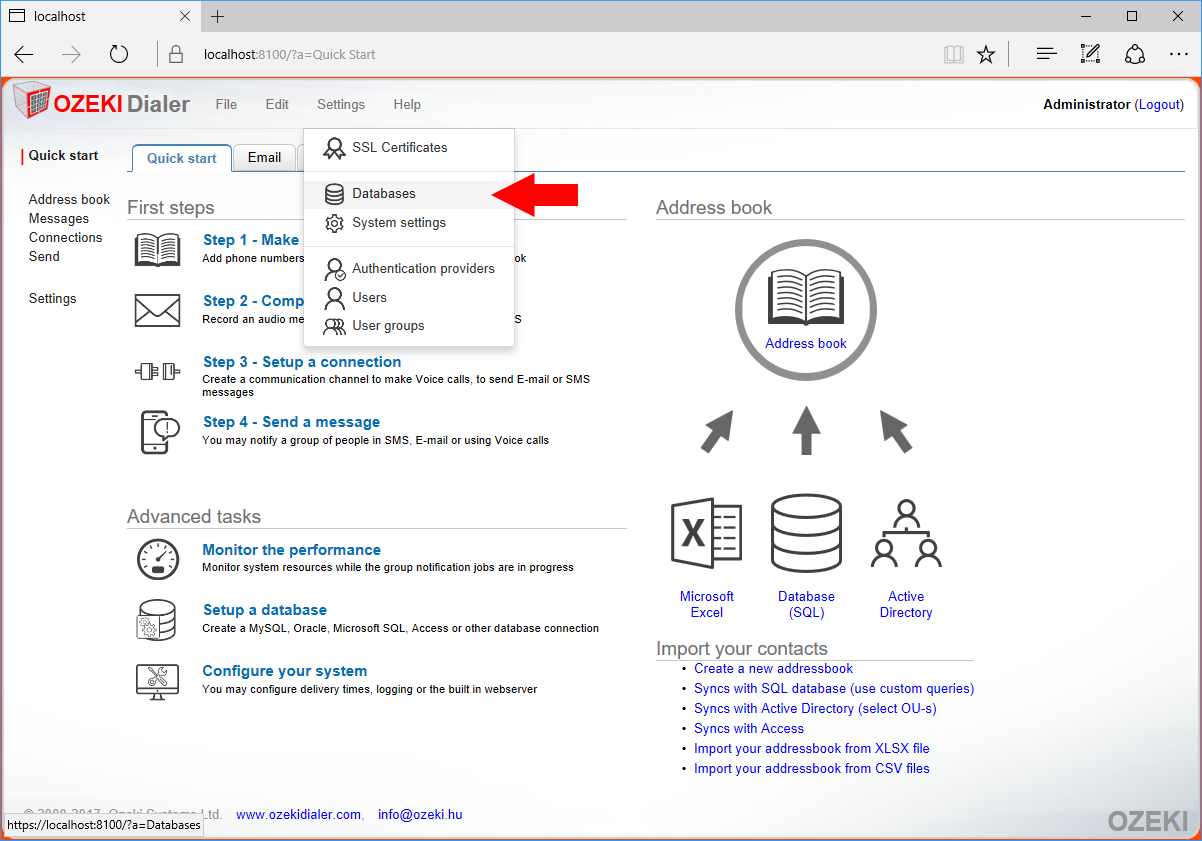
Please follow this guide for a perfect connection between your SQL database and Ozeki Bulk Messenger. Start Ozeki Bulk Messenger and login with the username you gave during installation. If you are in, you should find yourself on the home page. On the top menu click on 'Settings' and choose 'Databases' (Figure 2).
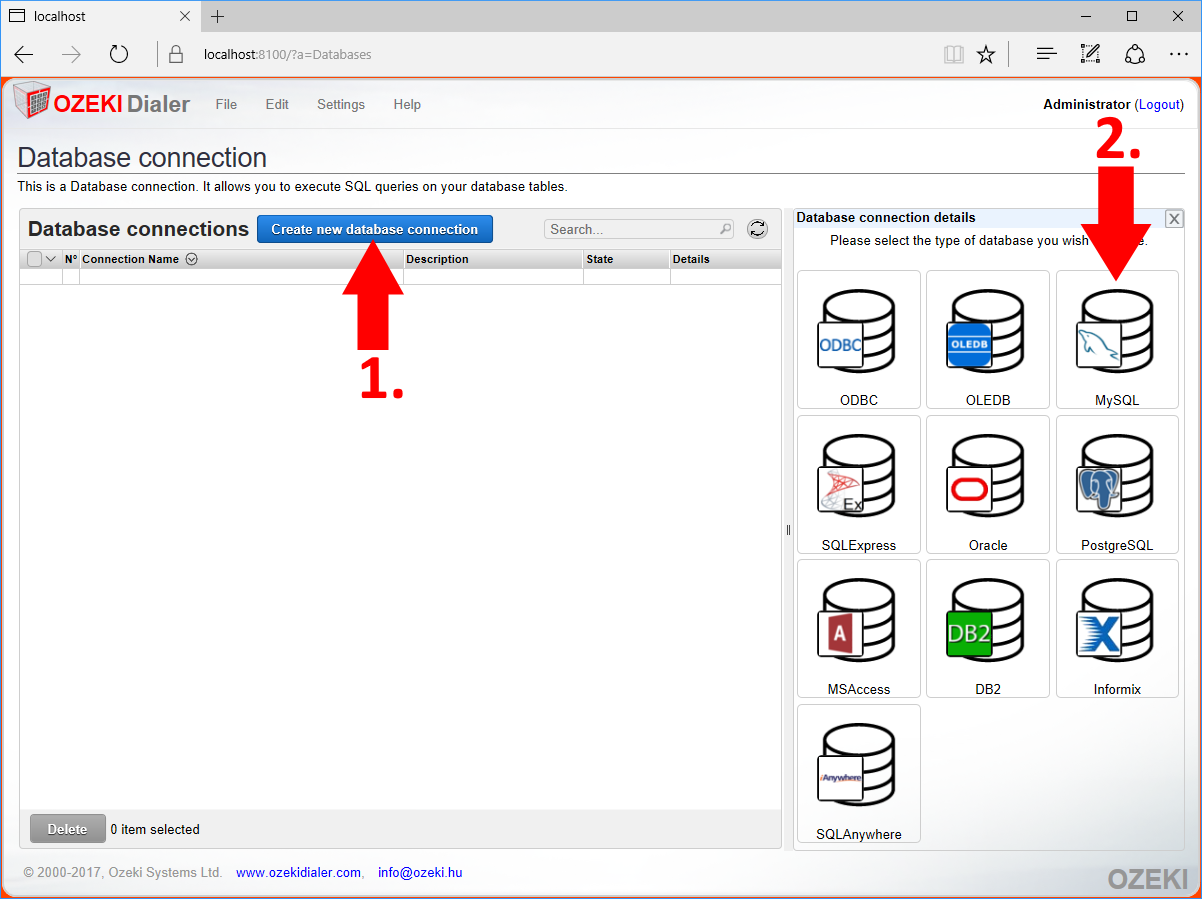
Now you should be on the 'Database connection' page where you can create, modify or delete database connections. Click on the blue 'Create new database connection' button and select 'MySQL' from the box appearing on the right side of the screen (Figure 3).
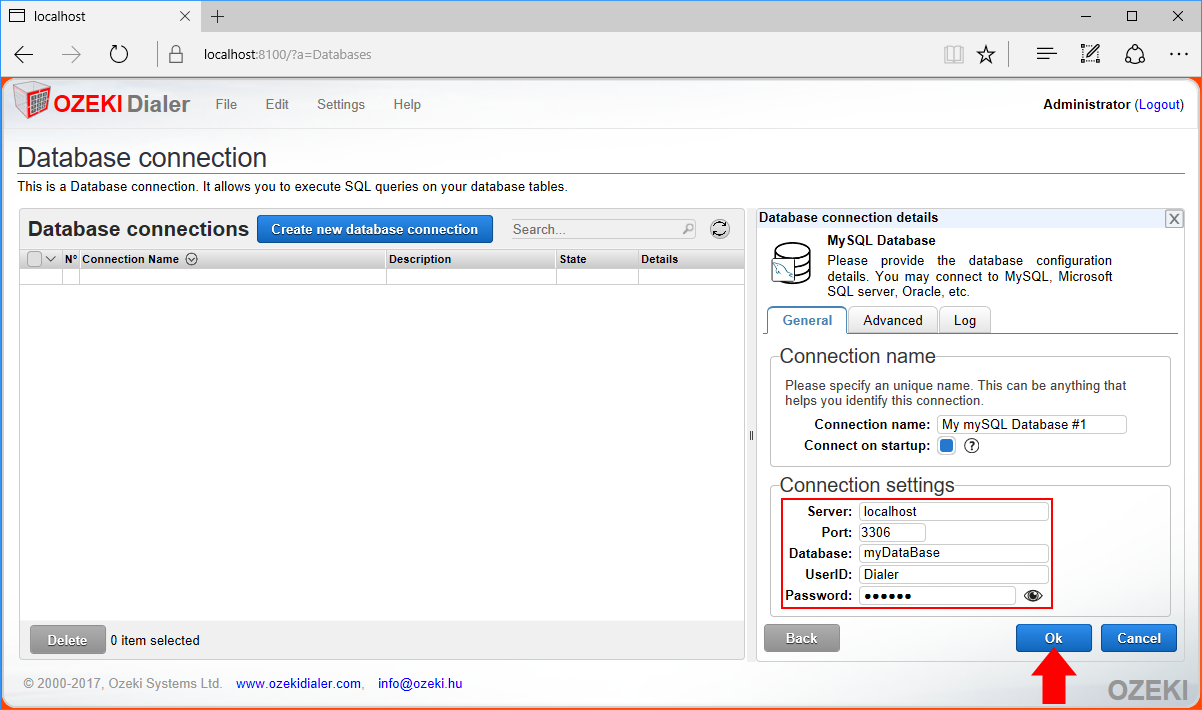
Please fill out the following form with connection details. Make sure to provide the SQL server IP and port number. The default SQL port number is usually 3306. You also need to provide the name of the database where your users are. Finally provide the SQL username and password and click 'OK' (Figure 4).
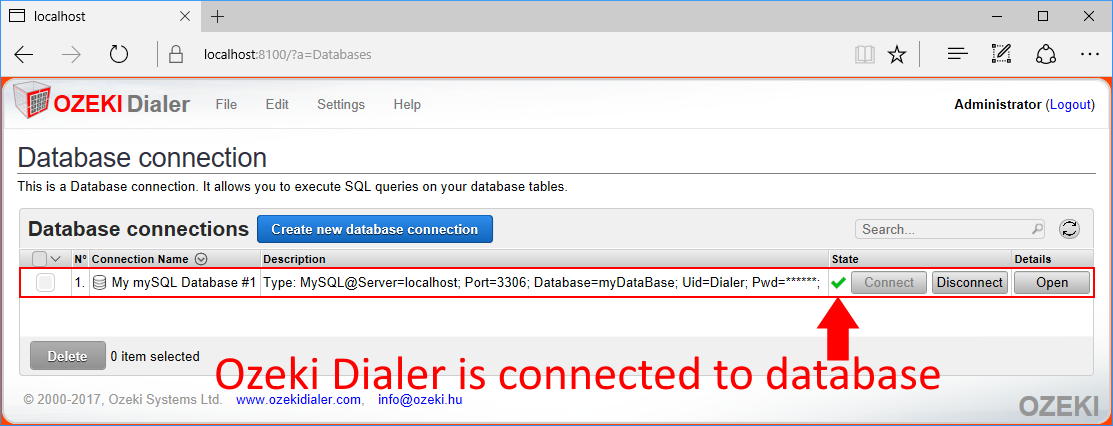
Hopefully the connection was successful and a green tick appears next to the connection as you can see it on Figure 5. Each database connection appears in a seperate row. In this example there is only one database connection added to the 'Database connections' table. If you see a red X next to it then you should check if your SQL server is running or if you have provided the correct SQL connection parameters.
STEP 3 - Connect Database Authentication Provider to the SQL database
In this step you will set a SELECT query on the SQL table. This SELECT query will be called when a login attempt occurs. It checks the user table for users.
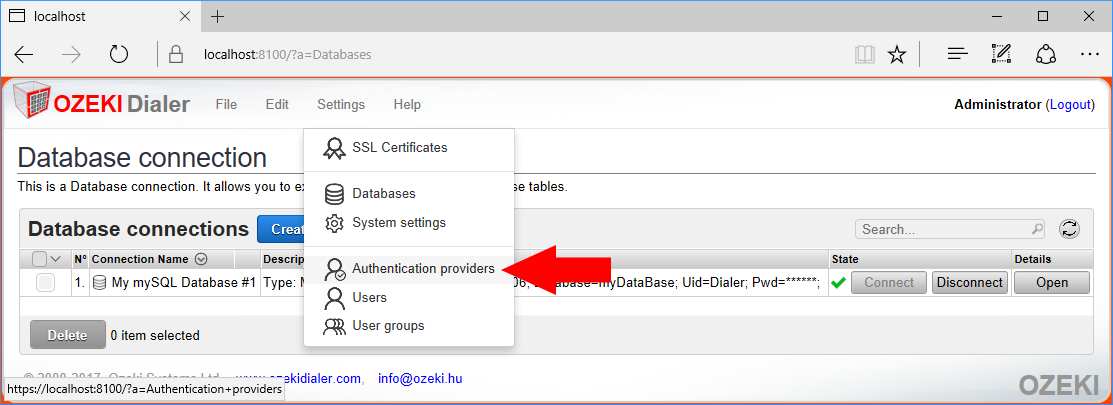
Jump to the authentication provider page by clicking 'Authentication providers' in the 'Settings' menu (Figure 6).
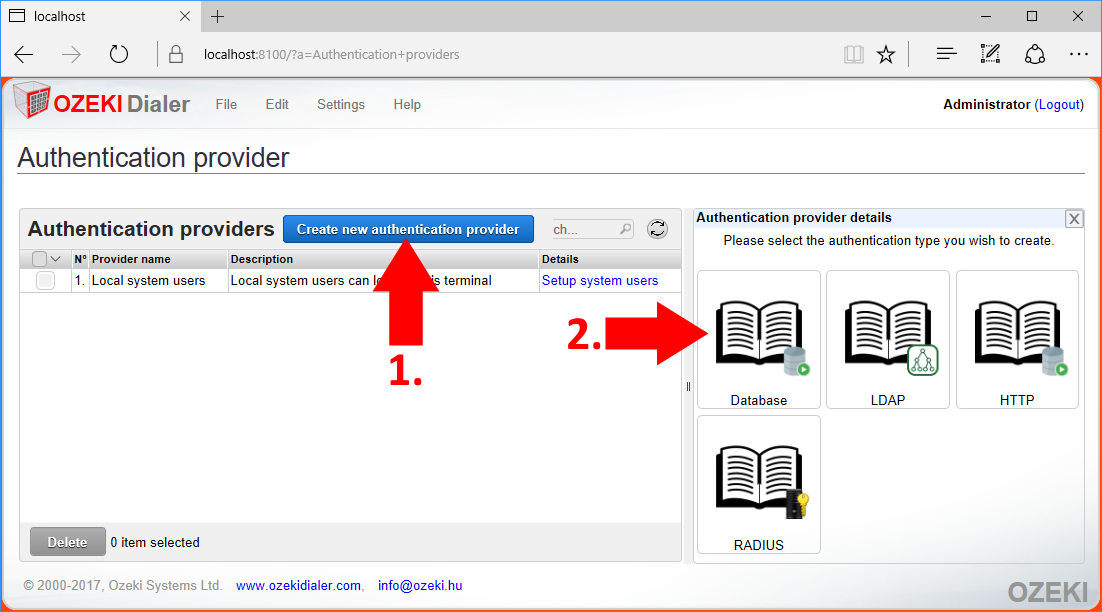
On the 'Authentication provider' page you can create, modify or delete authentication providers. Create a new authentication provider by clicking the blue 'Create new authentication provider' button. A new box will open on the right side of the page. In this box you can select between authentication providers. Please choose 'Database' authentication provider (Figure 7).
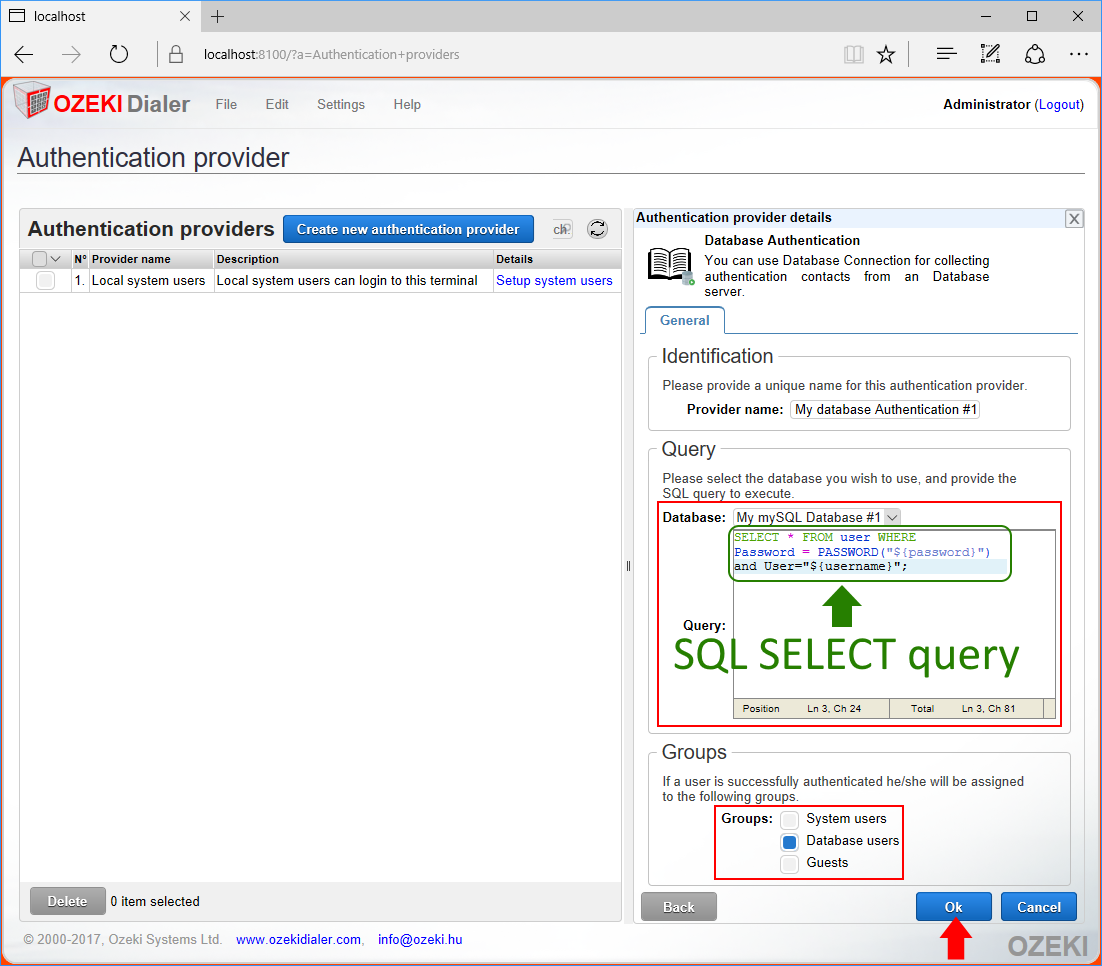
A form will be available in the box. You should fill out the form to configure the database authentication provider. In the most important field you need to write the SQL query. In STEP 1 we have set up an SQL database that is compatible with the default query which is
SELECT * FROM user WHERE
Password = PASSWORD("${password}") /* Hashes password and compares the hash. */
and User="${username}";
Users are categorized into groups. Choose usergroups at the bottom of the page and click 'Ok' (Figure 8).
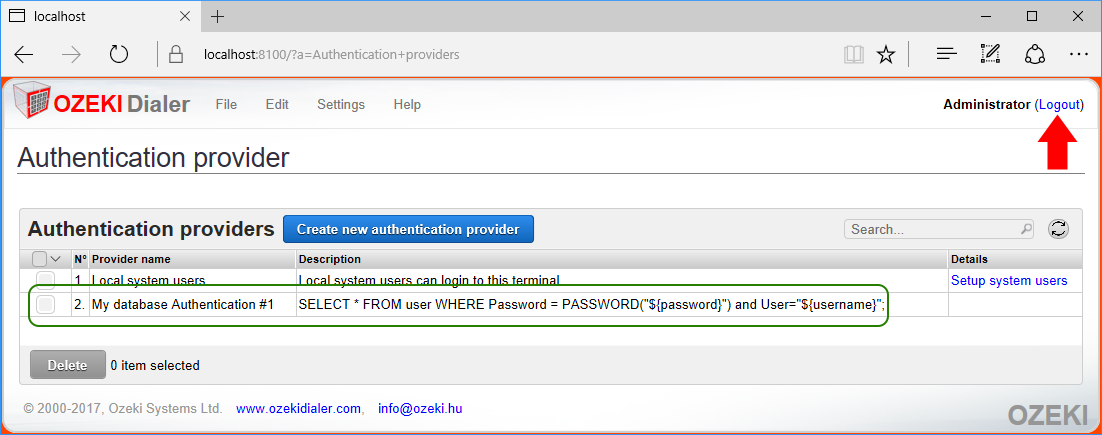
You should see the new authentication provider added to the 'Authentication providers' table. This new row shows information of the authentication provider you have created. You can see it in the green bracket on Figure 9.
STEP 4 - Test Database Authentication Provider
Test your newly created Database Authentication Provider. Start with logging out from Ozeki Bulk Messenger (Figure 9)
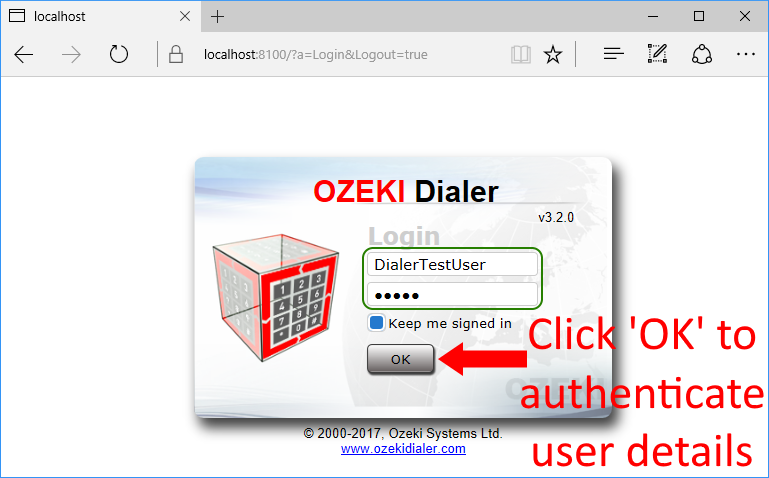
Please login with a username and password combination that is acceptable by the SQL query (Figure 10). It is important that the passwords are not stored directly in the SQL table, only the hash of the passwords should be stored. If you press 'OK' a SELECT query will search through the table and if the username, password hash pair is found then the login is accepted.
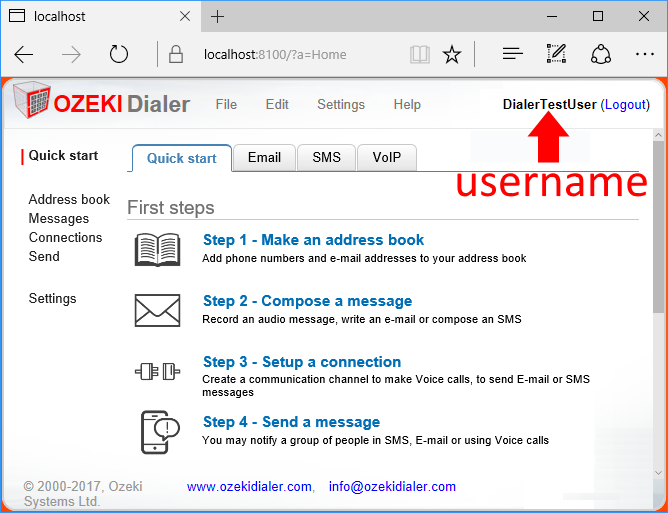
If everything went fine you will find yourself on the home page with the username written in the top right corner (Figure 11). From now on you can logout and login using every user detail that is athorized by the Database Authentication Provider. This way your employees can easily control Ozeki Bulk Messenger. You can follow their actions through the Ozeki Bulk Messenger log.
