Standard Authentication Provider in Ozeki 10
The Standard Authentication Provider is the easiest user authentication method since it is integrated in Ozeki 10. You can create, modify or delete users with Ozeki 10. Created users can access the software GUI. Try to login and one of the authentication provider will give you access rights if you are on the user list. This guide shows how to create a user in Ozeki 10.
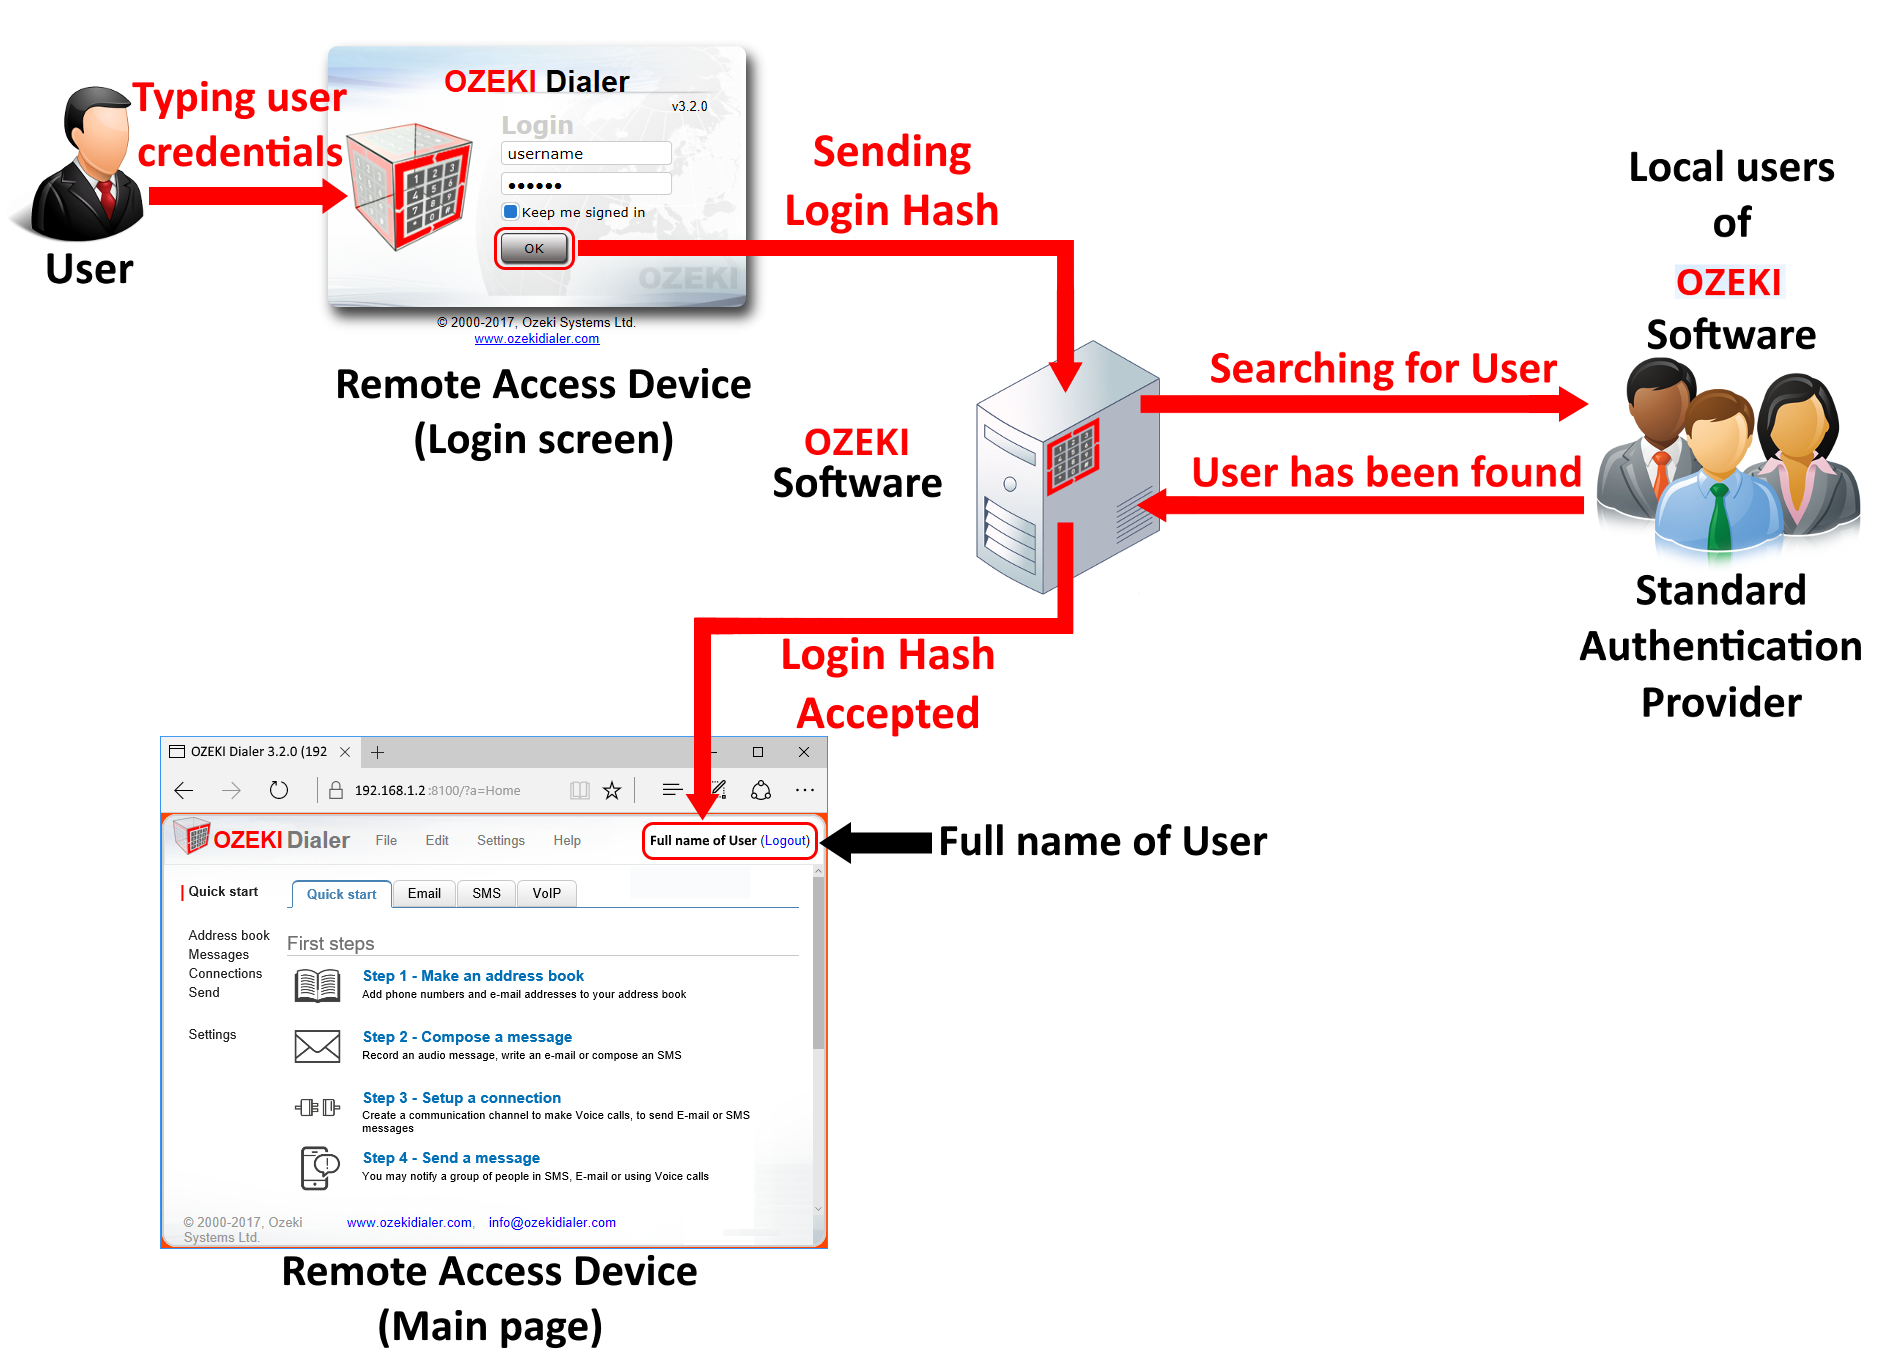
Figure 1 demonstrates the workflow of the standard authentication provider. It shows what happens from typing the login details until the user has been provided access to Ozeki 10. The registered users are saved in Ozeki 10, so they can be easily compared with the hashed login screen input.
Get started
Before starting you need to download and install Ozeki 10. During the installation process you will be asked to provide details for the user's account.
 | Ozeki 10 can be obtained by opening the download page: Download Ozeki 10! |
STEP 1 - Login to Ozeki 10
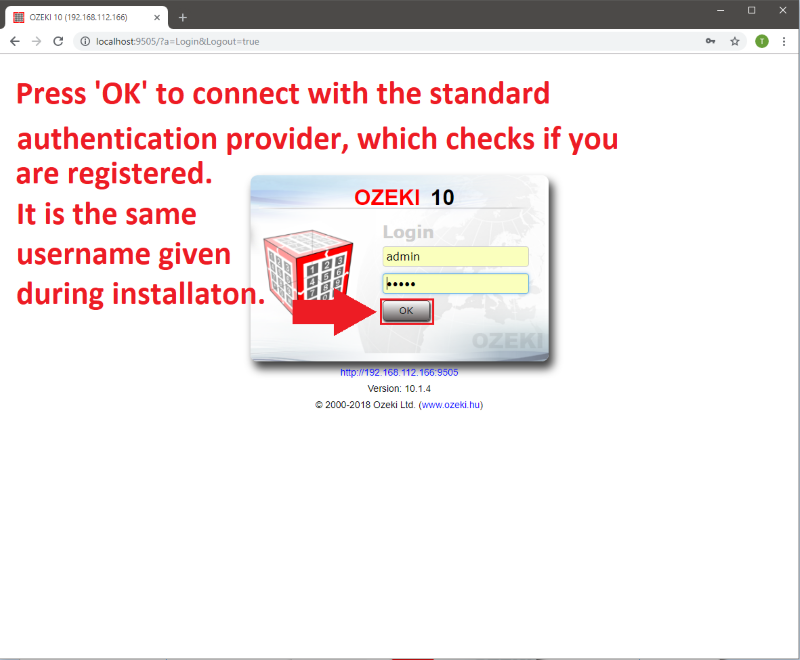
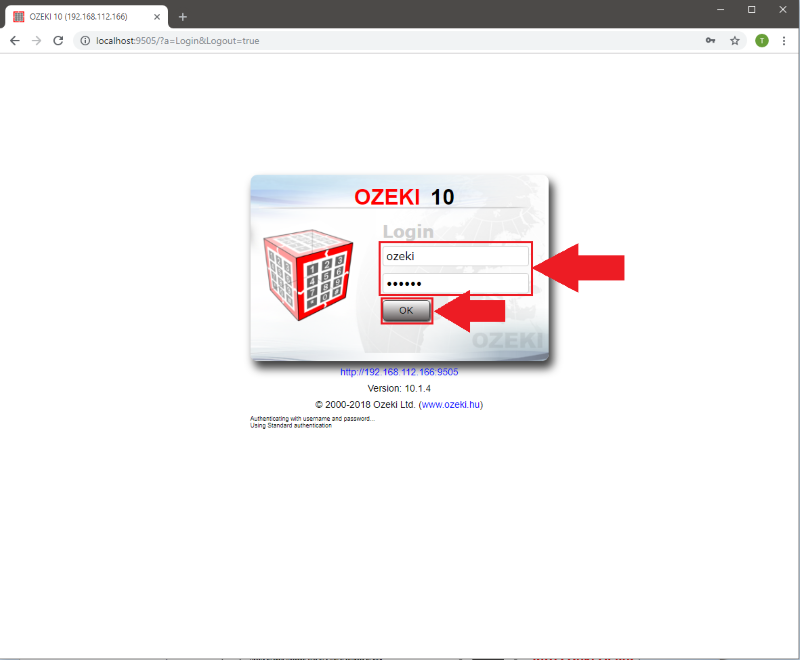
Start Ozeki 10 and type the required login credentials (Figure 2). These are the same login information you have previously provided during the installation of Ozeki 10. These login details will be verified through the standard authentication provider, which is implemented in the Ozeki 10 software.
Click 'OK' and continue this step-by-step guide through the GUI to learn how to create new users.
checks user credentials
STEP 2 - Create Standard Authentication Provider
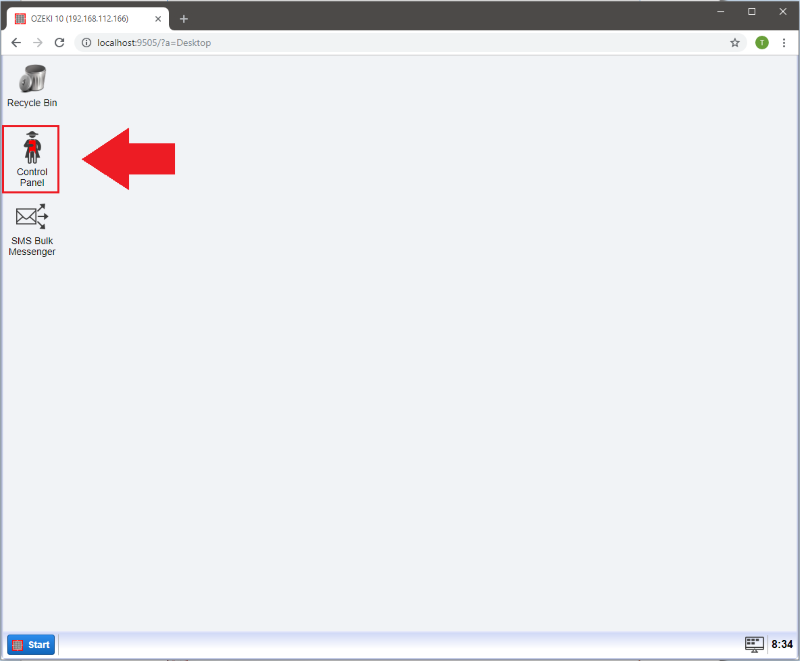
You should find yourself on the desktop page. Please select the 'Control Panel' app as you can see in Figure 3.
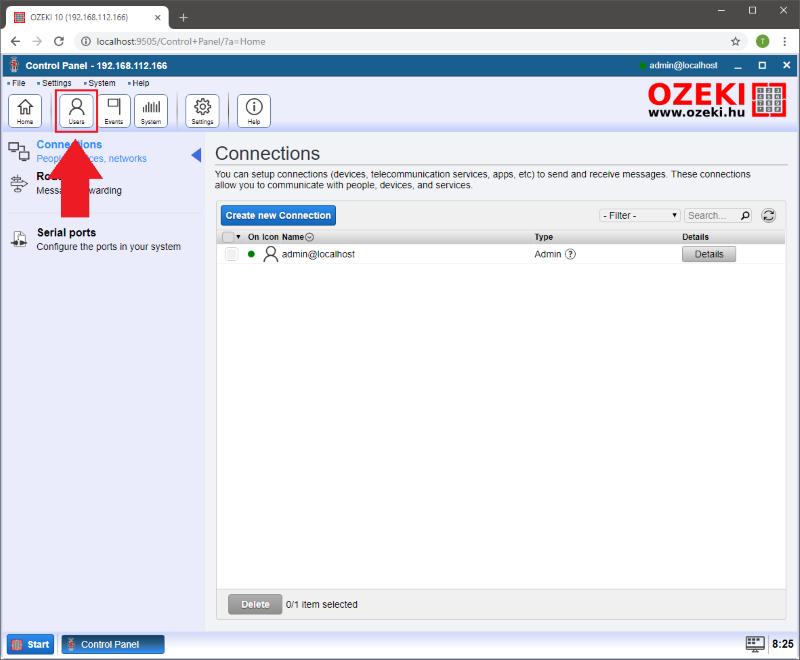
The current page should be the 'Contorol Panel' window. Click on the 'Users' button (Figure 4) to create, remove or delete users in the standard authentication provider.
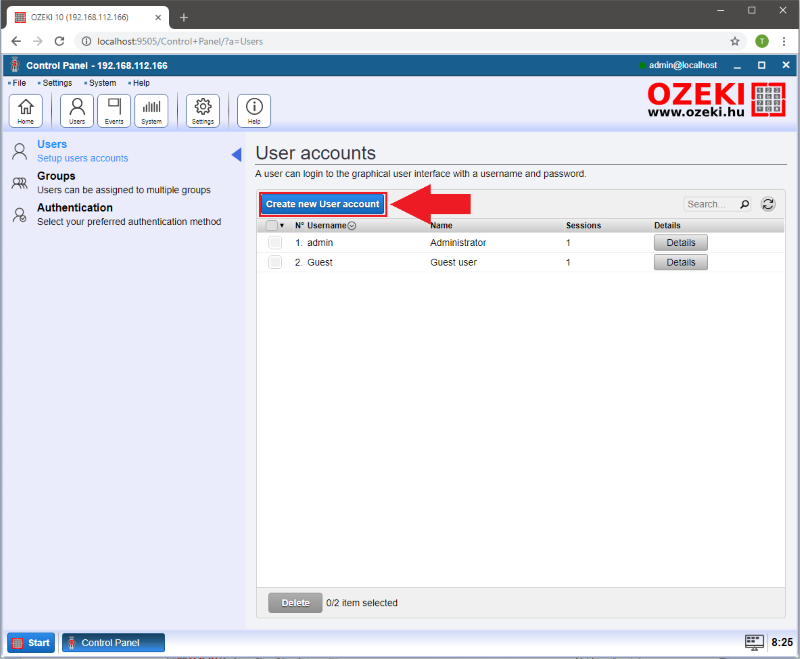
If you are on the 'User accounts' page, you are on the perfect page to create, modify or delete Ozeki 10 users. In this tutorial you will see how to create a new user. Simply click on the blue 'Create new User account' button (Figure 5).
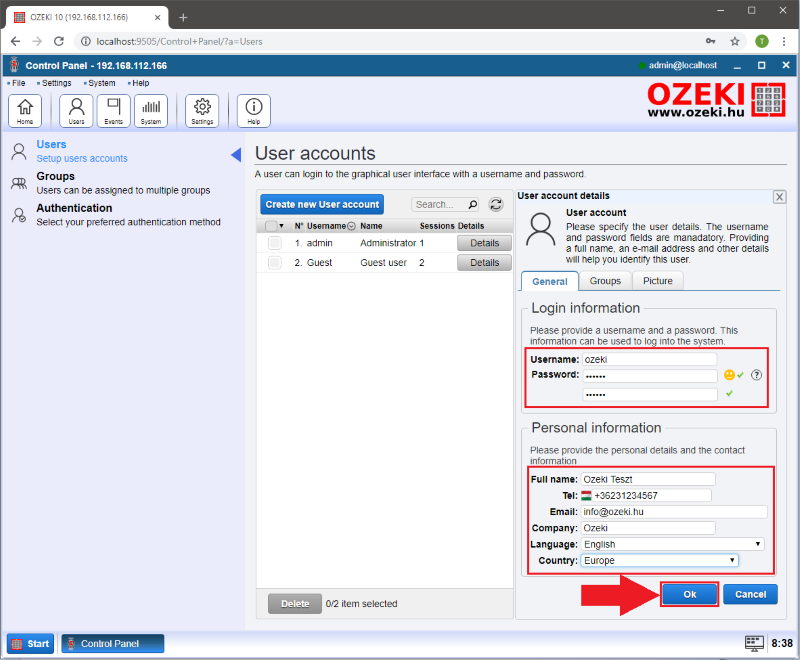
On the right side of the page a 'User account details' box will appear. The most important details you will need to provide are the login information, so please type in a username and a password. The password must be at least 6 characters long and you should repeat it just to make sure there is no mistyping.
Then you can provide personal information including full name, telephone number, e-mail address, company name, language and country. If you do not provide anything the full name will be the username.
After you have filled the required fields (Figure 6), please press 'Ok' to save the user.
STEP 3 - Test the Standard Authentication Provider
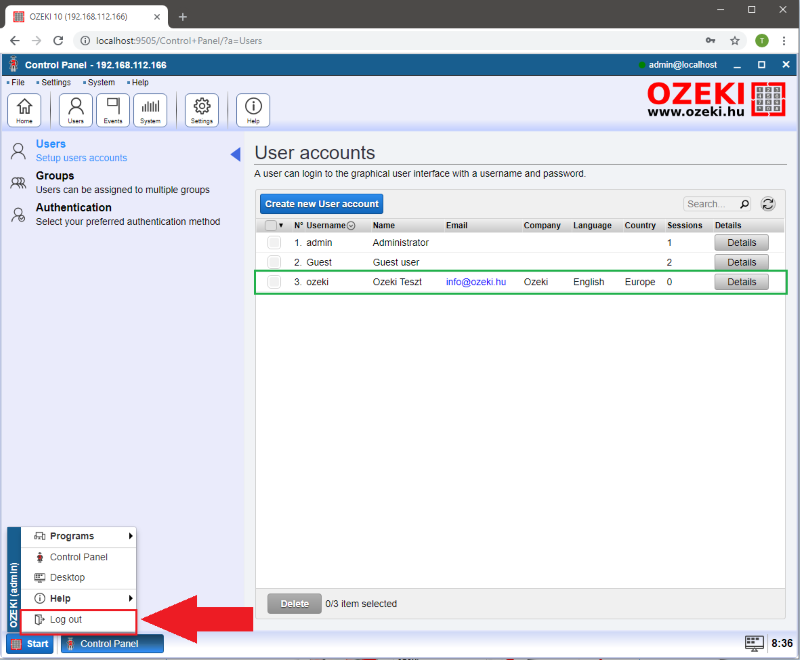
A new row has appeared in the 'User accounts' table. The new row contains the details of the user you have just created. Probably you would like to try this new user, so please log out (Figure 7).
To try the new user please login with the new user credentials (Figure 8). In Step 2 you have created a new user. The credentials will be authenticated through the standard authentication provider after you have clicked 'Ok'.
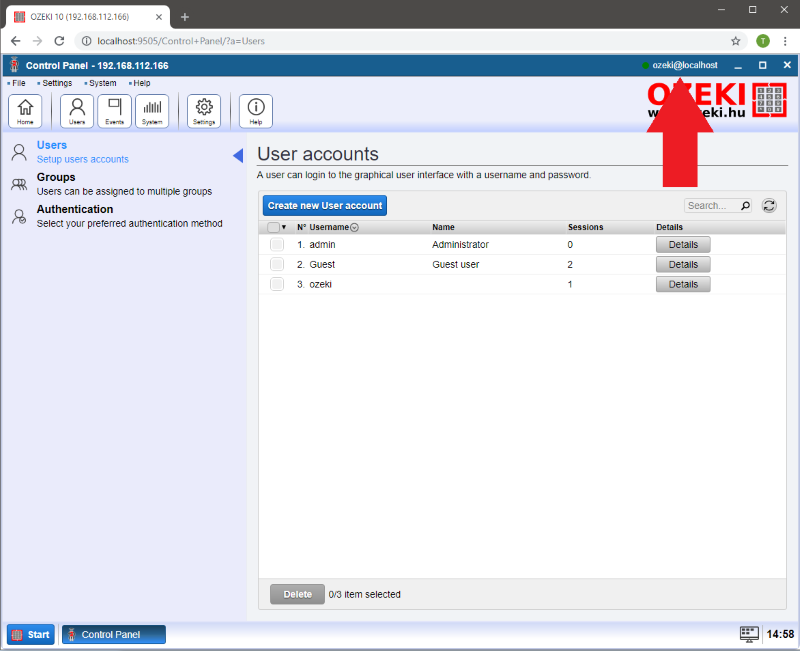
You will see that the user's full name will appear in the top right corner of Ozeki 10. So you can see that the new user is logged in. In this example the new user is called 'Ozeki Teszt' (Figure 9). If there is no full name of the user then the username will be shown.
