Connect Analog Phone lines to Ozeki Bulk Messenger
If you would like to add analog phone lines to your Ozeki Bulk Messenger, you will need an Analog Telephone Adapter (ATA) device. As Ozeki Bulk Messenger uses the VoIP network to make calls, an ATA device is required to translate the digital VoIP signals to analog. In the following I would like to show you how to setup a PSTN connection in your Ozeki Bulk Messenger software.
Step 1 - Create new connection
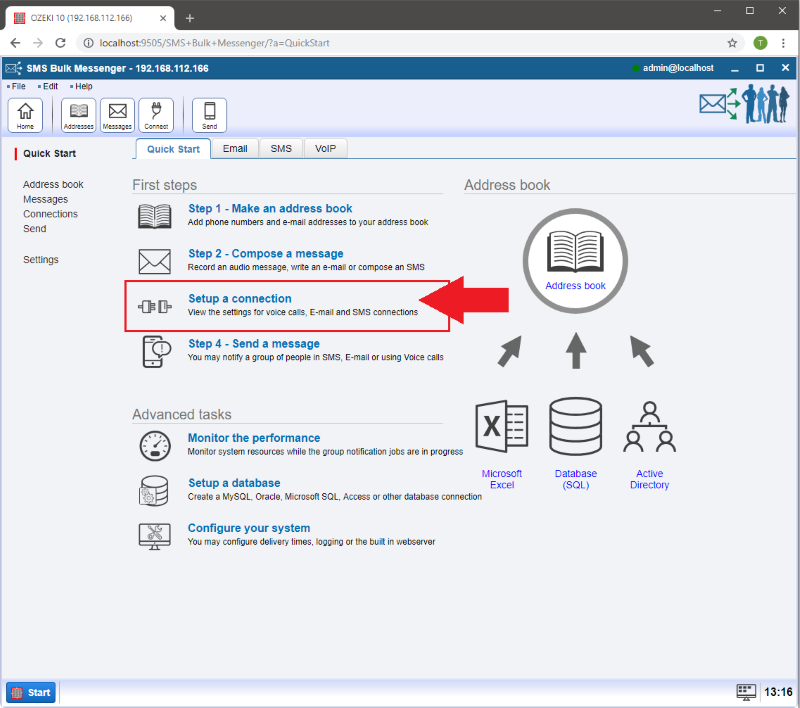
On the 'Quick Start' page select 'Step 3 - Connections'.
Step 2 - Select connection details
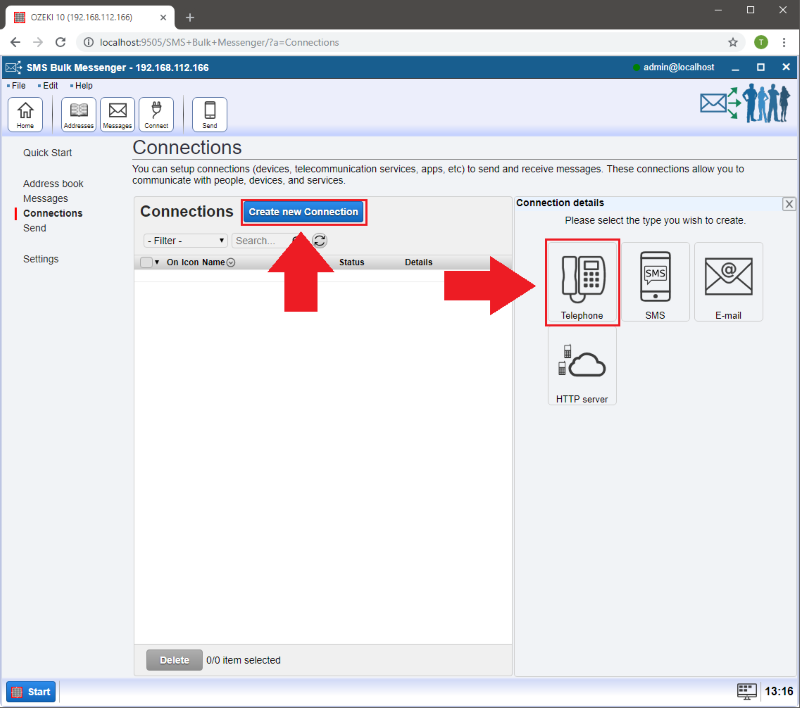
On the new page you have to select 'Create new connection'. Then choose 'Telephone'.
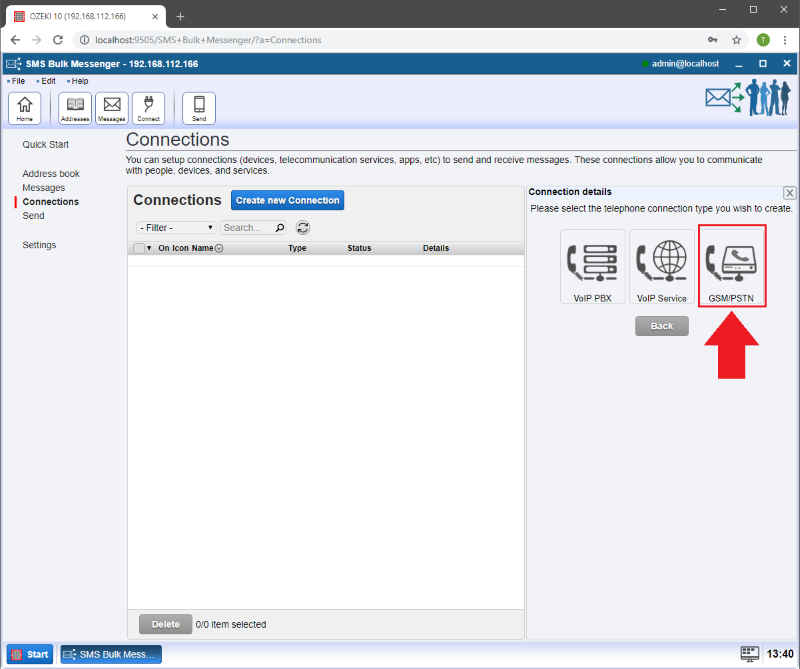
At connection types select the 'PSTN Gateway' connection.
Step 3 - General tab information
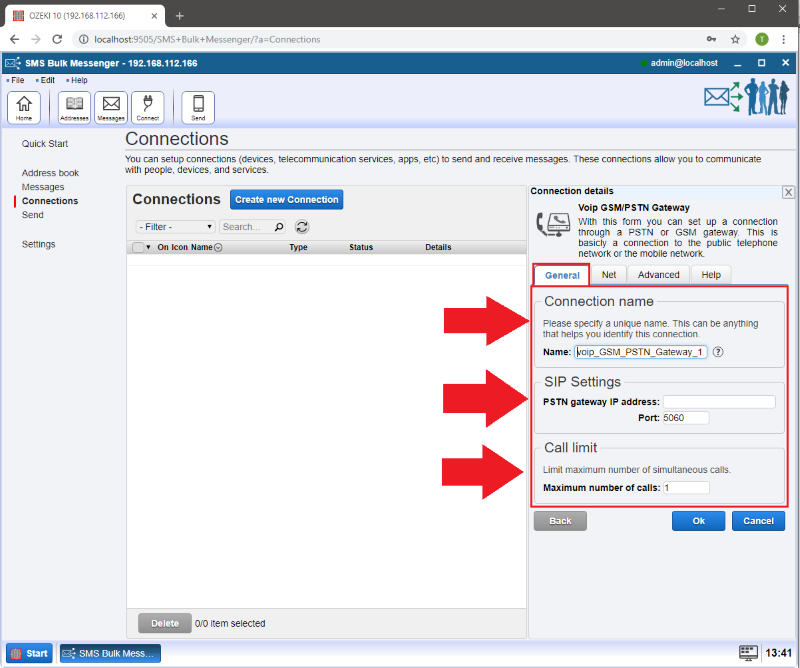
At the 'General' tab you can setup your PSTN Gateway connection settings.
In the 'Connection name' menu you can add a unique name for your
connection so it will be easier to differintiate it from the other connections.
If you would like to connect on startup or reconnect
immediately when connection is lost make sure to check 'Connect on startup:'.
At 'SIP Settings' there is the 'PSTN gateway IP address'. Provide the IP address of the gateway which will forward your call to the phone you dialed. Make sure to also provide the 'Port' number of your PSTN gateway.
Step 4 - Network, Transfer and Log details
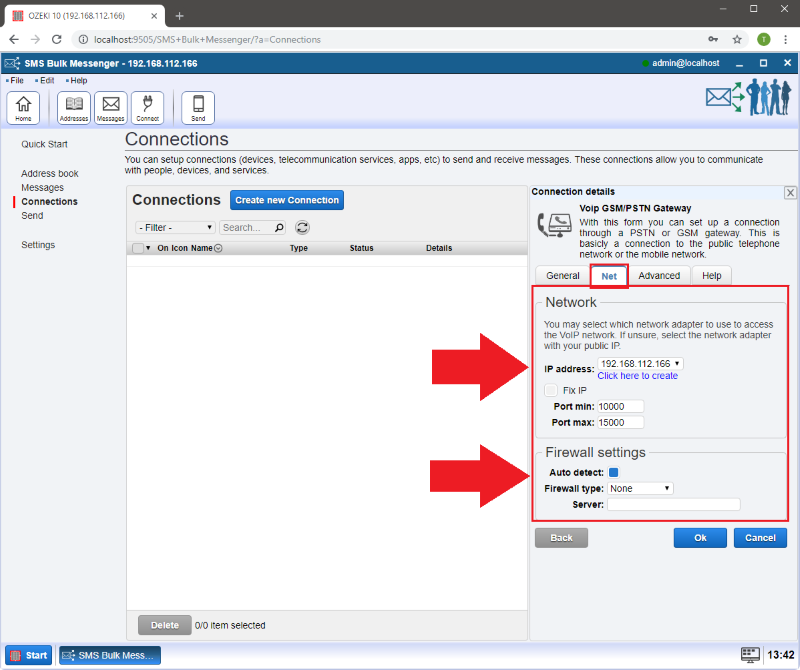
Click on 'Net' tab and provide information about your network adapter so it can be connected to the PSTN network.
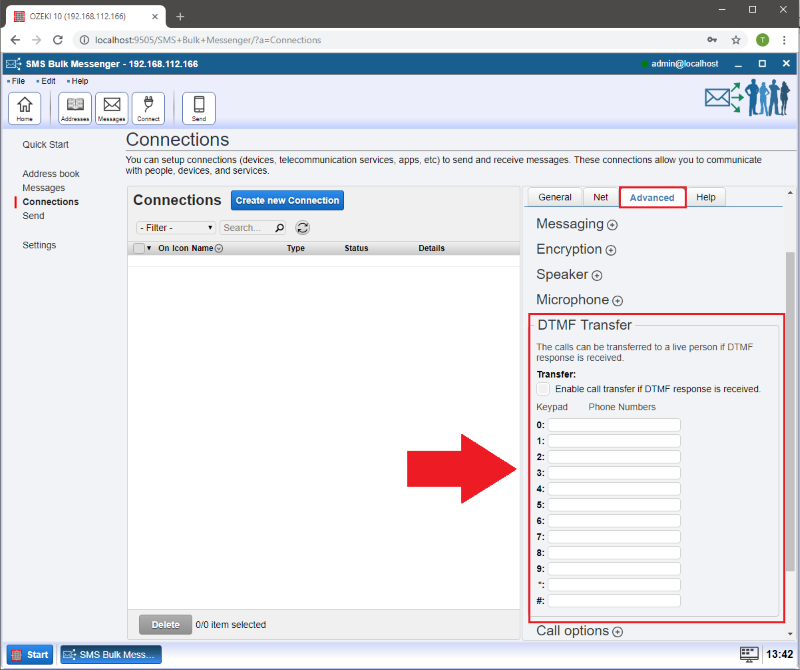
At 'Advanced' you can transfer the calls to a live person if DTMF response is received. Check the box next to 'Enable call transfer if DTMF response is received.' and add the phone numbers below to the suitable keypad.
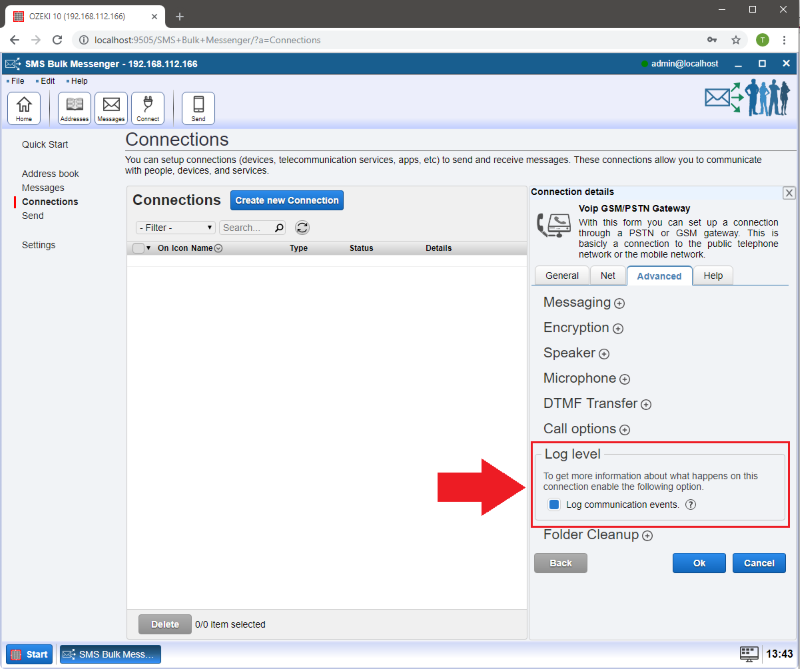
In the 'Log' menu your calls can be logged. There is a possibility to enable and disable logging by checking the box next to 'Enable logging'.
Step 5 - How to dial
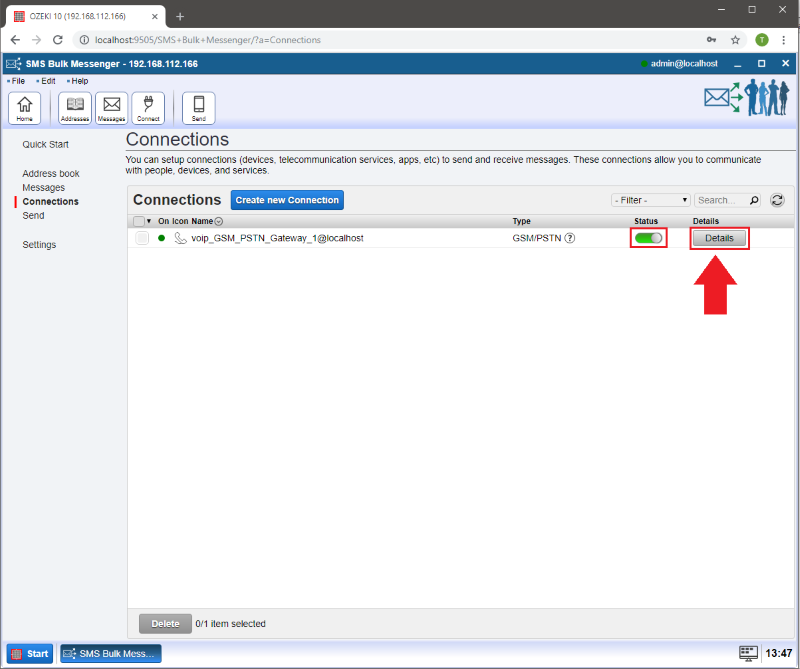
If a green pipe appeared your connection has been setup. Click on the 'Details' button to see the event log, modify the configuration or make a test call.
