Connect your Gmail account with Ozeki Bulk Messenger
Gmail is the most popular E-mail solution nowadays because it is free to register and easy to use. Ozeki Bulk Messenger makes it possible to send E-mails to your contact groups using Gmail. In the instructions below we will show you how to associate the Ozeki Bulk Messenger software with your Gmail account.
Step 1 - Allow less secure apps to use your gmail account
Please click on the link to proceed to your Gmail account login page:
Gmail.com
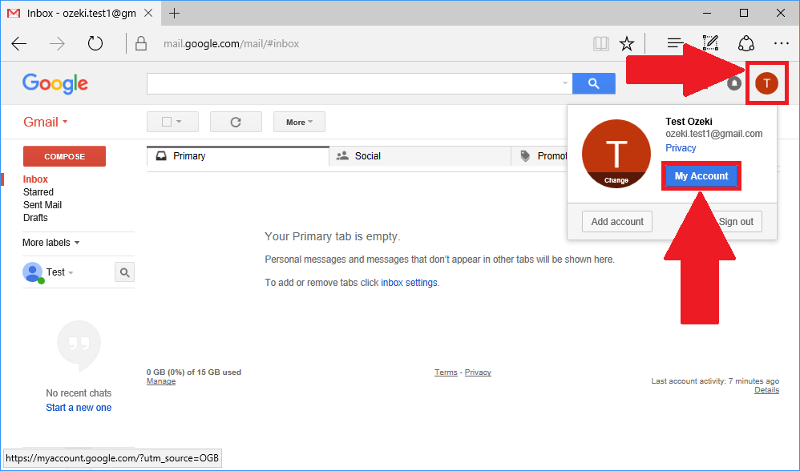
Now select 'My account' after clicking on the little circle next to the bell in the top right corner.
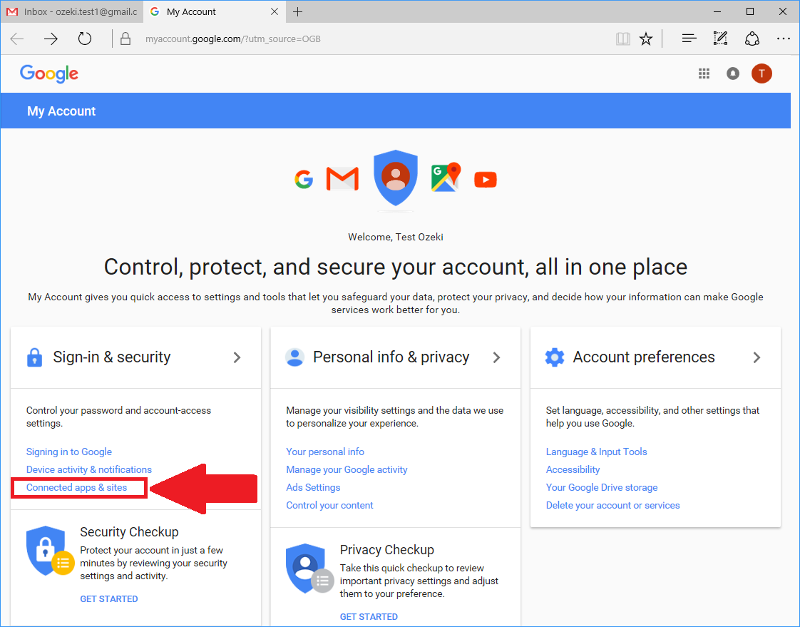
At the 'Sign-in & security' segement please select the 'Connected apps & sites' option.
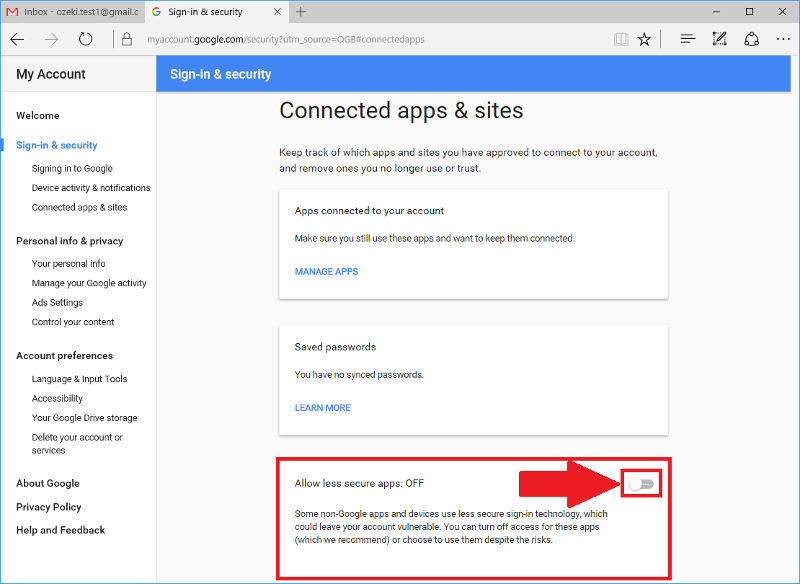
Now switch from 'Allow less secure apps: OFF' to 'Allow less secure apps: ON' using the slider.
Now please return to Ozeki Bulk Messenger.
Step 2 - Create new connection
Open the 'Quick Start' page where you and select 'Step 3 - Setup a connection'.
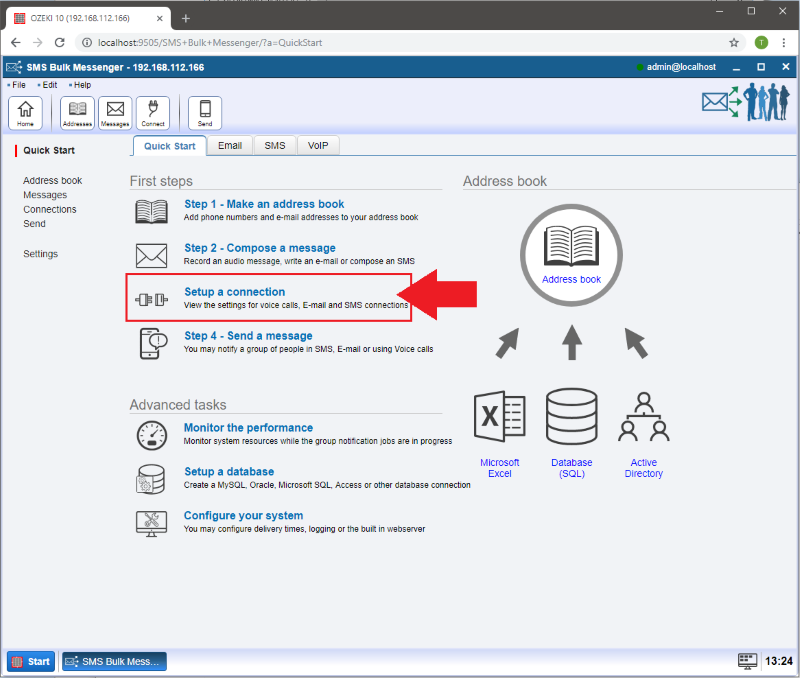
Step 3 - Select connection details
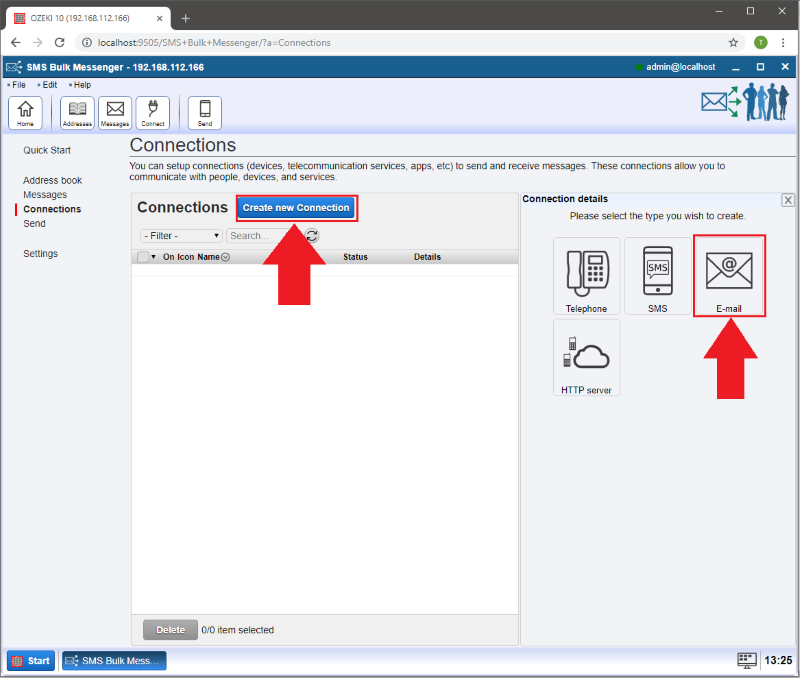
When the new page appears click 'Create new Connection'. Then select 'E-mail'.
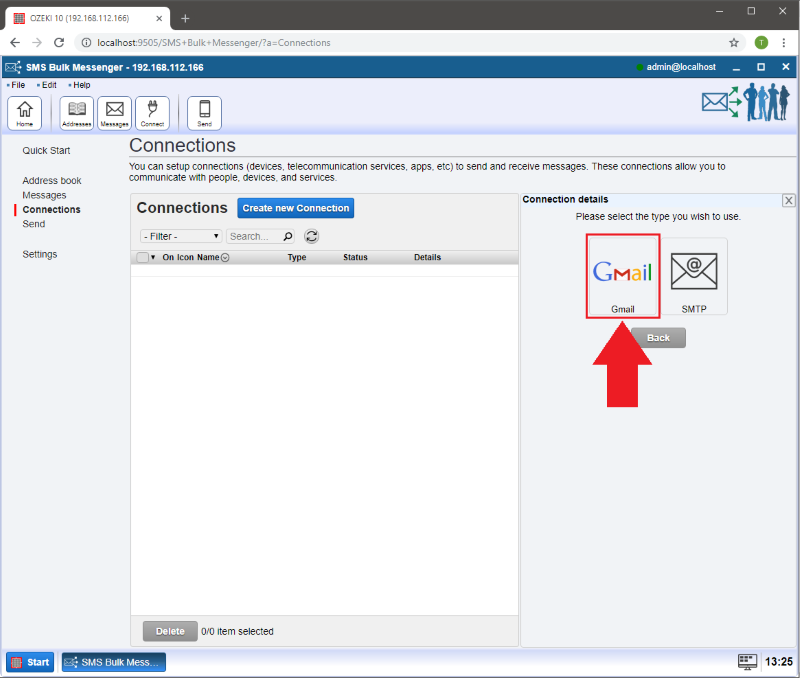
Choose the 'Gmail' connection.
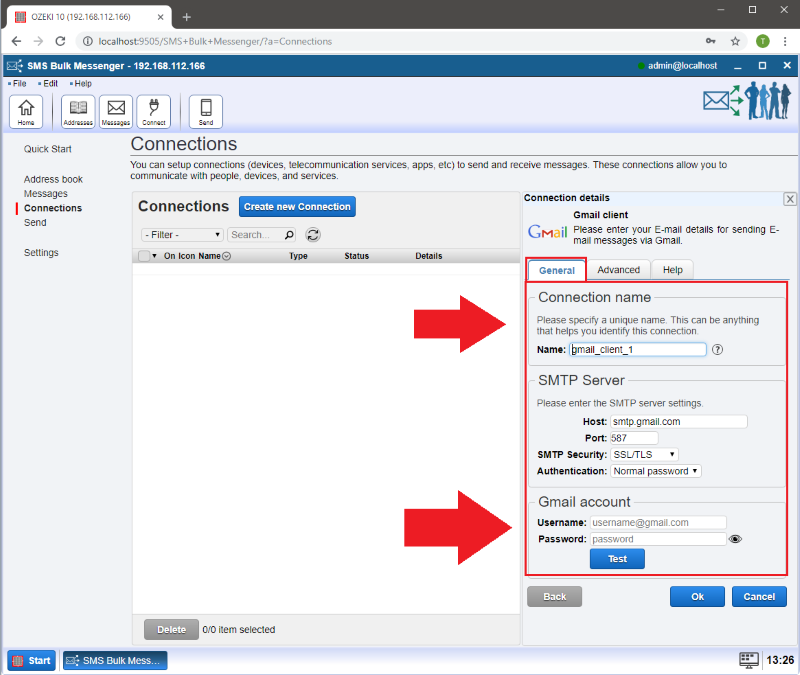
Step 4 - General tab settings
On the 'General' tab you may provide the connection settings. Define different names for the connections to keep them organized.
Two important details are required in connection with your Gmail account.
- 'Username:' The username of your Gmail account which is the part before ...@gmail.com
- 'Password:' The password you use to log into your Gmail account.
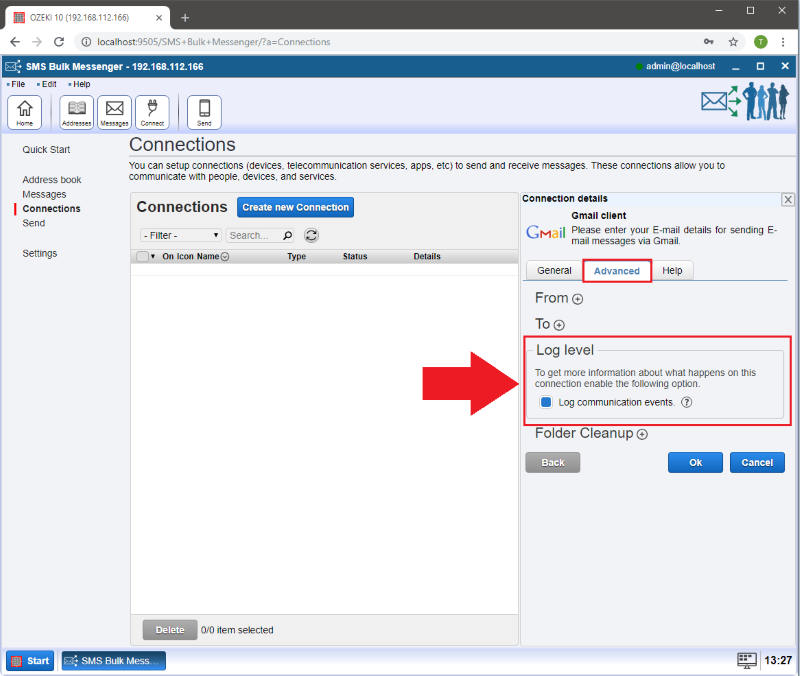
Step 5 - Advanced tab
You can log your E-mail on the 'Advanced' tab.
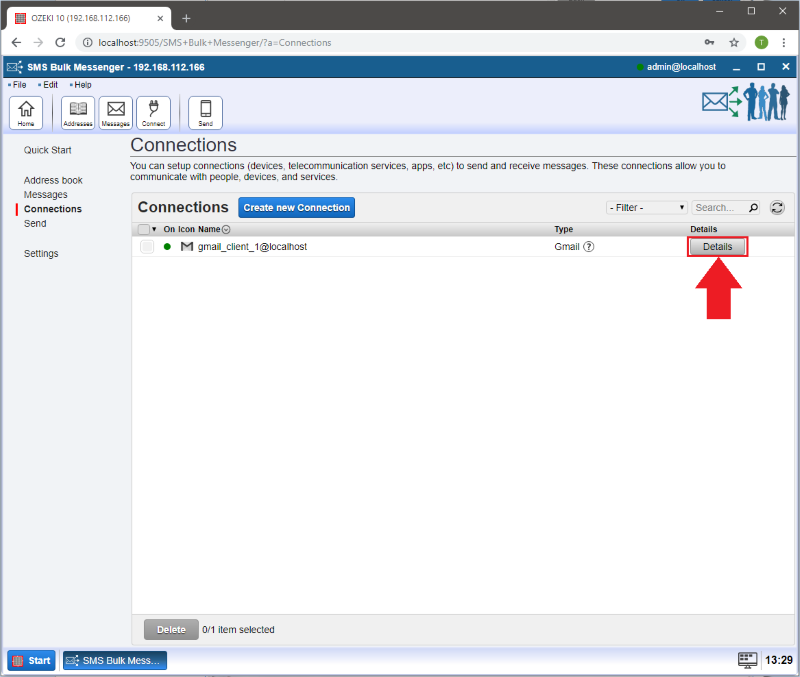
Step 6 - How to send an E-mail
Please select the 'Details' button to open the event log, modify the configuration or send a test E-mail.
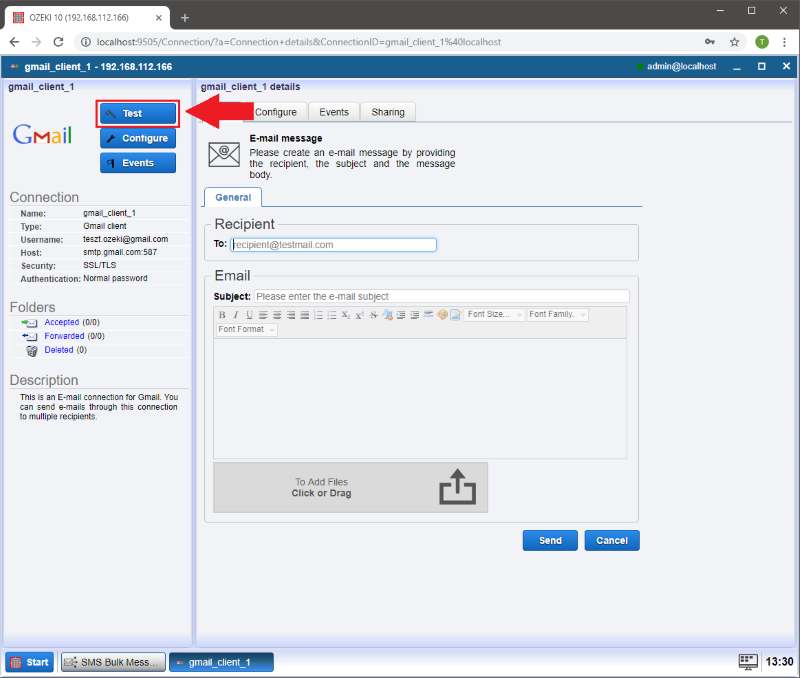
Step 7 - Send a test E-mail
Click on the 'Test' button.
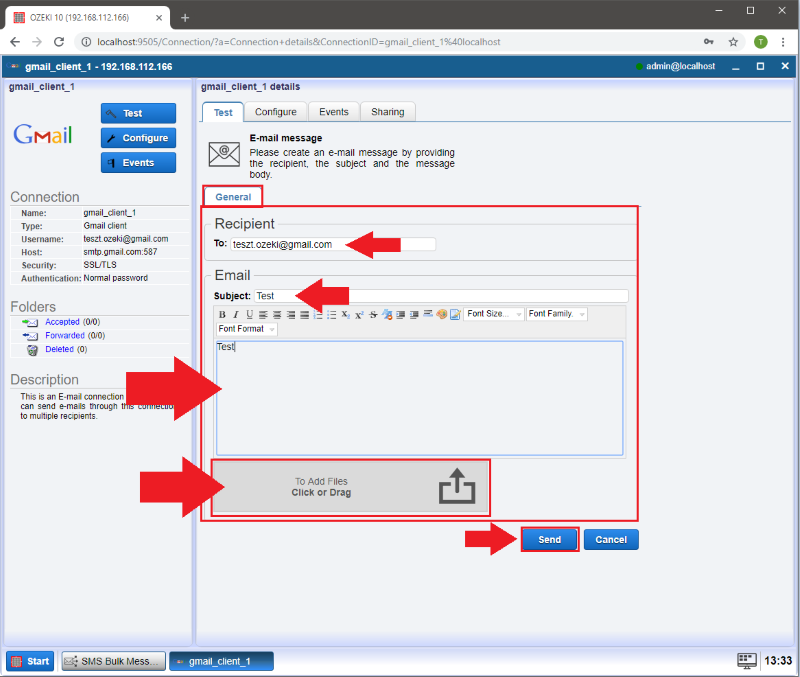
- 'To:' Add the E-mail address you would like to send a message to.
- 'Subject:' Write here something which refers to the message you are going to write in the blank area.
- 'Message:' Type something into the blank area.
- 'Attachments:' If you would like to attach a file to the E-mail, you can do it by clicking on the 'Click or Drag' buttonand selecting the file you would like to add or by moving the file to the corresponding area.
- Finally press 'Send' to send your E-mail.
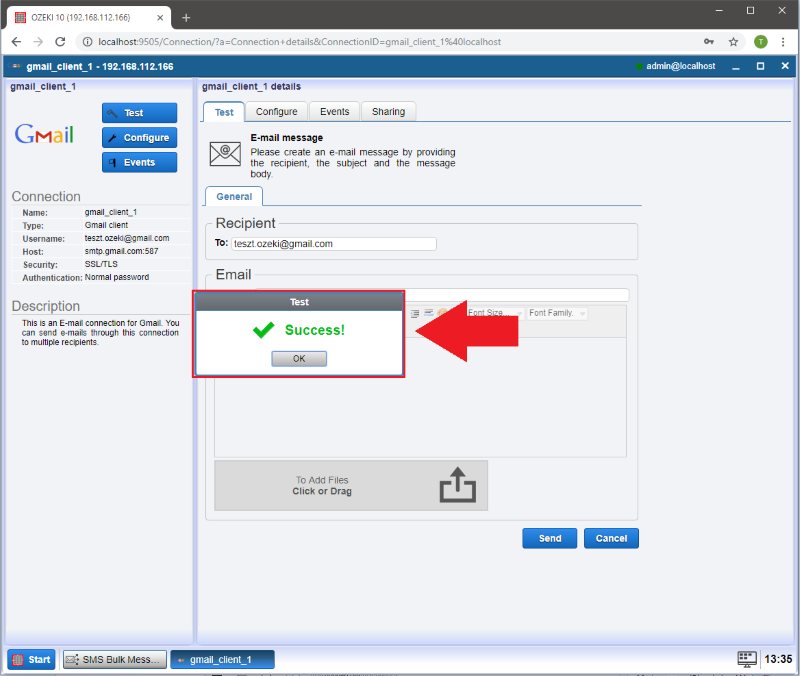
A pop-up window will appear showing whether the E-mail has been succesfully sent. You can check the logs on the 'Events' tab.
Step 8 - Check in Gmail
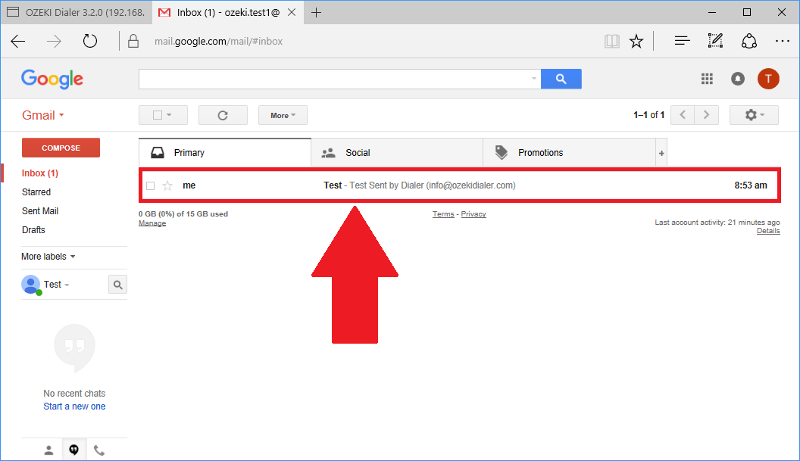
Now it is time to check the result on the Gmail interface, thus we can be sure that the E-mail was received.
