Connect SMTP Server to Ozeki Bulk Messenger
With the help of Ozeki Bulk Messenger you can send notification E-mails to your contact groups, send welcome messages to your new employees/trainees and you can even send postcards for their birthdays or at Christmas. No matter which SMTP Server you use our software supports all of them! In the next steps we will show you how to connect the Ozeki Bulk Messenger software to your SMTP server.
Step 1 - Create new connection
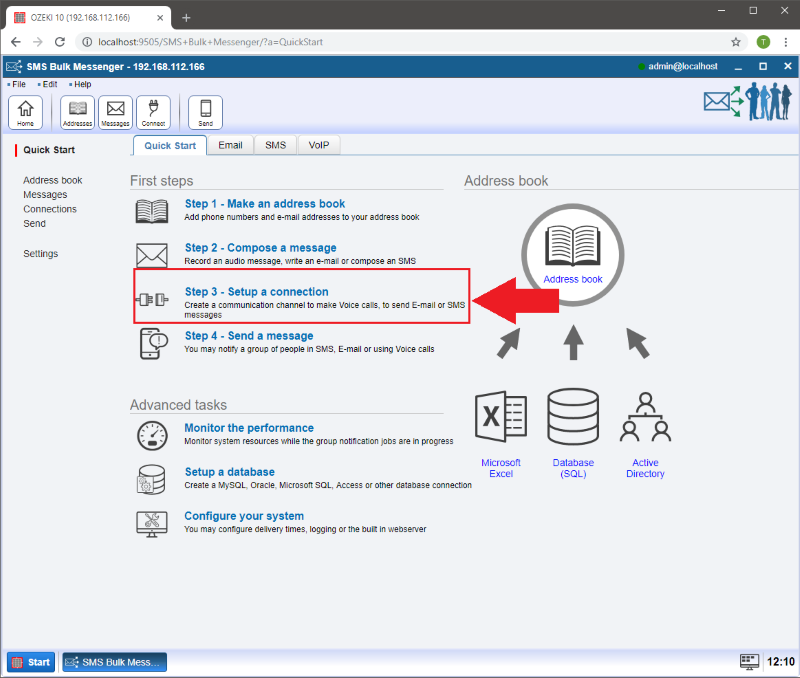
On the 'Quick Start' page please click 'Step 3 - Setup a connection'.
Step 2 - Create an E-mail type of connection
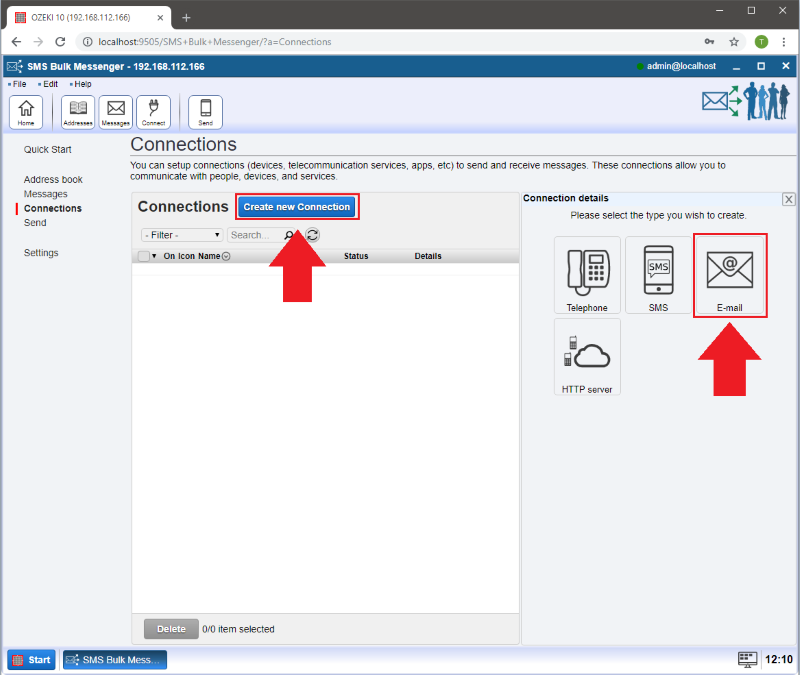
On the new page select the 'Create new Connection' button and then choose 'E-mail' in the pop-up window.
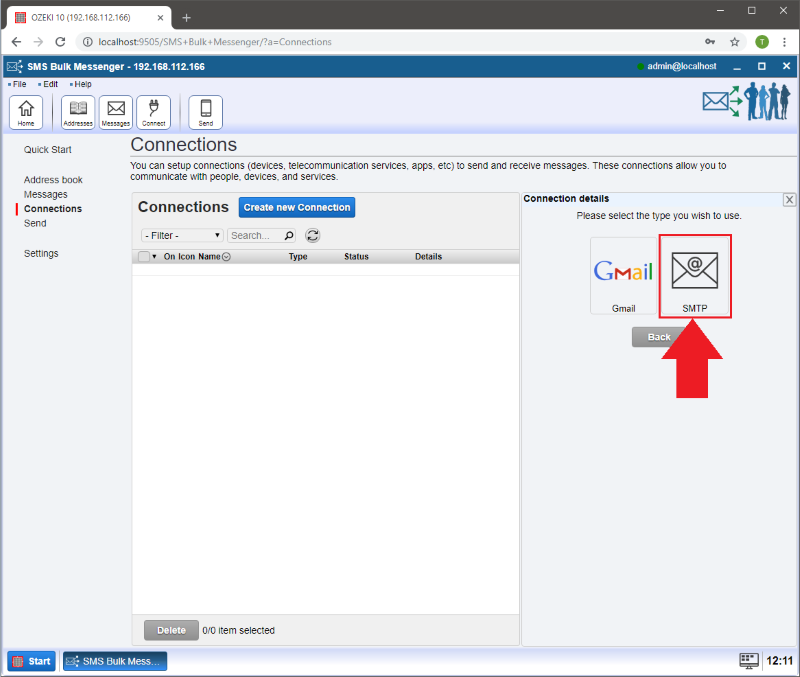
After that, select the 'SMTP' connection type.
Step 3 - General tab informations
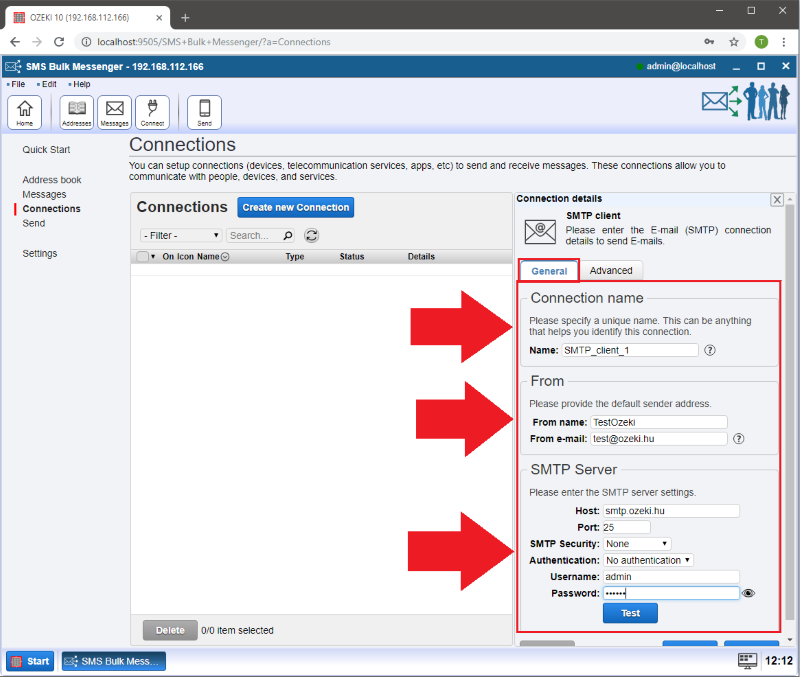
On the 'General' tab you can setup your connection settings.
- Provide a name at the 'Connection name' section.
- Add your default sender address at the 'From' section.
- 'From name:' Here you can add a name that will appear in the E-mail you send.
- 'From e-mail:' Here you need to add the E-mail address you would like to send the messages from.
- At the 'SMTP Server' segment you may provide information about your SMTP Server.
- 'Host:' The address of your SMTP Server.
- 'Port:' The port number of your SMTP Server.
- 'SMTP Security:' This information is related to security data. If your SMTP Server requires authentication, you have to select this method.
- 'Authentication:' This information is related to security data. If your SMTP Server requires authentication, you have to select this method.
- 'Username:' This information is related to security data. If your SMTP Server requires authentication, you have to select this method.
- 'Password:' This information is related to security data. If your SMTP Server requires authentication, you have to select this method.
Step 4 - Logging data
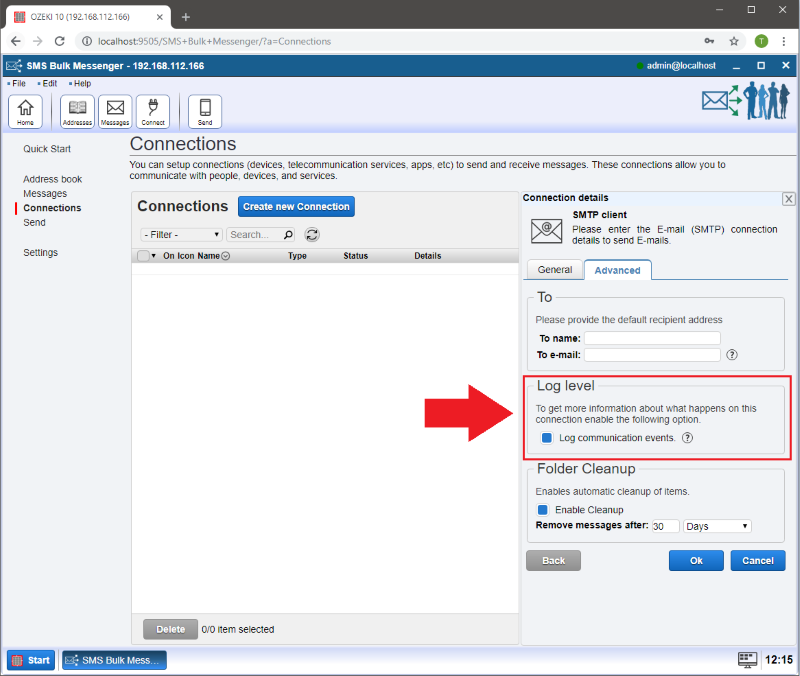
The calls can be logged on the 'Advanced' tab.
Step 5 - How to send an E-mail
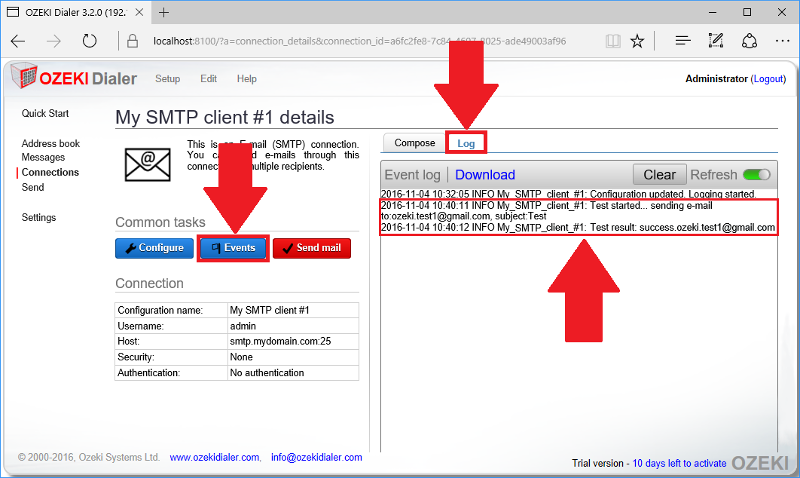
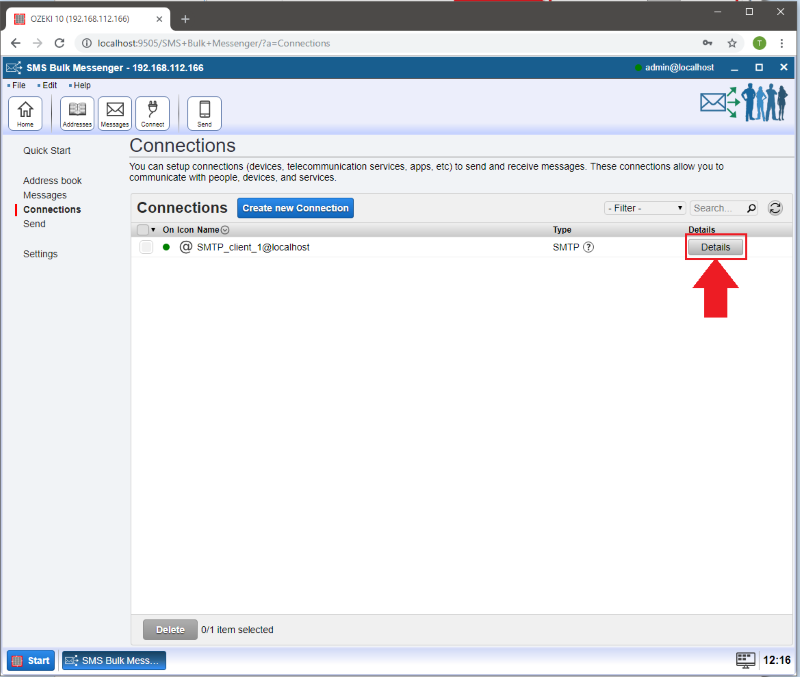
Please select the 'Details' button to see the event log, modify the configuration or send a test E-mail.
Step 6 - Send a test E-mail
Click on the 'Test' button on the left.
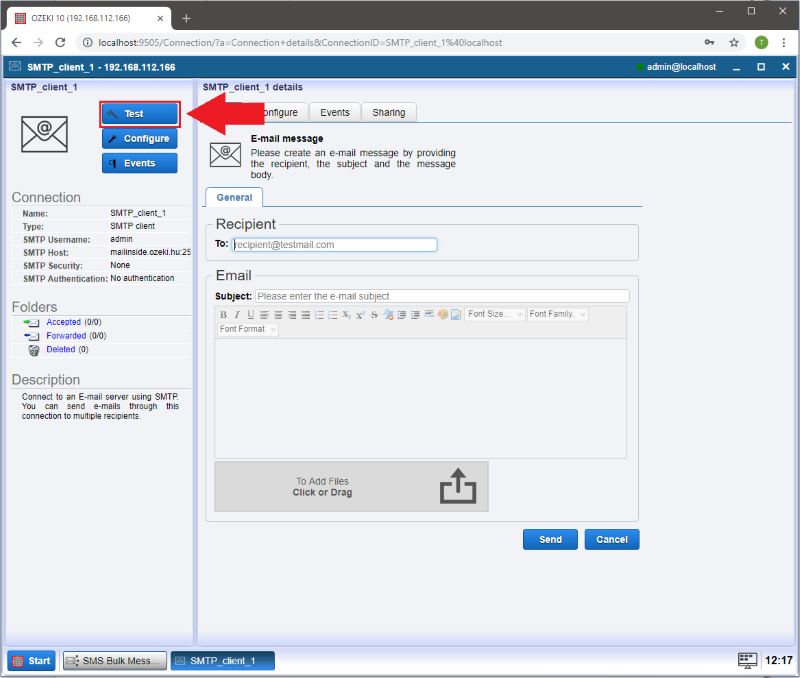
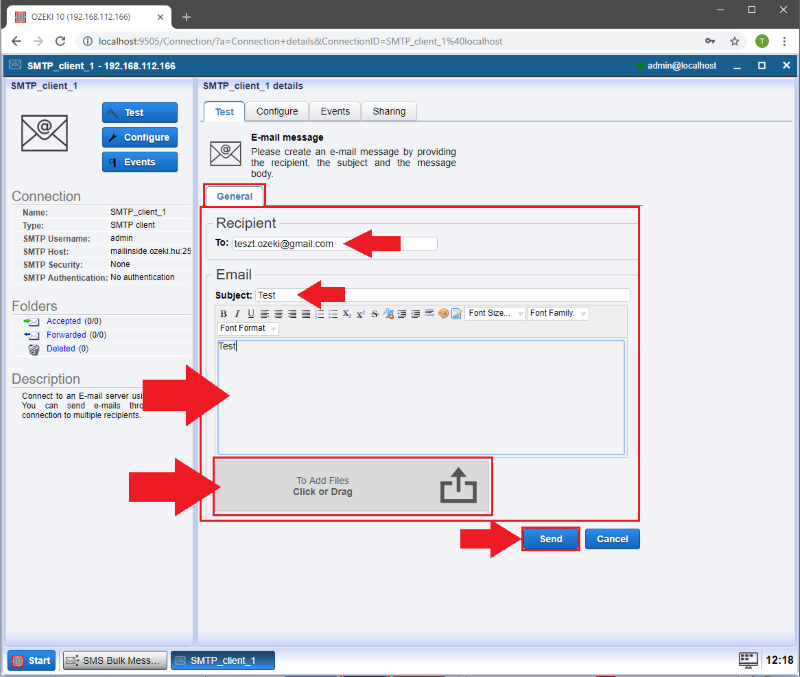
On the 'General' tab you can create your E-mail message.
- 'To:' Add the E-mail address you would like to send a message to.
- 'Subject:' Write here something which refers to the message you are going to write in the blank area.
- 'Message field:' Type something into the blank box.
- 'Attachments:' If you would like to attach a file to the E-mail, you can do it by clicking on the 'Click or Drag' button and selecting the file you would like to add or by moving the file to the corresponding area.
- Finally press 'Send' to send your E-mail.
