How to make your first voice call
This guide will help you making your first voice call. You can make voice calls using several types of address books and with a massive amount of messages.
Get started
Ozeki Bulk Messenger runs on Windows, Linux and Android Smart phones. To start using it, you need to download and install it. Installation is straightforward. The software can be downloaded by clicking on the following link:
 | Ozeki 10 can be obtained by opening the download page here: Download Ozeki 10! |
Step 1 - Make an address book
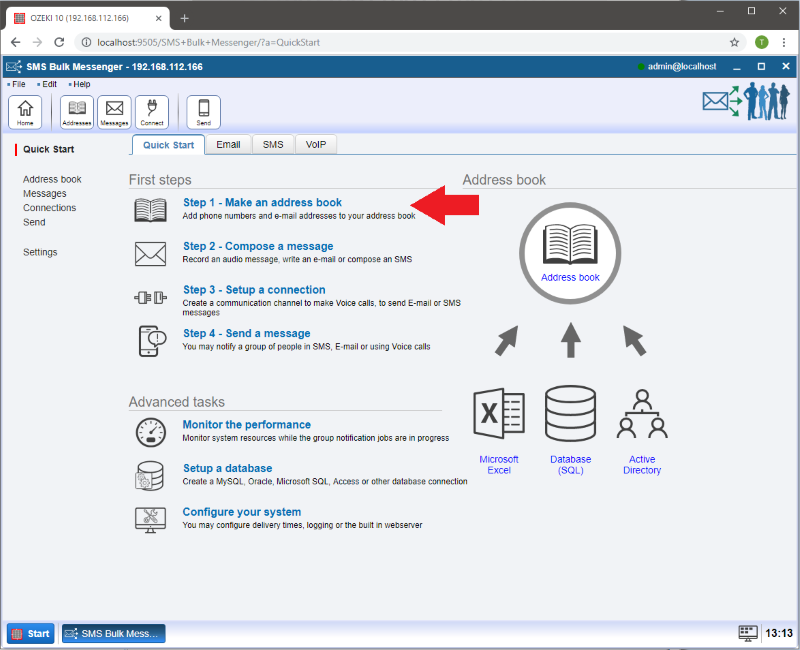
On the main page you have to select 'Step 1 - Make an address book' (Figure 1).
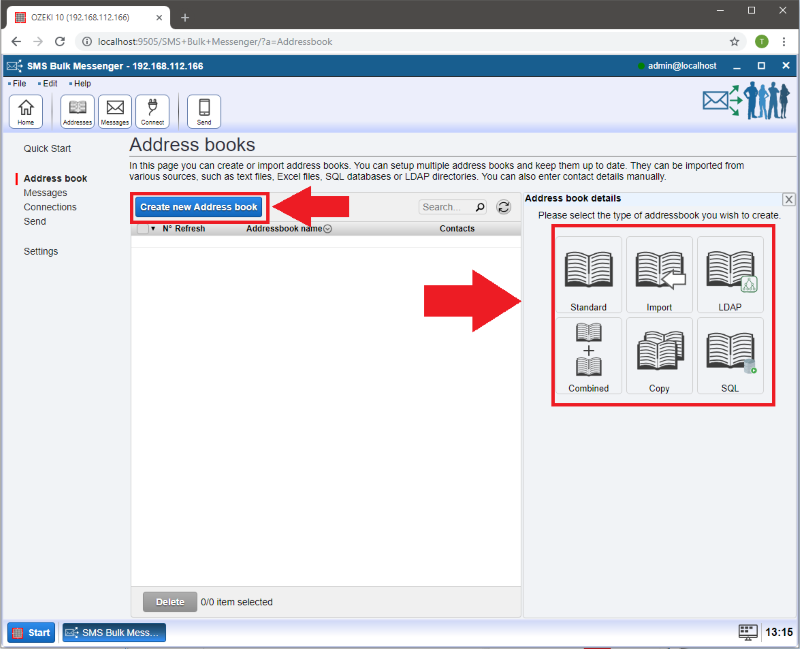
After the new page has appeared, please select 'Create new Address book' (Figure 2).
Then you can choose from many addressbook types which can be found in the 'Address book details' window to the right.
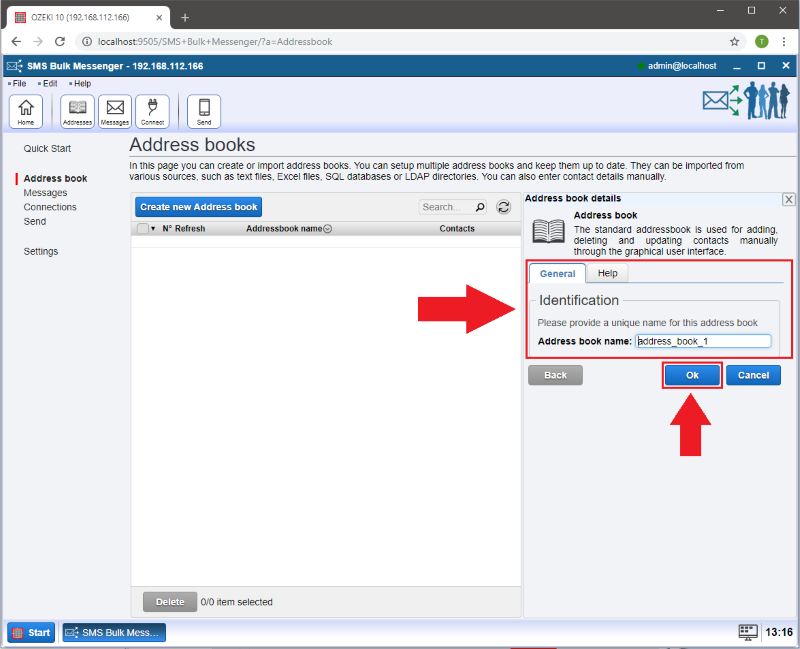
In this case we have selected the 'Standard' type addressbook. In the 'Identification' field you can provide a name for the created addressbook.
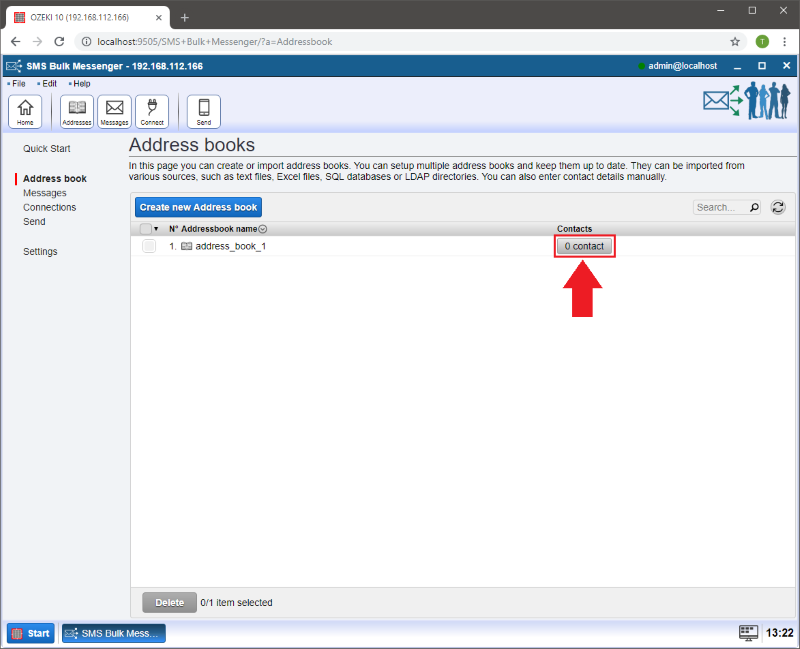
As we use a Standard addressbook we have to add the contacts to the addressbook manually. To do this, you have to click on the 'Contacts' button after the addressbook has appeared on the list.
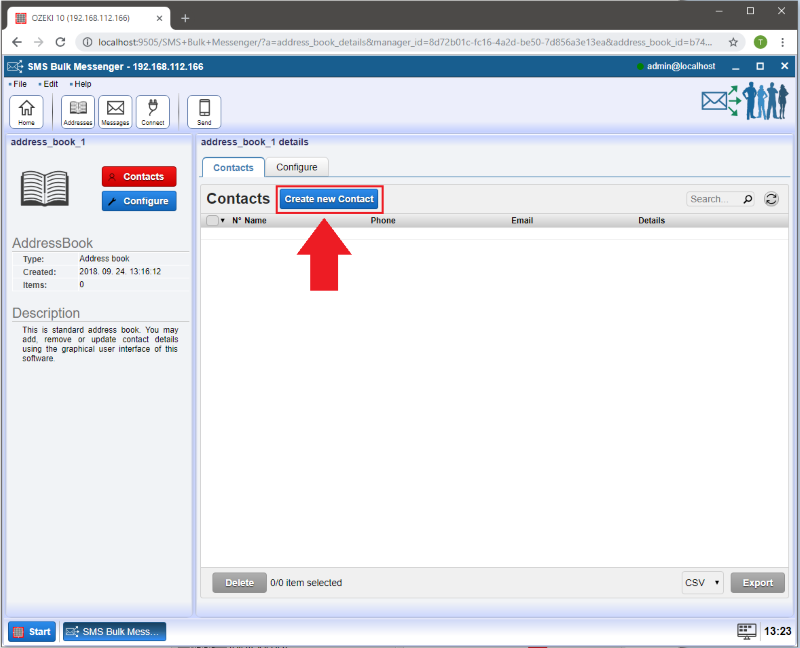
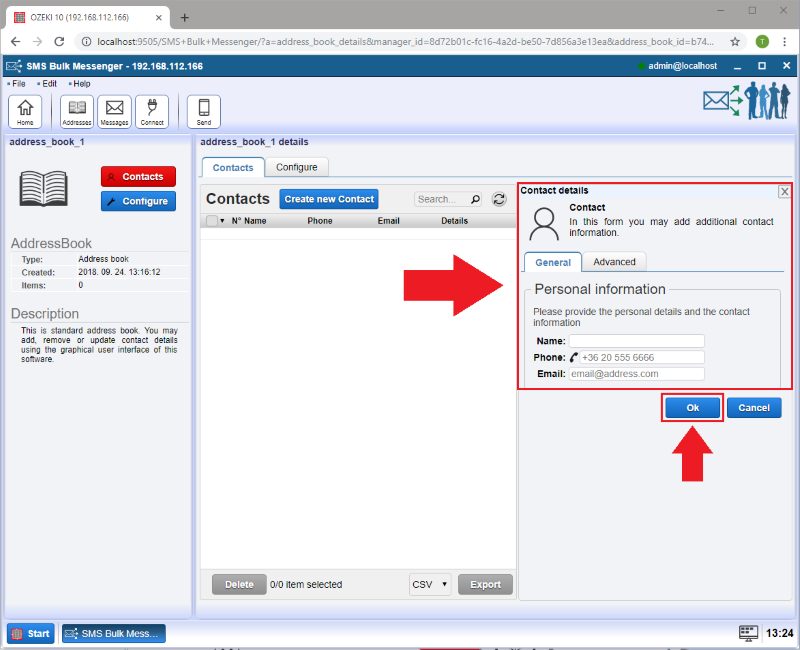
If you select 'Create new Contact' you will find the 'Contact details' window to the right. (Figures 5 and 6)
This is where you can provide detailed information about the contact you wish to add to your addressbook. After clicking 'Ok' your contact is added to the contact list.
Step 2 - Compose your voice message
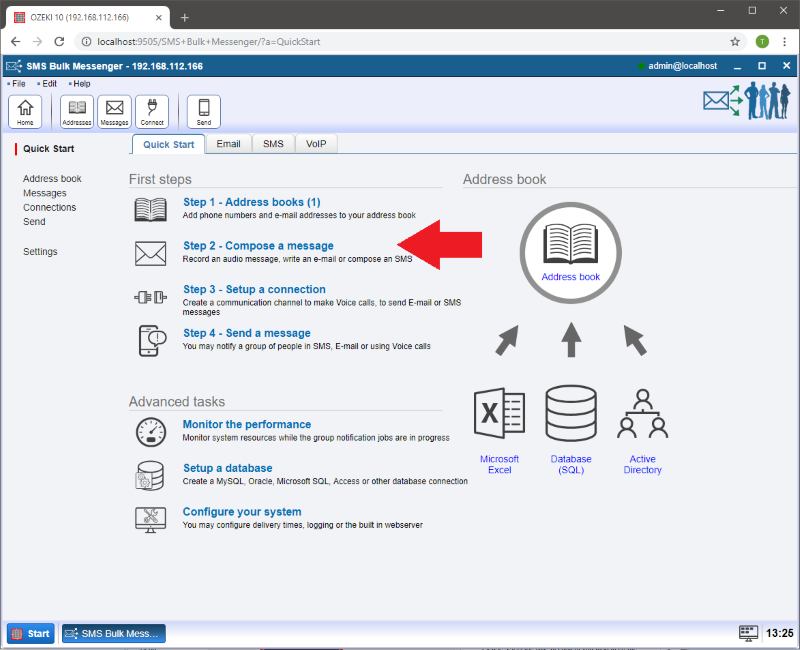
Select 'Step 2 - Compose a message' (Figure 7).
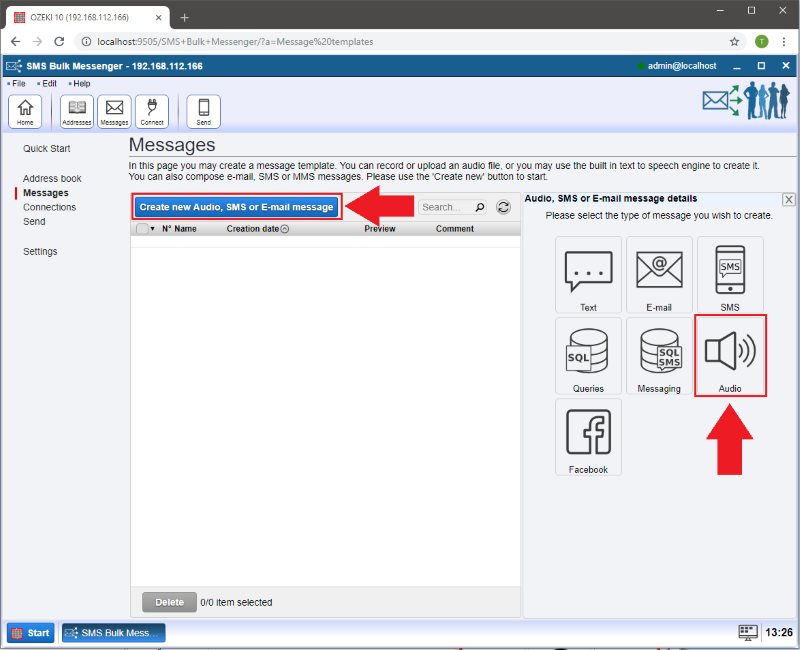
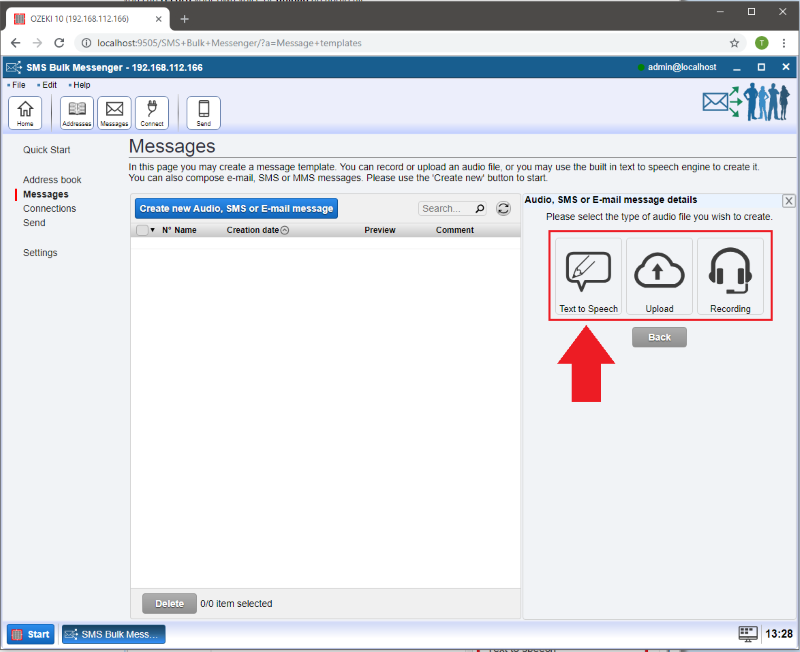
On the new page you have to select 'Create new Audio, SMS or E-mail message'. To create your first voice call click on the 'Audio' message type (Figure 8).
If you select the 'Text to speech' option (Figure 9) then you can easily send automated voice messages. Besides text to speech, you can record your own voice or upload an audio file.
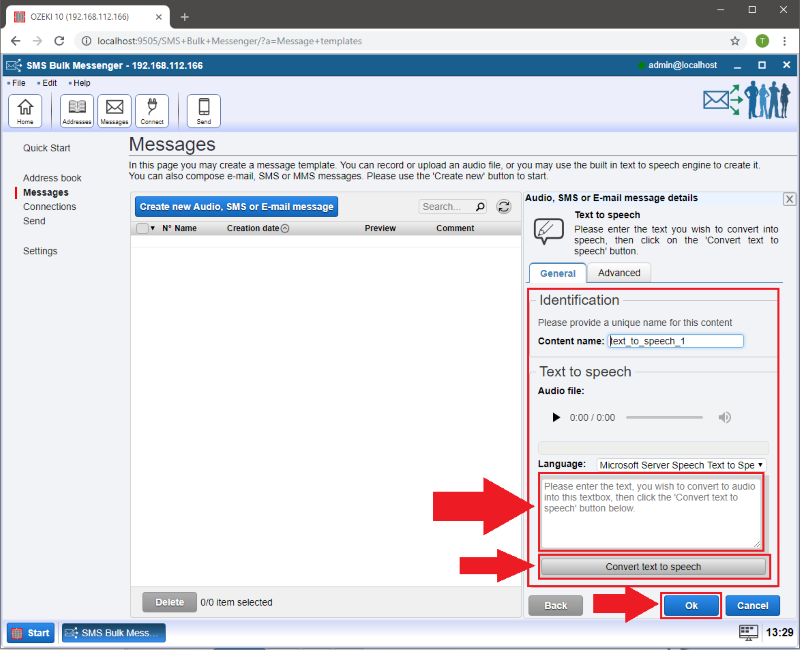
If you have selected text to speech, please type the message in the required area and click on the 'Convert text to speech' button then press OK(Figure 10).
Step 3 - Setup a connection
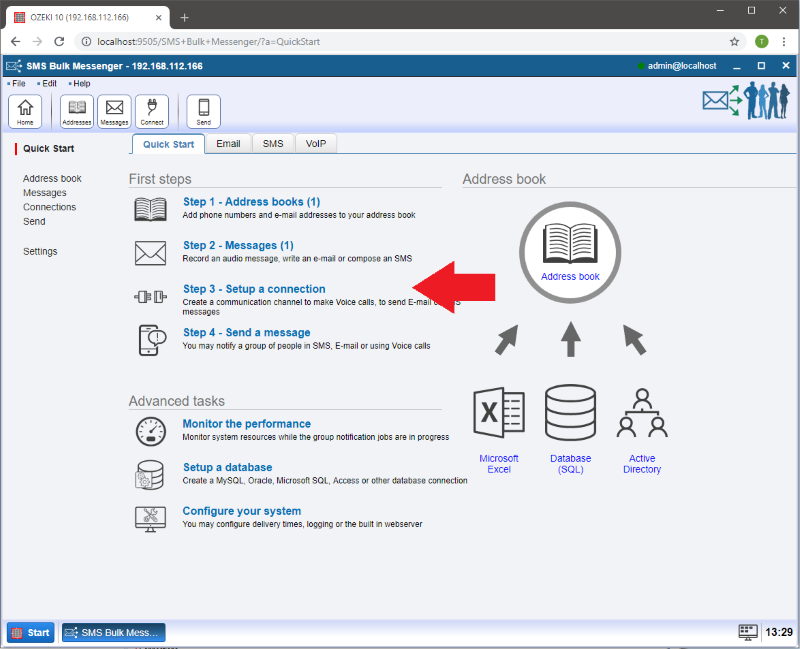
At this step you have to select 'Step 3 - Setup a connection'. (Figure 11).
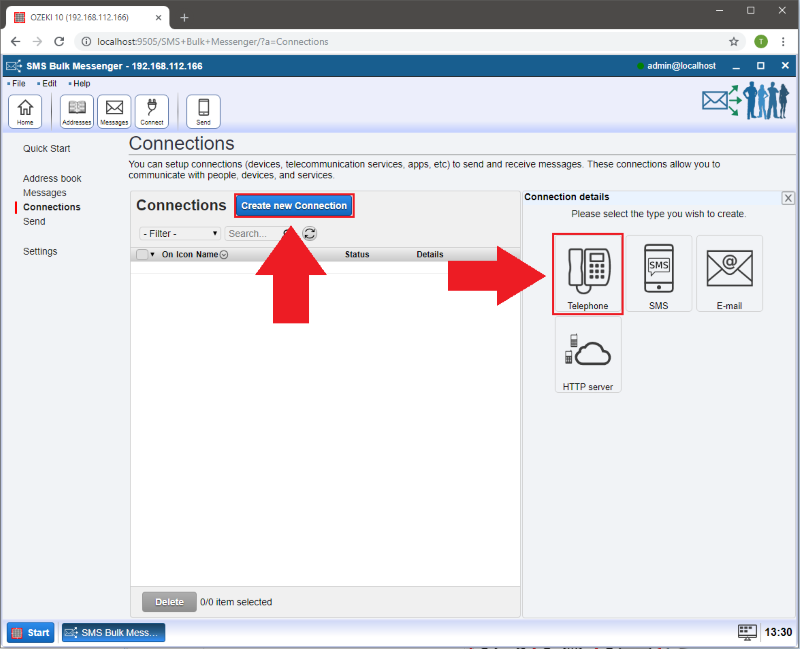
On the new page click on 'Create new Connection' and after that select the 'Telephone' connection for your voice call (Figure 12).
There are three types of telephone connections:
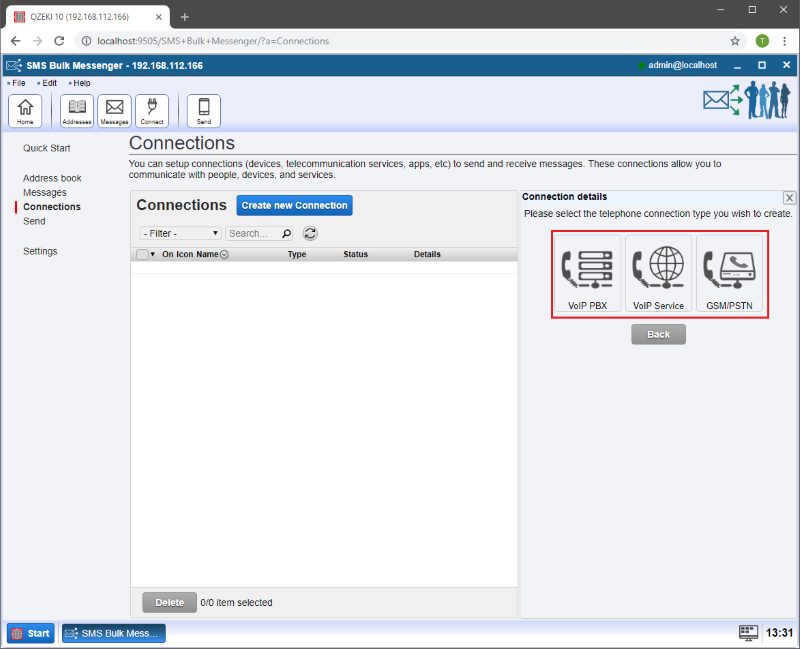
Just pick one of them. You can find step-by-step configuration tutorials below:
How to install different types of connections.Step 4 - Send a message
This is the final section to make a successful voice call with Ozeki Bulk Messenger.
Select 'Step 4 - Send a message' to deliver your message (Figure 14).
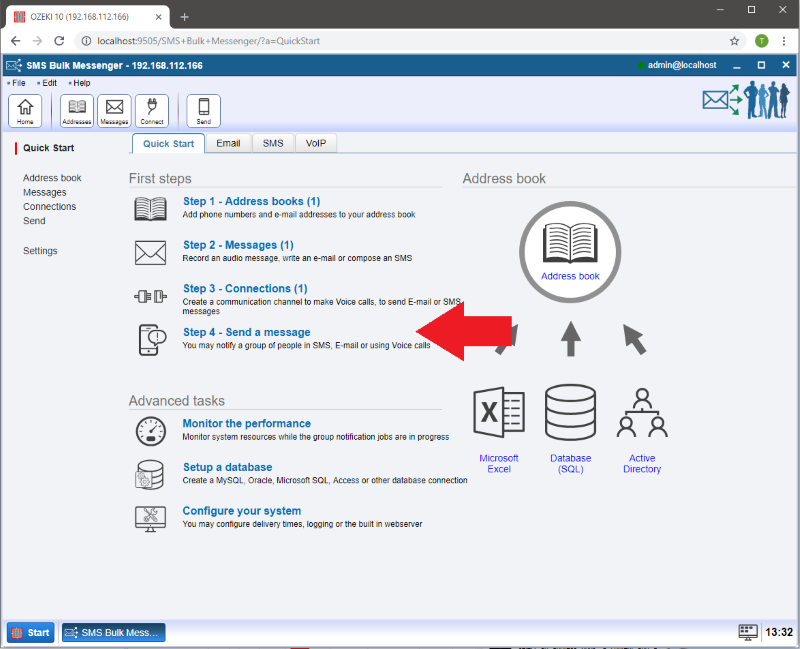
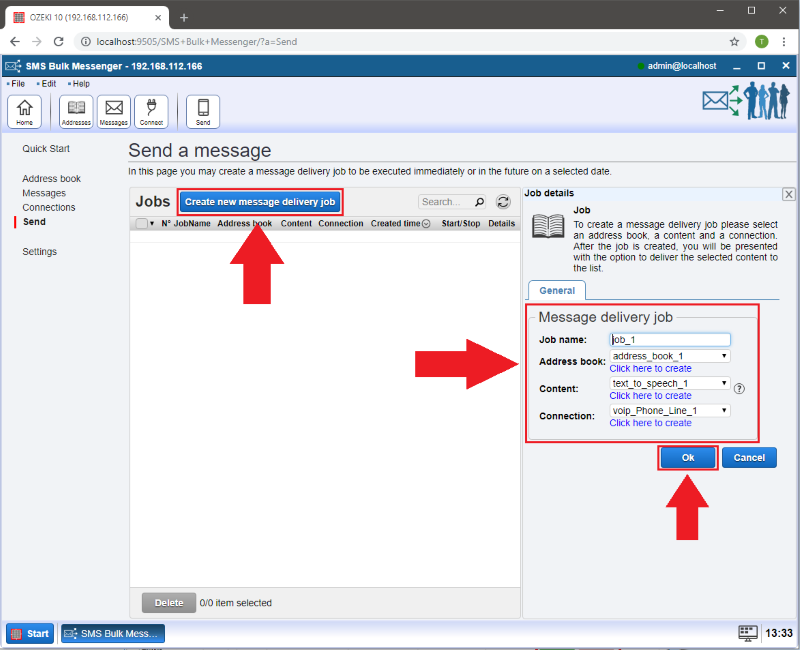
Click on the 'Create new message delivery job' button. At the right side you can select the suitable address book, message and connection(Figure 15).
After you have created the job, it will appear in the list. If you want to start your delivery you have to hit the green 'Start' button (Figure 16).
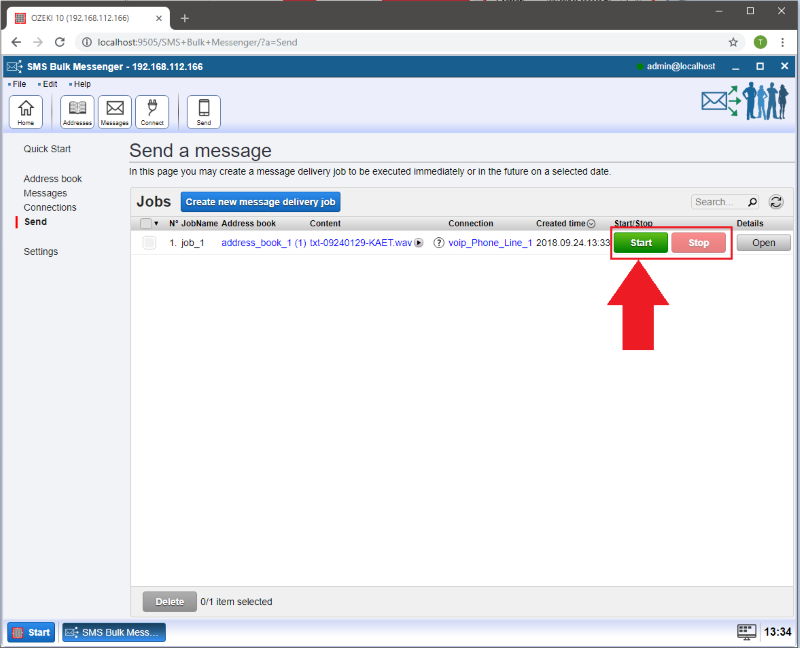
After the delivery job is finished, you can see the result of the job: the rate of completed or failed calls (Figure 16).

