How to send your first E-mail with Ozeki Bulk Messenger
On this page you will find images and step by step instructions on how to use the Ozeki Bulk Messenger software for sending E-mails. This guide will provide you information about how to add an address book and then add contacts to it. After that, how the content of the message and the connection can be created. And finally, how to start your E-mail delivery job setup.
Get started
Ozeki Bulk Messenger runs on Windows, Linux and Android Smart phones. To start using it, you need to download and install it. Installation is straightforward. The software can be downloaded by clicking on the following link: | Ozeki 10 can be obtained by opening the download page: Download Ozeki 10! |
Step 1 - Make an address book
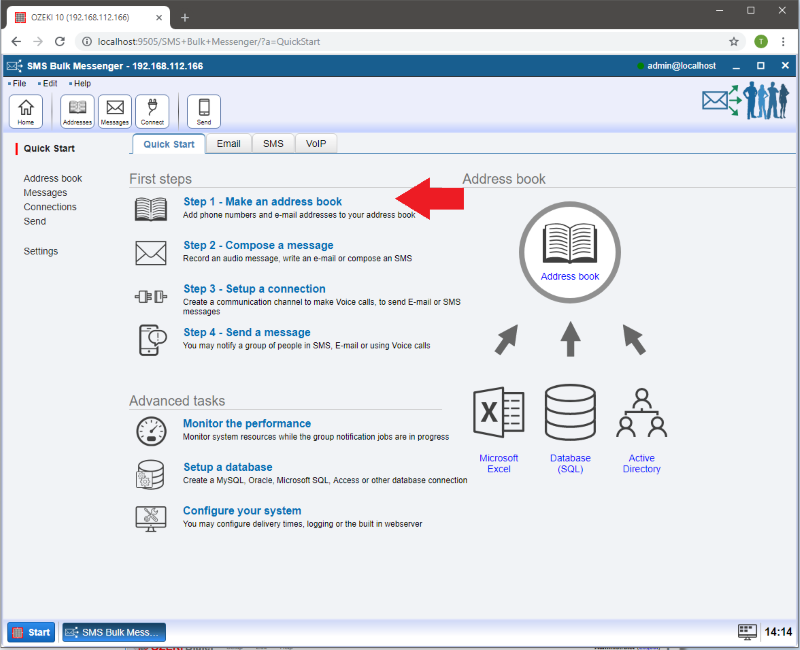
On the Quick Start tab please select 'Step 1 - Make an address book' (Figure 1).
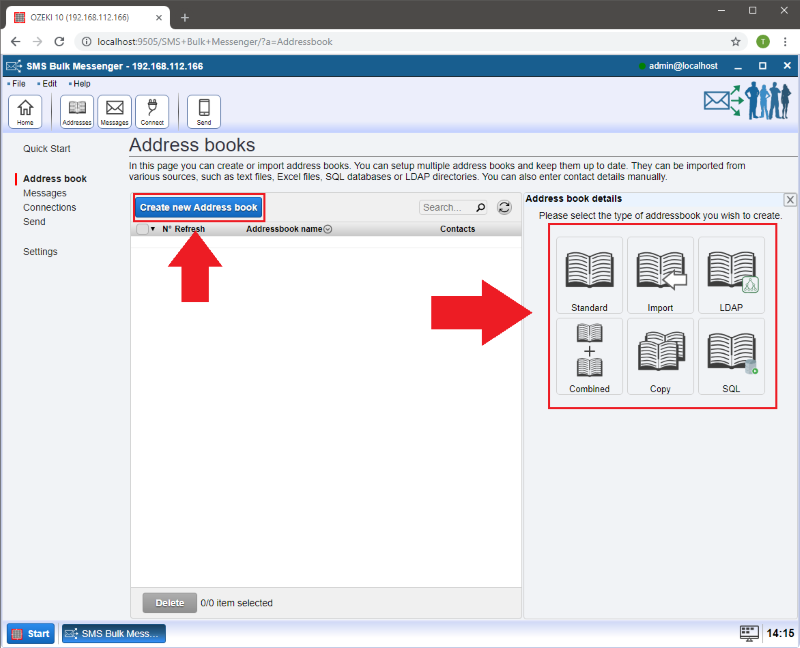
After the new page has appeared click on the 'Create new Address book' button (Figure 2).
On the right side of the page there will be several address book types to choose from to handle your contacts.
In this example we selected the 'Standard address book' (Figure 3).
It is also possible to import an address book from external sources like an Excel spreadsheet (.XLSX, .CSV), txt file or from an online database (SQL or LDAP).
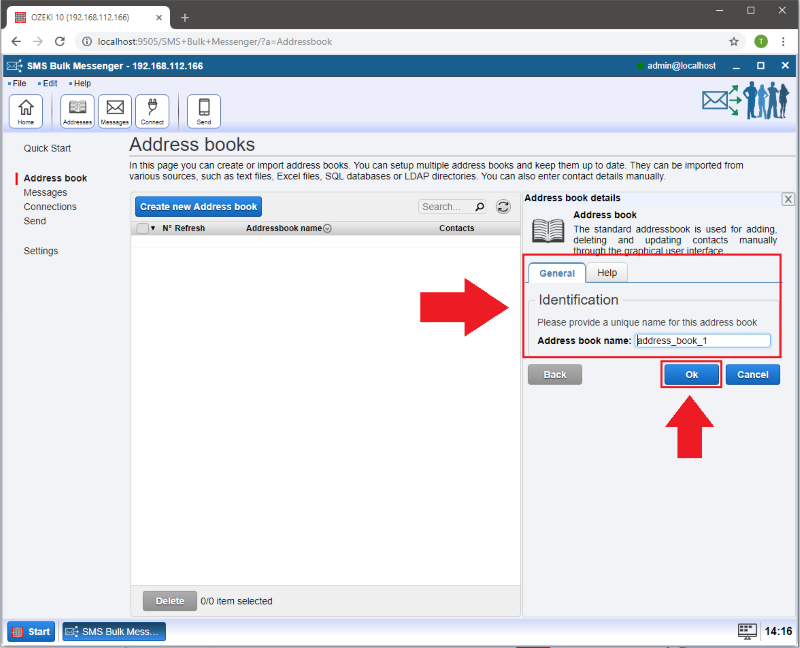
After having the type of your addressbook selected you can provide it with a name.
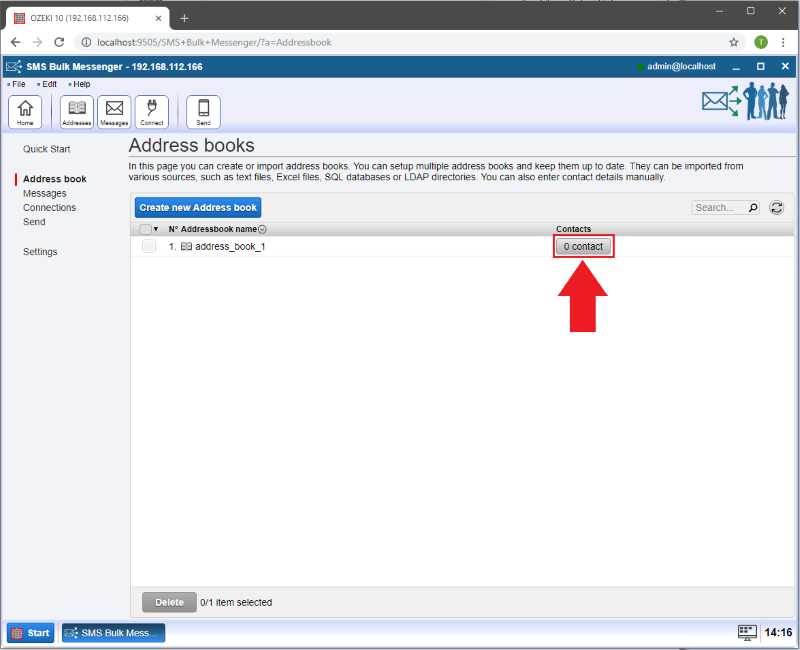
In order to add contacts to your addressbook or edit the existing ones click on the 'Contacts' button (Figure 4).
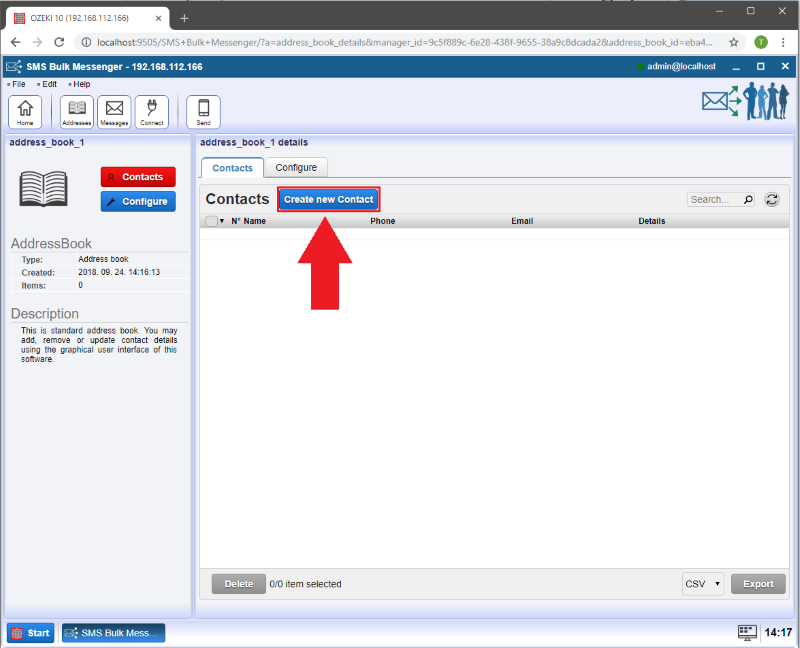
Select 'Create new Contact' to add a contact to your address book.
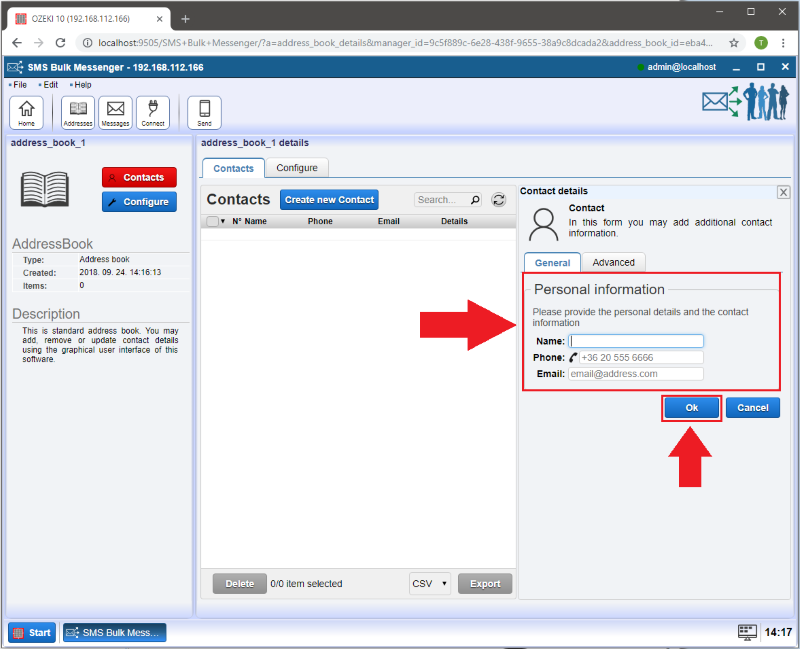
A 'Contact details' window will appear on the right where you can easily add personal information about your contact (Figure 6). When you are done, click 'Ok'.
Step 2 - Compose your message
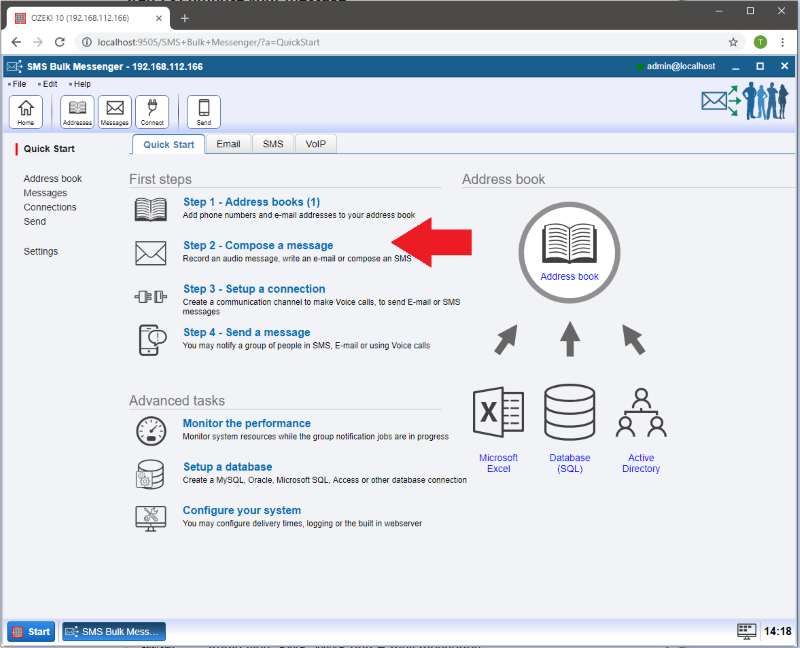
Select 'Step 2 - Compose a message' (Figure 7).
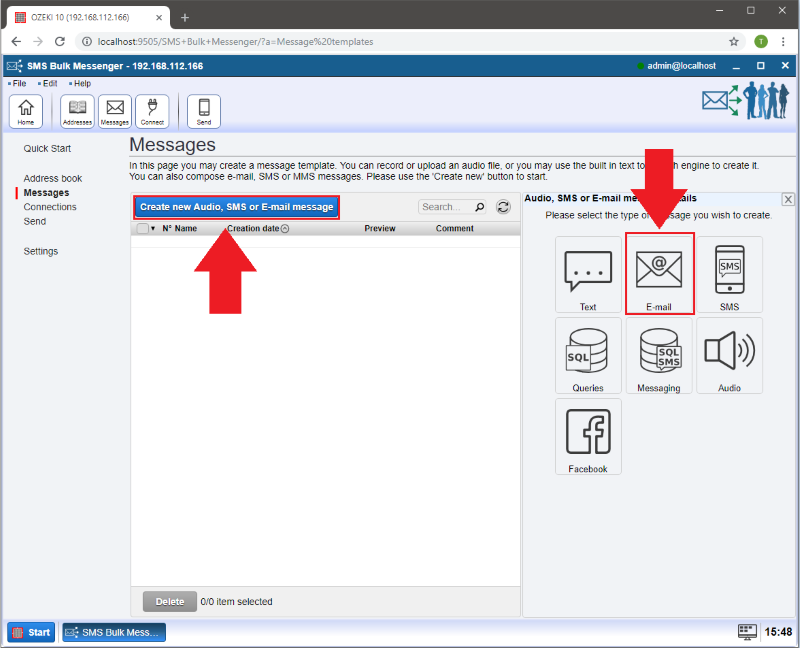
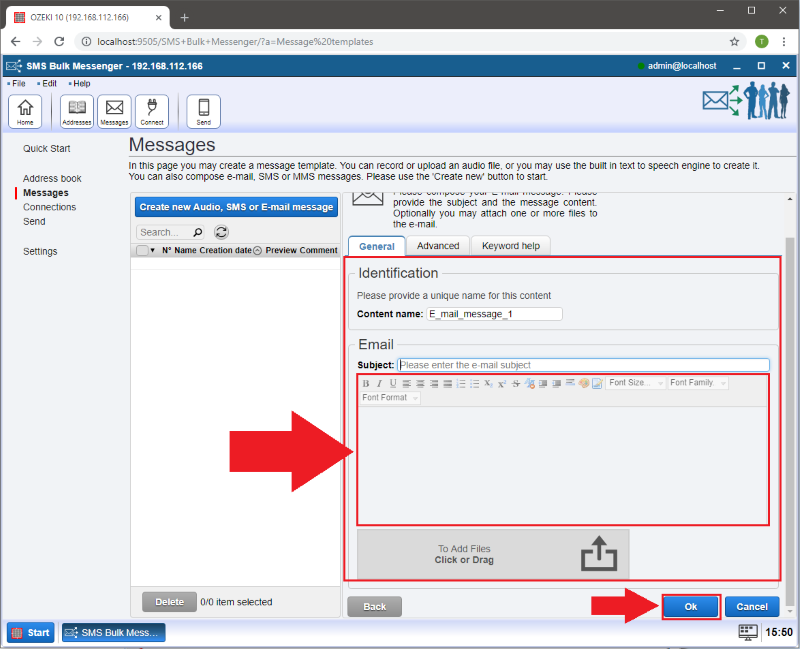
Click on the 'Create new content' button and then select 'E-mail' (Figure 8).
In the 'Content details' window to the right you can add the subject and the text of your E-mail. You can even send attachments in your E-mail. If you are finished with the composing, click 'Ok'.
Step 3 - Create Connection
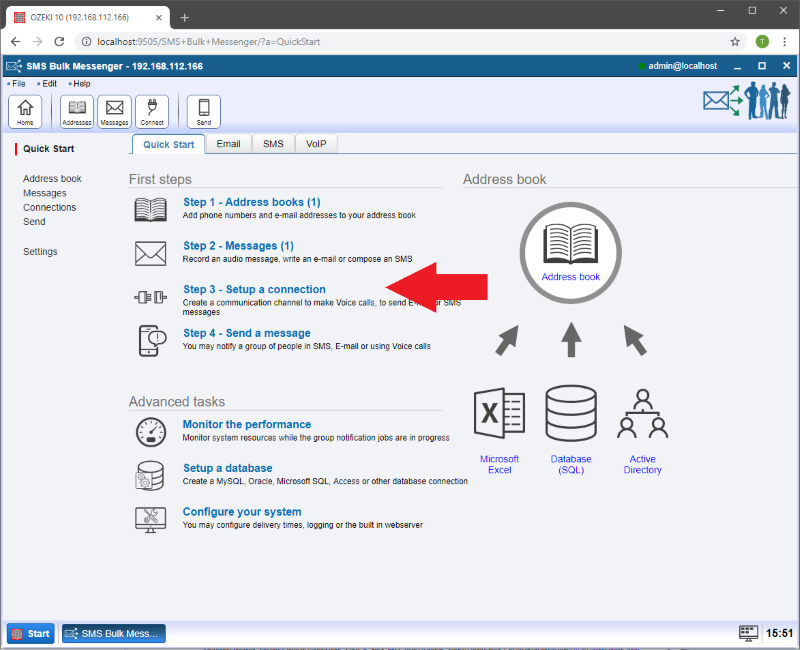
After having your E-mail finished, it is time to setup a connection. Select 'Step 3 - Setup a connection' (Figure 10).
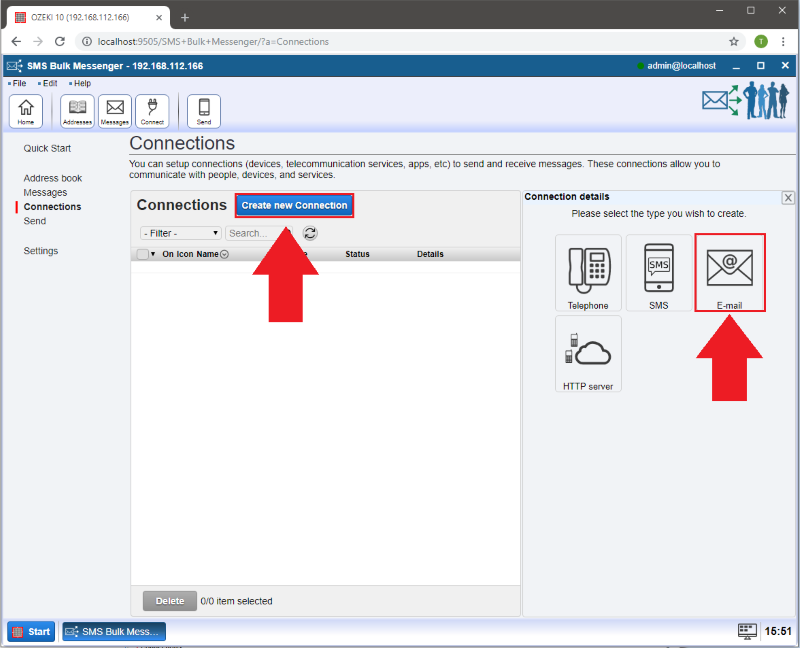
On the new page pleas press the 'Create new Connection' button. Then select the 'E-mail' type of connection on the right (Figure 11).
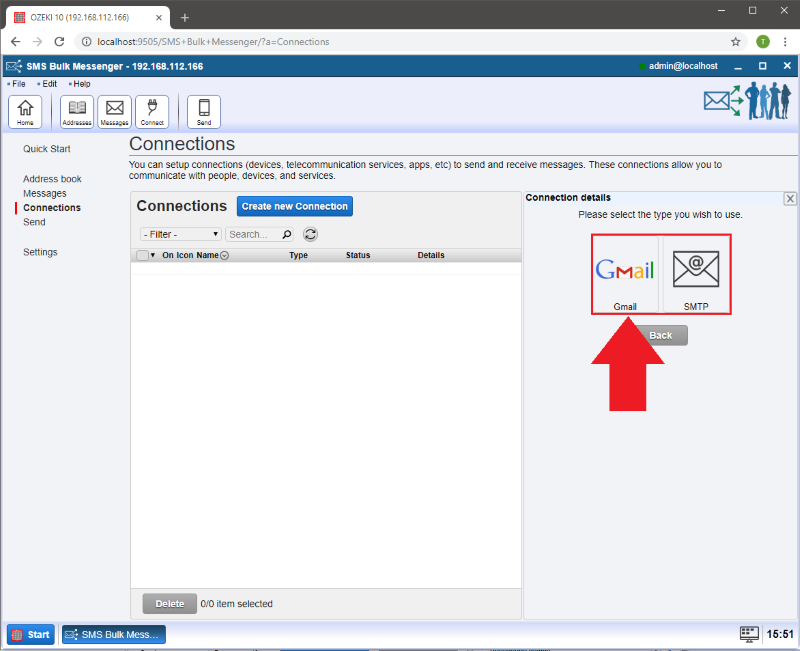
There are two types of E-mail connections: 'Gmail' and 'SMTP'. In this example, we selected the Gmail connection.
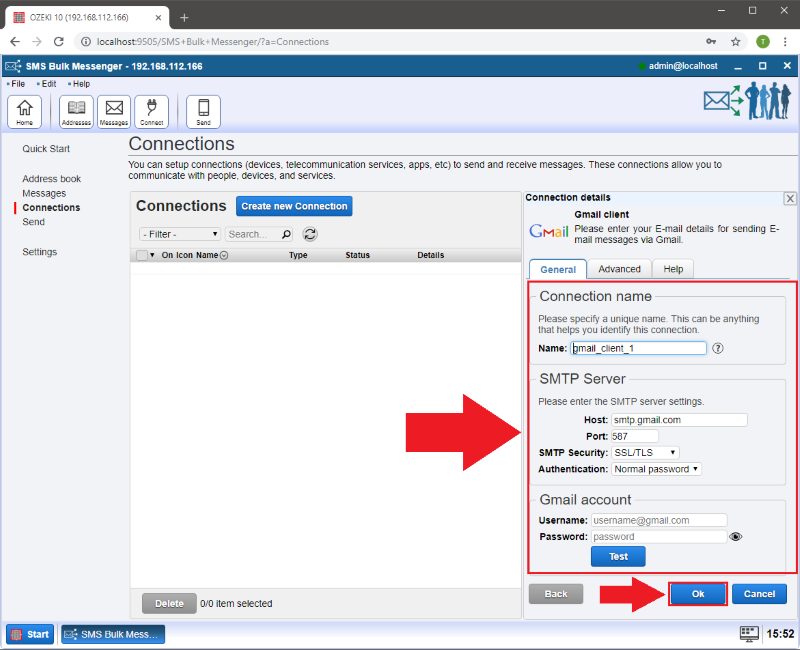
Please enter your Gmail username/E-mail address and password in the window on the right (Figure 13).
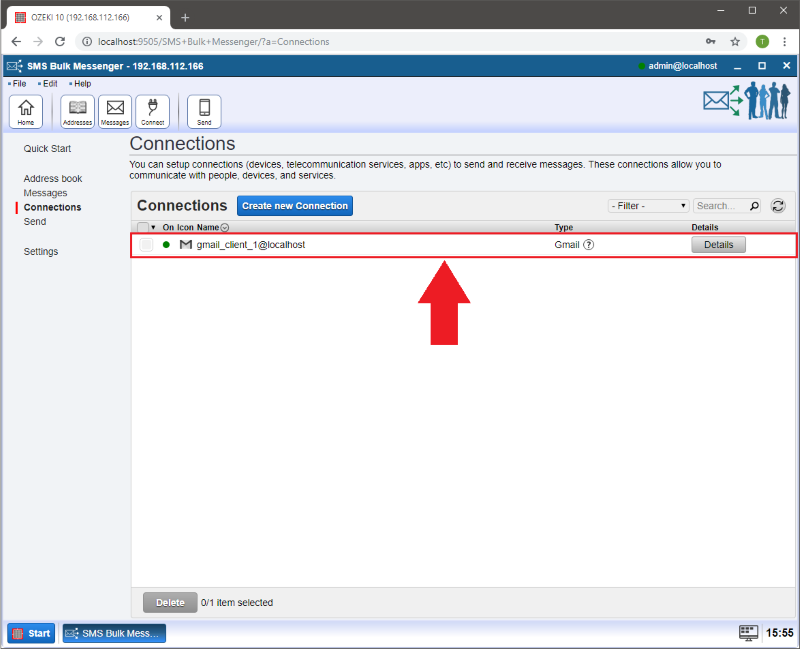
You can see all of your connections in this list. (Figure 14)
Step 4 - Create your delivery job
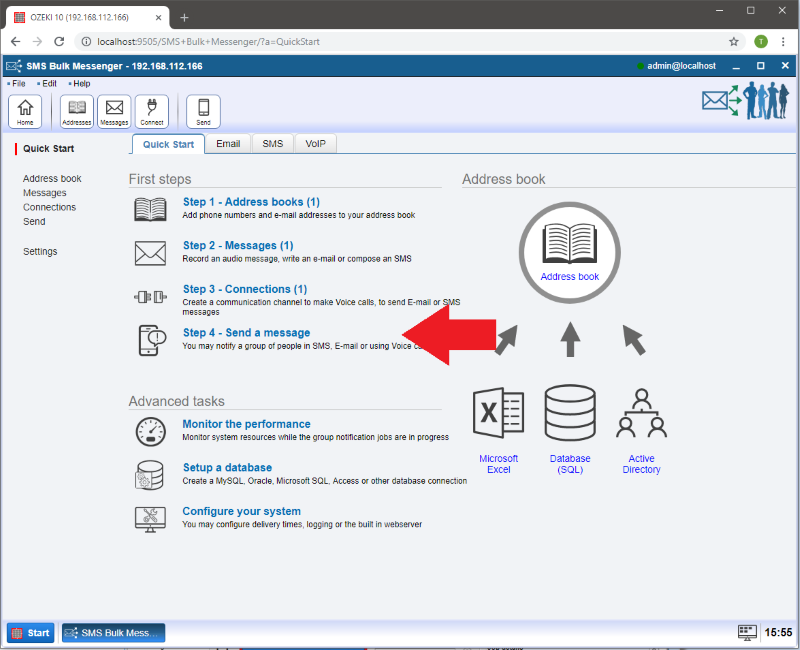
In this final section, you will learn how to create a delivery job using the already created addressbook, content and setup connection. In this way you can simply deliver your E-mail messages to the recipients. Select 'Step 4 - Send a message' (Figure 15).
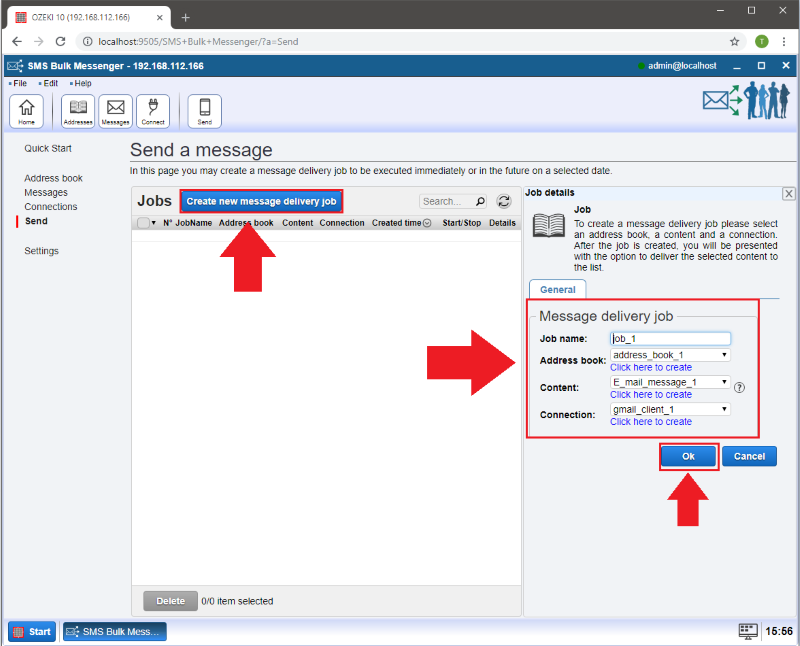
As a next step select 'Create new message delivery job'. At the right side you can choose the suitable address book, message and connection for you (Figure 16).
Then press 'Ok'.
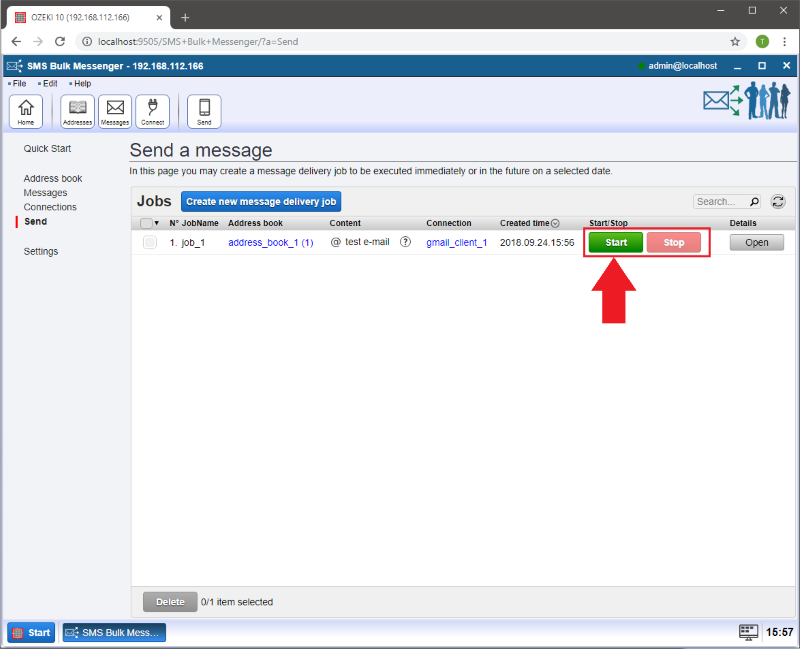
After clicking 'Ok', the job will appear in the list. If you click on the green 'Start' button your E-mails will be sent immediately. (Figure 17).
At the end of the job you will see the percentage of E-mails delivered (Figure 18).

