Connect a VoIP PBX
If you would like to make automated VoIP calls, you will need a VoIP PBX to be installed. This device makes it possible to connect your Ozeki Bulk Messenger software to the corporate telephone center. You can make calls to the telephones connected to your telephone center and automated calls to phones using PSTN or GSM network. This means you can reach both landline and mobile phones.
How the VoIP PBX connection works
Step 1 - Setup a new connection
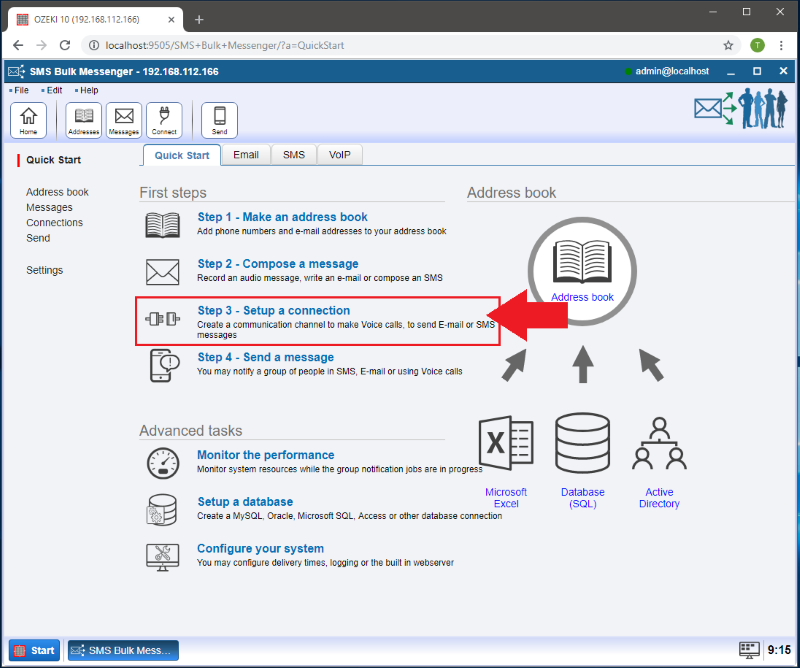
Please click 'Setup a connection' on the Quick Start tab.
Step 2 - Select connection details
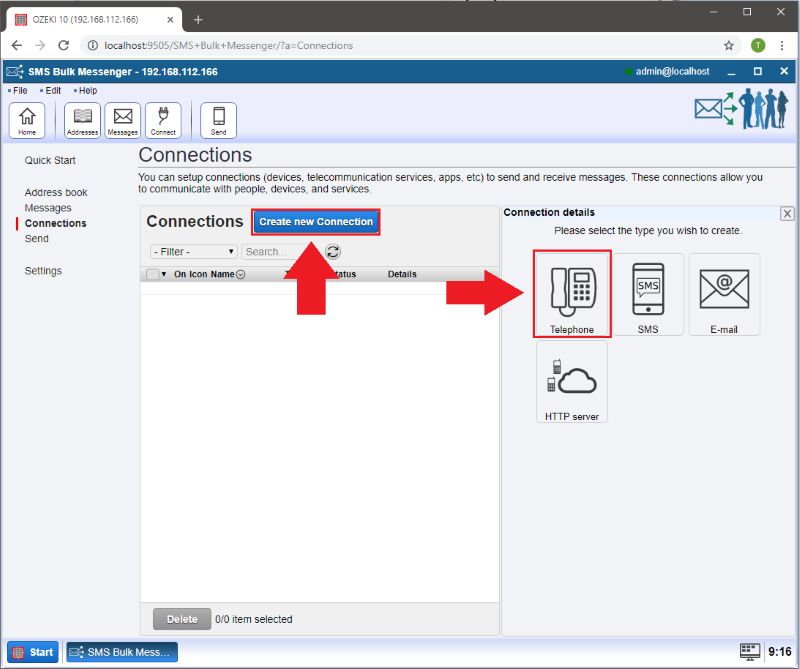
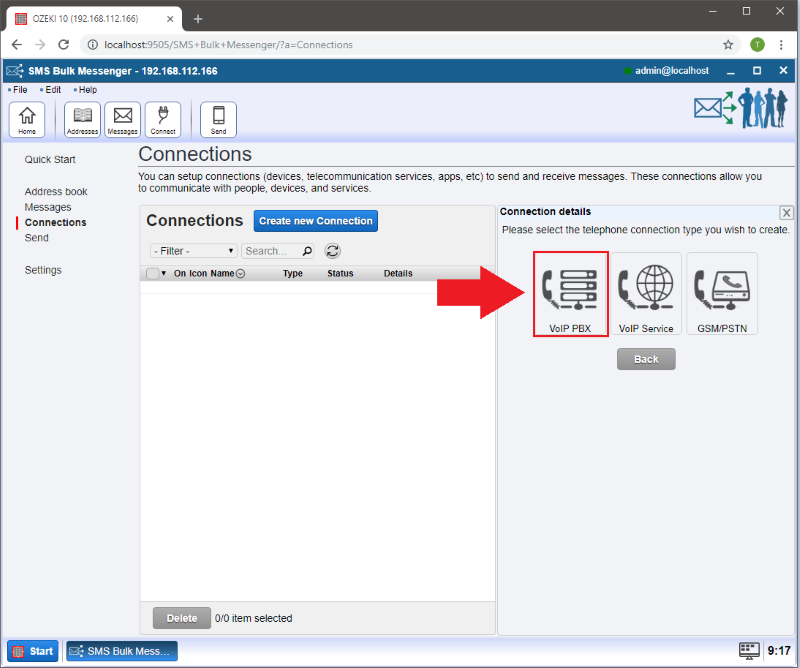
After the new page has appeared click 'Create new Connection'. Then select the 'Telephone' connection type on the right.
Step 3 - General tab informations
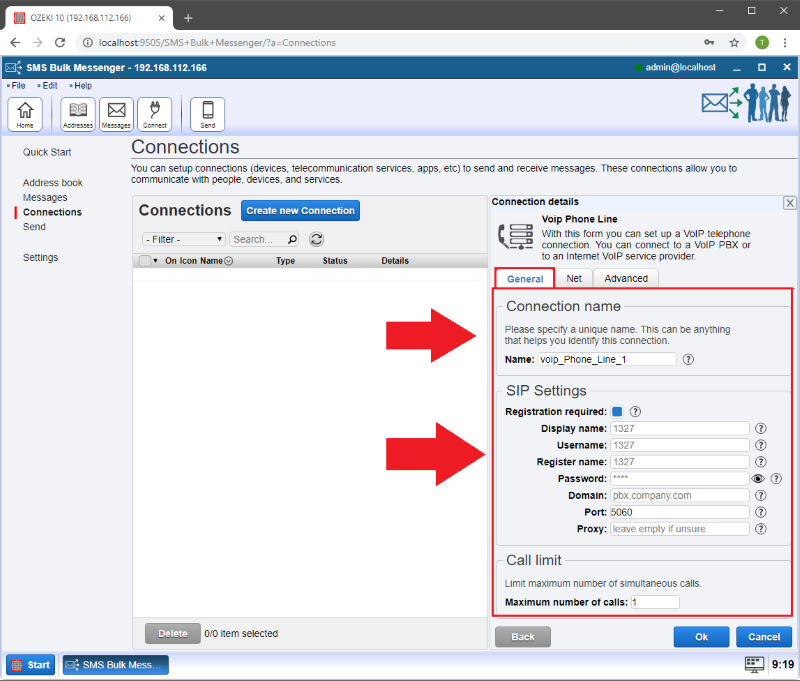
On the 'General' tab you can configure your connection settings. The 'Connection name' is a unique name, it helps you to keep your connections organized It is easier to differentiate them with different names.
In the SIP Settings section make sure there is a blue box next to 'Registration required'.
- 'Display name:' your Caller ID. This number will be displayed on the phones you call.
- 'Username:' This will be your username to log into the VoIP PBX.
- 'Register name:' Usually you can add your username as register name but there are a few PBX systems which require a different one.
- 'Password:' This protects your VoIP PBX from unauthorized access. It should be a number that is difficult to steal.
- 'Domain:' This is probably the most important data field. Here you are required to provide the IP address of your VoIP PBX, to make it possible for Ozeki Bulk Messenger to identify the VoIP PBX.
- 'Port:' In most cases this is 5060. This specifies the SIP port number for the VoIP PBX.
- 'Proxy:' If the VoIP PBX has a proxy address, enter it here. If it is not required by your PBX, you can leave it blank.
At the 'Call limit' option on the bottom you can specify the maximum number of 'Simultaneous calls' you would like to make. Please note that this may be also limited by your VoIP PBX system.
Step 4 - Network, Transfer and Log settings
On the 'Net' tab you can provide information about the network adapter which you would like to use for creating a connection to the VoIP network.
You can also configure the 'Firewall' here.

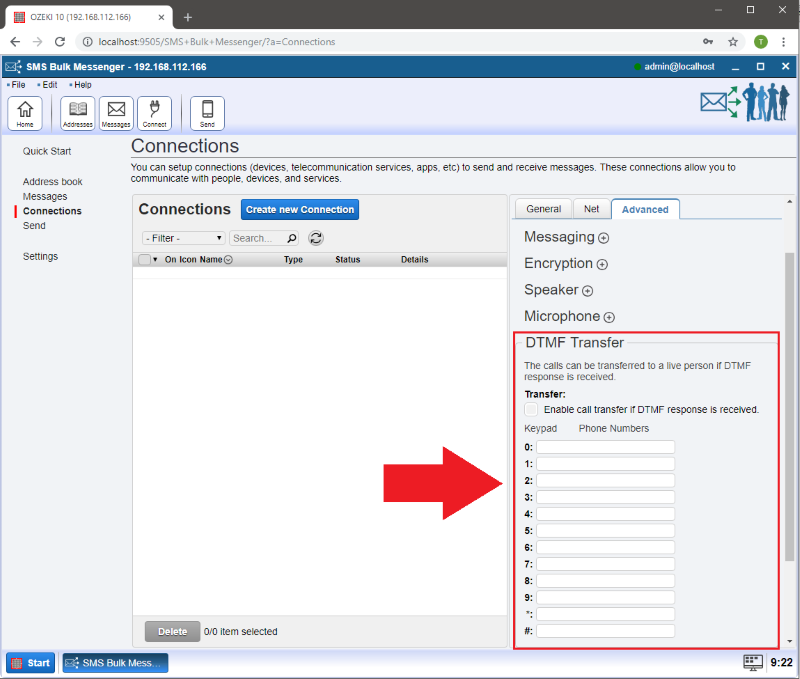
On the 'Advanced' tab you can transfer the calls to a live person if DTMF response is received. Check the box next to 'Enable call transfer if DTMF response is received.' and add the phone numbers below to the appropriate keypad.
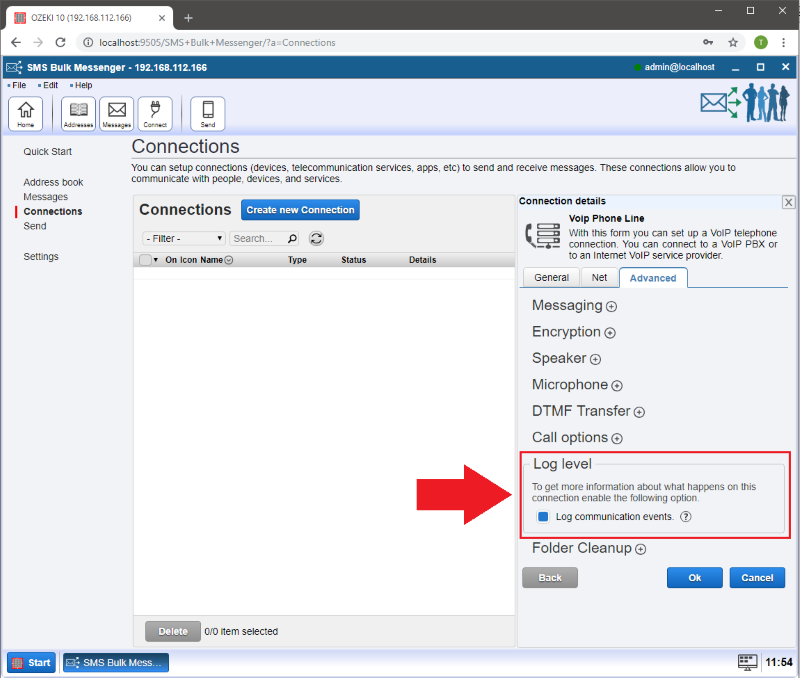
In the 'Log' segment you can log your calls. You can enable and disable logging by checking the box next to the 'Log communication events' option.
Step 5 - Open your connection
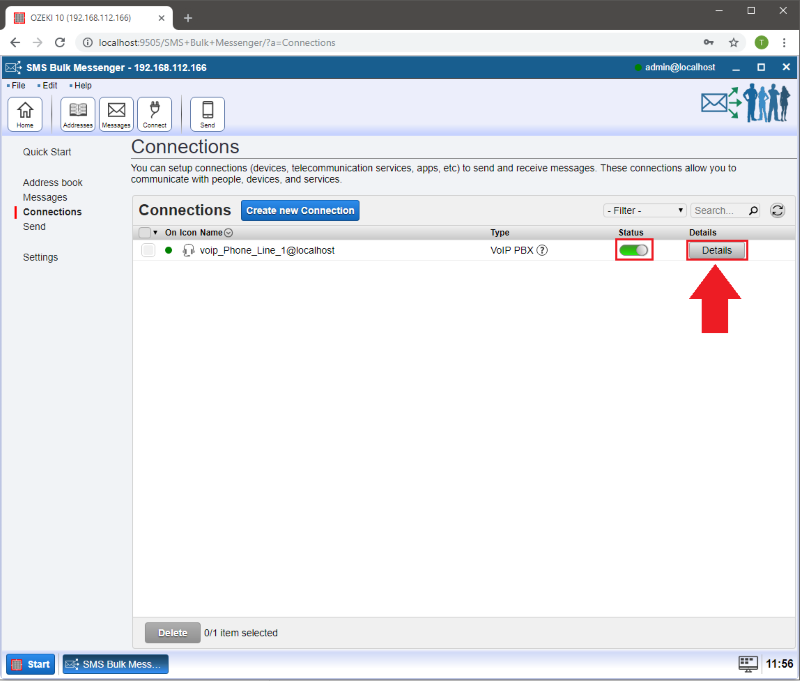
If the status indicator turns green it means your connection has been successfully established.
By clicking on the 'Details' button you can check the event log, modify
the configuration or make a test call.
