How to use custom data in outgoing messages
With Ozeki Bulk Messenger it is possible to deliver personalized information to your clients. Use data stored in your database (or in Excel files) to make each message you send unique. This feature is useful if you wish to send out information such as account balances, delivery dates or address information. Banks or any kind of telecommunication (or other) providers can use this kind of function to notify their clients.
In this guide you can see an example on how you can send customized e-mail messages using MySQL database server.
Step 1 - Create a database table
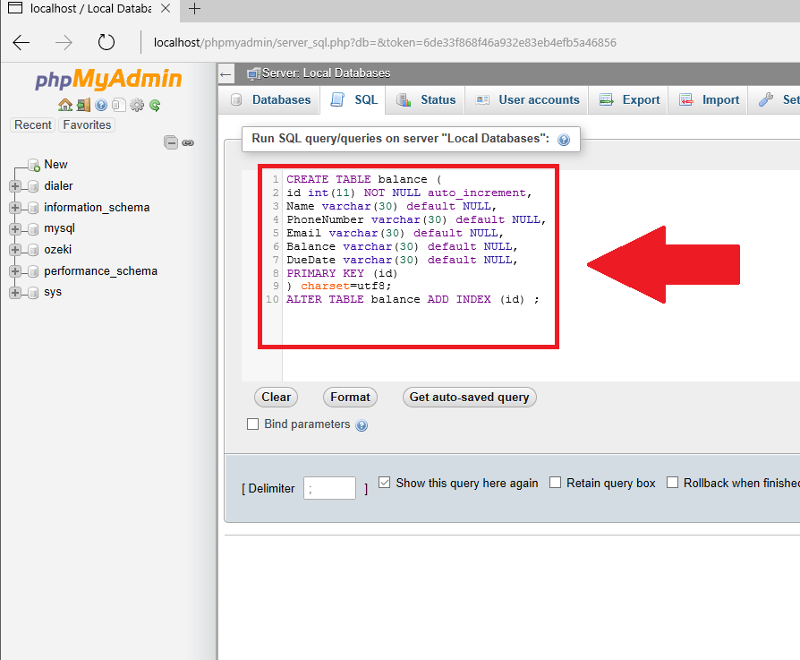
Log in to the SQL database client and create a new database table.
CREATE TABLE balance ( |
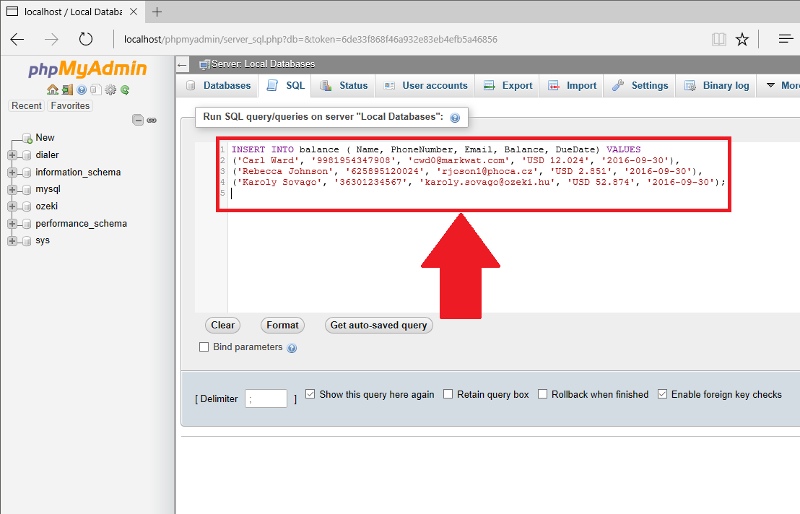
Now it is time to insert contacts into database table.
INSERT INTO balance ( Name, PhoneNumber, Email, Balance, DueDate) VALUES |
Step 2 - Create a database connection
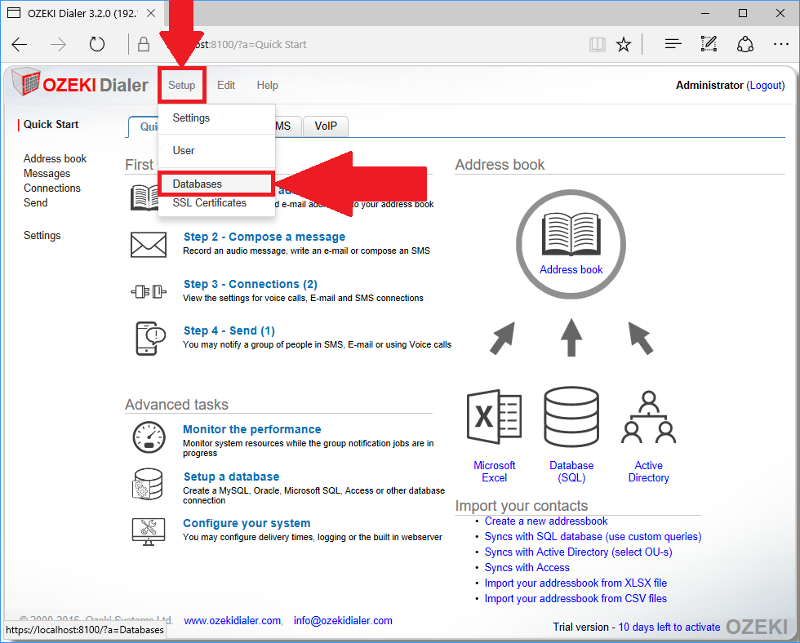
On the top of the 'Quick Start' page choose 'Setup' menu and then 'Databases' submenu.
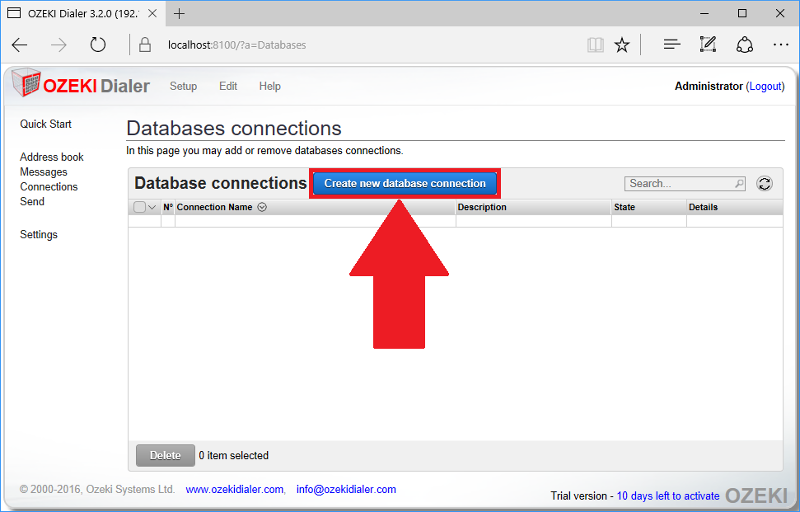
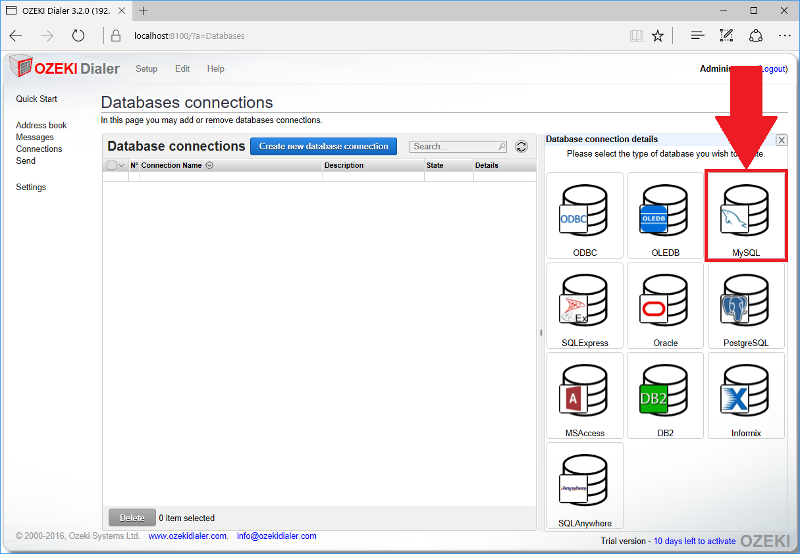
After that you will see a page where you can select which type of database you would like to add to Ozeki Bulk Messenger. Click on the 'Create new database connection' button.
The 'Database connection details' window will show up to the right. In this case choose 'MySQL'.
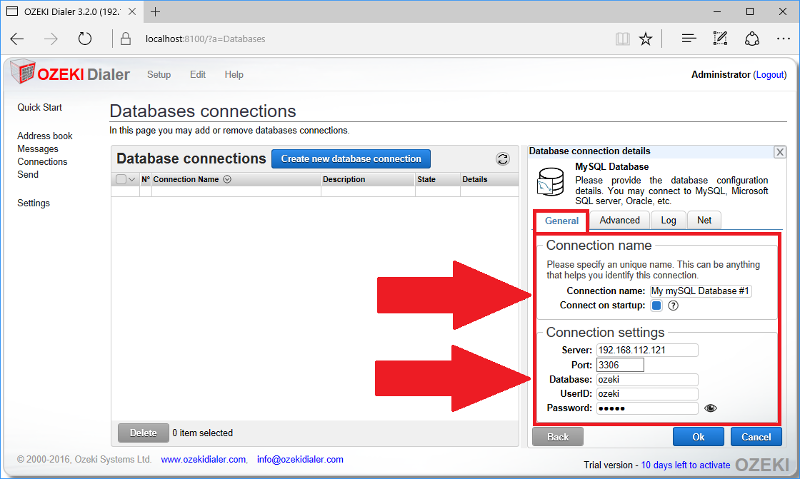
Provide a name and in the 'Connection settings' window give important details of your database.
Step 3 - Create an SQL address book
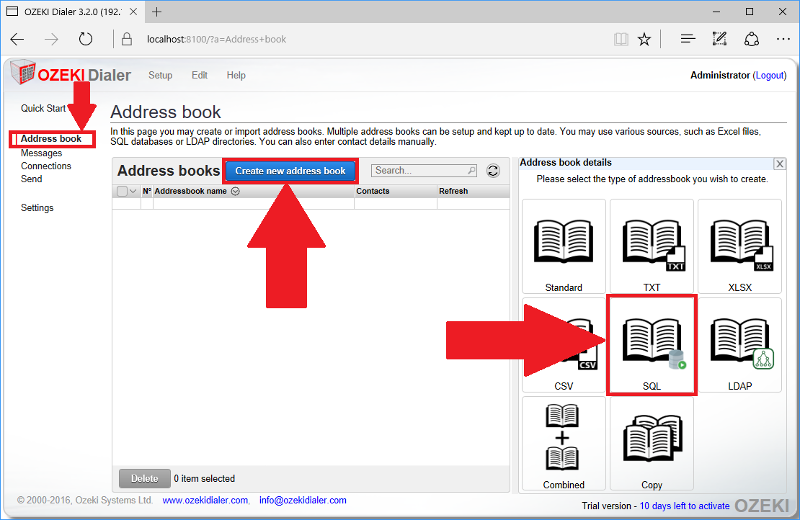
Go to 'Address book' menu on the left-hand side and then click on 'Create new address book'.
In the 'Address book details' window select 'SQL'.
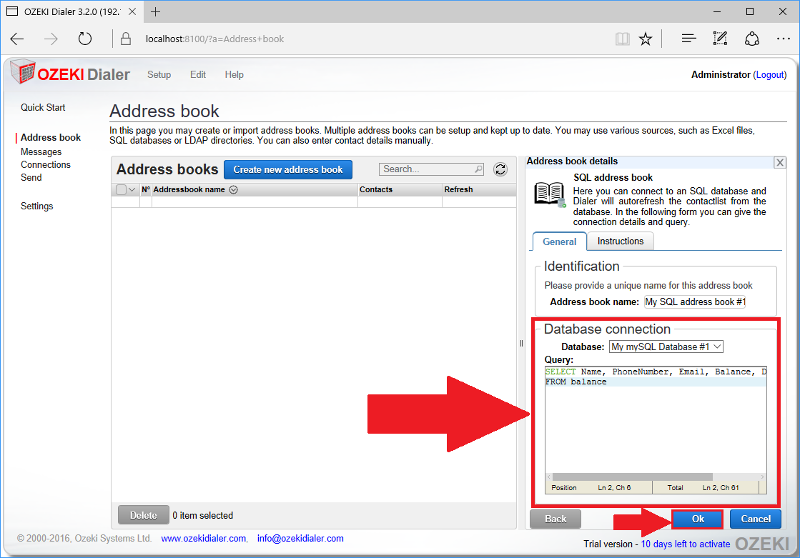
In the 'General' tab you can give a name for your address book and select a previously added database connection. In the 'Query' field provide the query you wish to use for querying data from your database:
SELECT Name, PhoneNumber, Email, Balance, DueDate FROM balance |
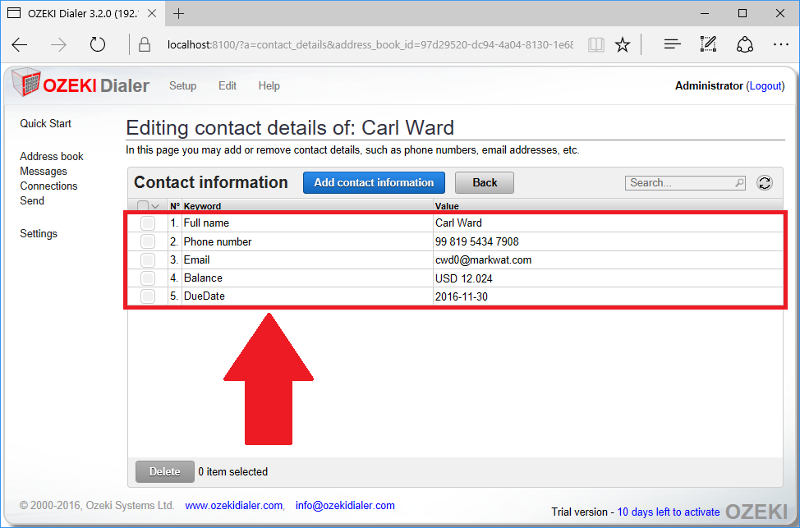
Using these keywords means that we can get the name, telephone number, email address of the contact and the balance available on the provided date from the database. Finally, we add them to the address book by clicking 'OK'.
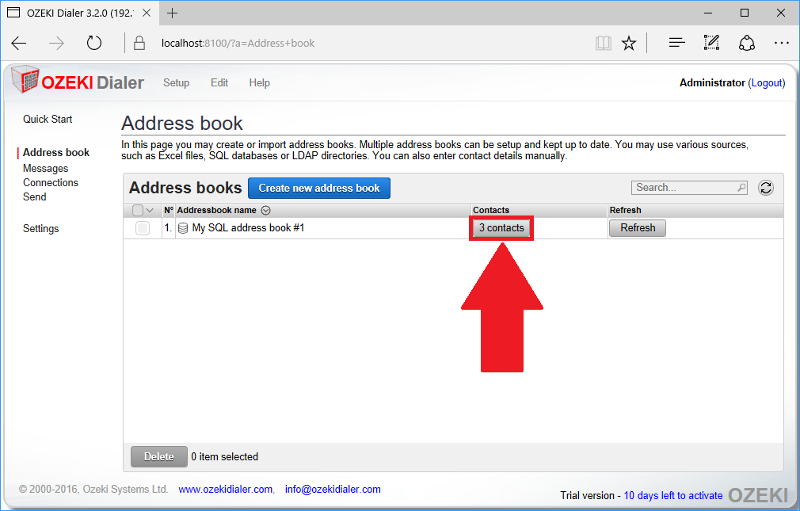
If the query was successful you can see that the number of your contacts have appeared in the 'Contacts' menu. Click on it in order to see more details about them.
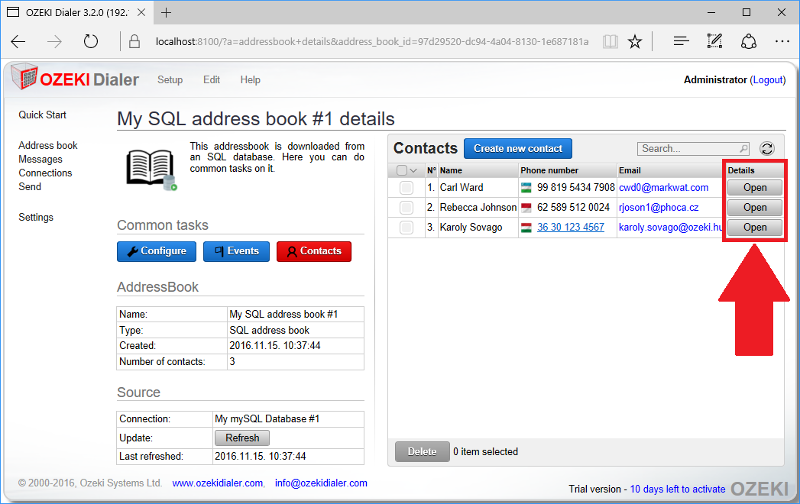
Click on 'Open' button next to one of the contacts.
Here you will see the information which we acquired from the database. The same keyword name will be used that is the name of the column in the database table.
Step 4 - Create a message
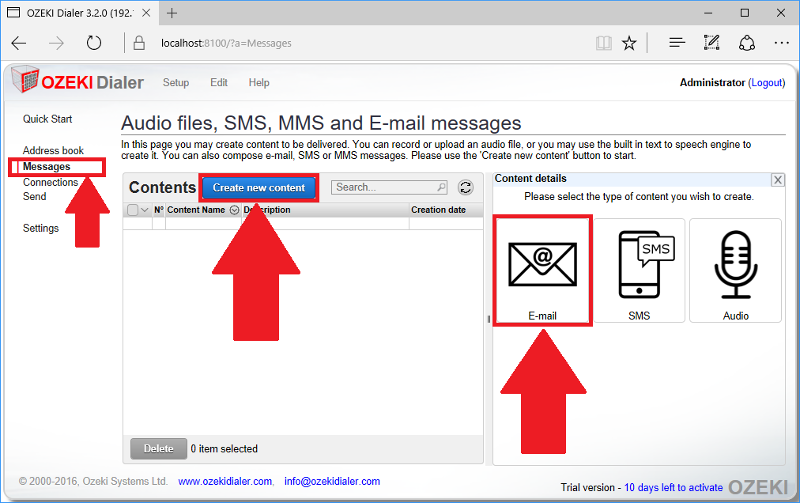
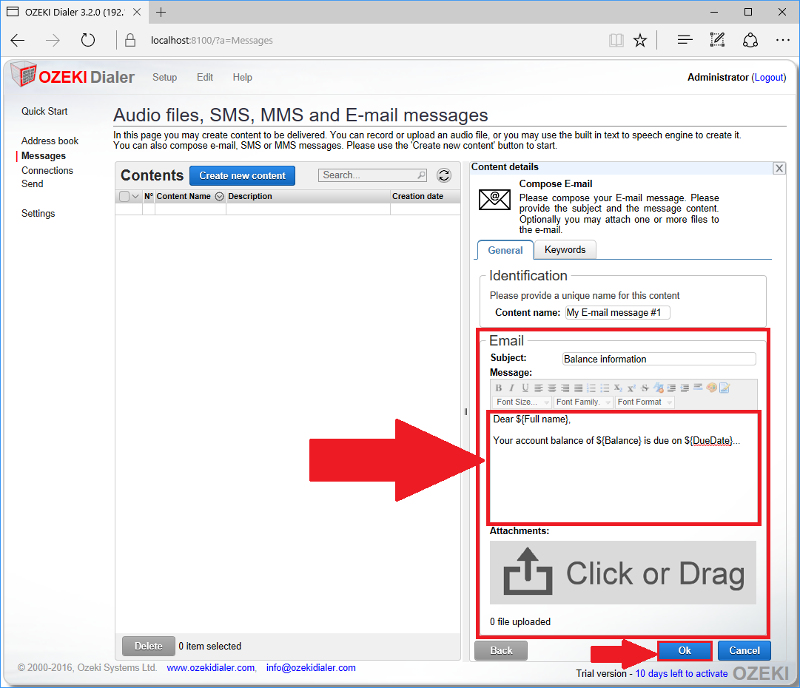
Go to 'Messages' menu on the left and then click on 'Create new content'.
In the pop-up window you will see the possible message types. Select 'E-mail'.
Provide a subject name and in the 'Message' field write down your message using the keywords. For example:
Dear ${Full name},

Your account balance of ${Balance} is due on ${DueDate}...
These keywords will be changed to the stored data of your contacts.
Step 5 - Create a new connection
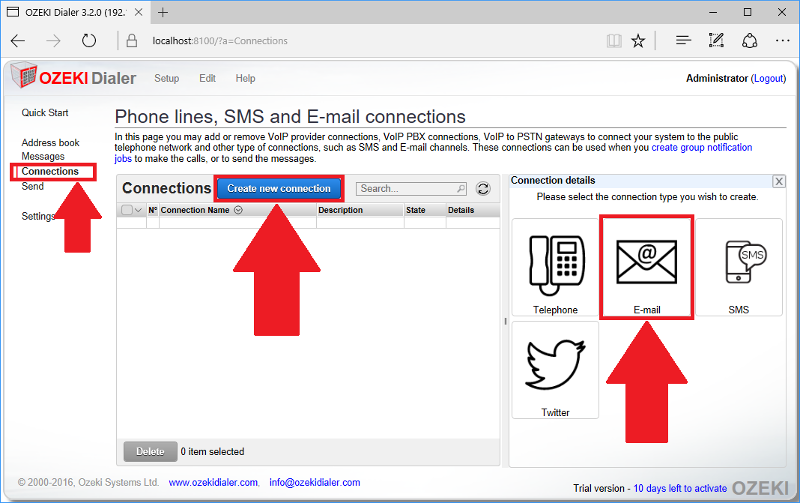
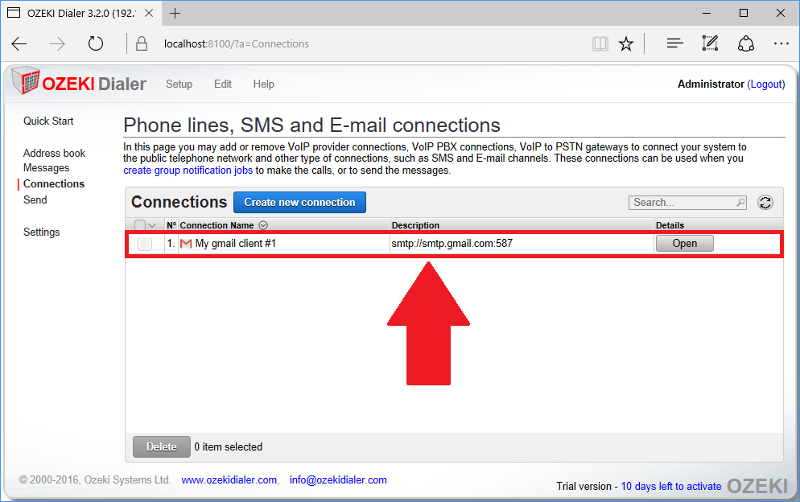
Select 'Connections' on the left side and click on 'Create new connection'.
Then select 'E-mail' connection type.
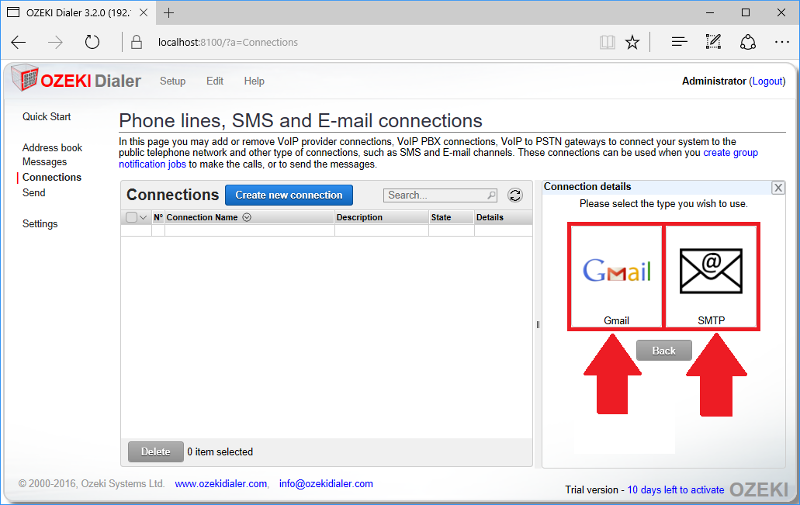
After that select 'Gmail' connection type if you wish to use your gmail account, or 'SMTP' connection type if you would like to use the corporate e-mail server for sending out e-mail messages.
If you wish to use your 'Gmail address', in the 'Gmail account' tab provide your Gmail username and the password belonging to it.
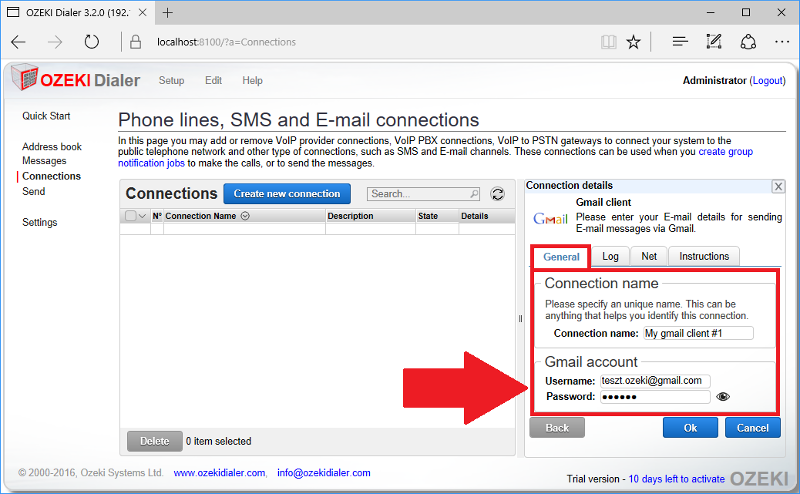
If finished click 'OK' and your setup connection will appear on the list.
Step 5 - Send your messages
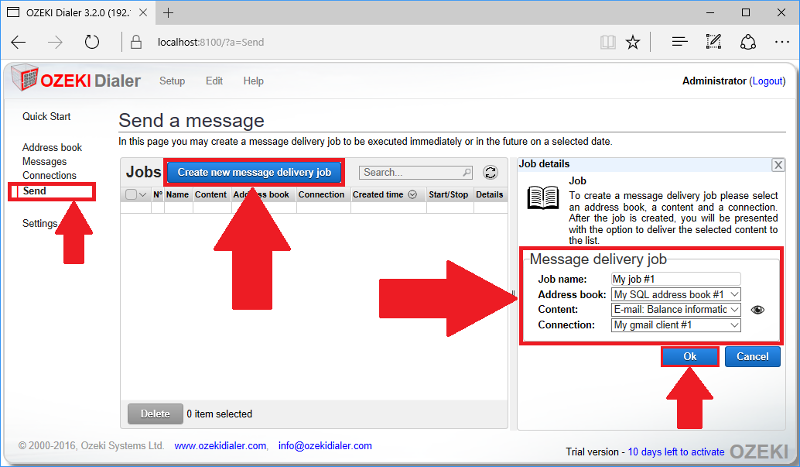
Go to the 'Send' menu then click on 'Create new message delivery job'.
In the 'Job details' window you need to specify the name of the preset job,
the address book, the content and the connection that you wish to use for this job.
When finished, click 'Ok'.
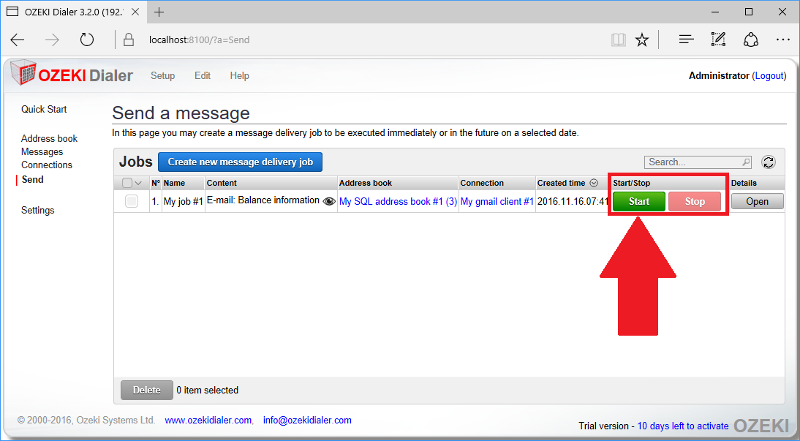
Now select the 'Start' button in order to start the job.
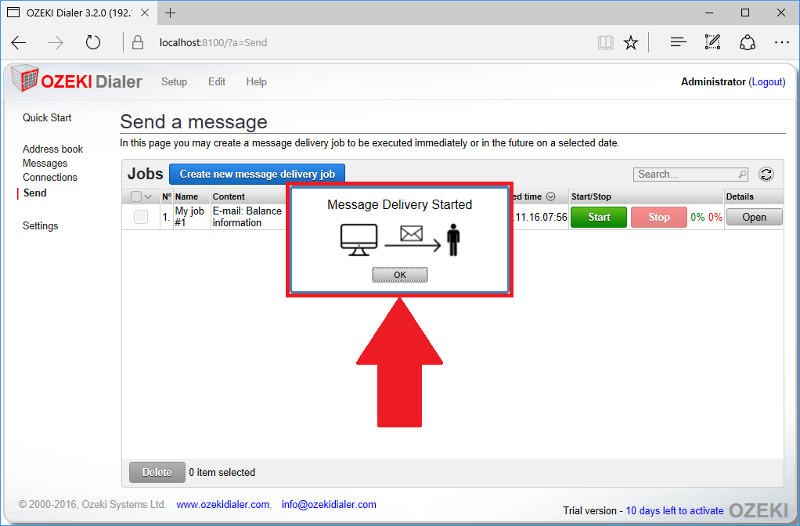
If you have successfully started the job, the following 'Message Delivery Started' window will pop up.
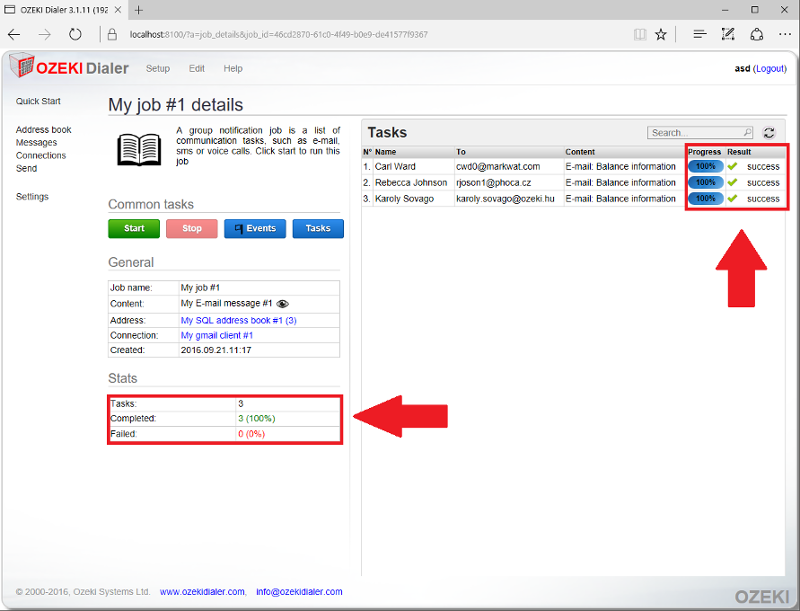
Click on the 'Open' button to see the details of your delivery job. In the 'Tasks' menu and also in the 'Stats' tab you can see that the delivering process was completed and all of the messages has been sent successfully.
In your E-mail client you can see the E-mail with custom data.

In this guide you could see an example about how you can send personalized e-mail notification to your clients. If you have any question, please send us an e-mail at info@ozeki.hu.
